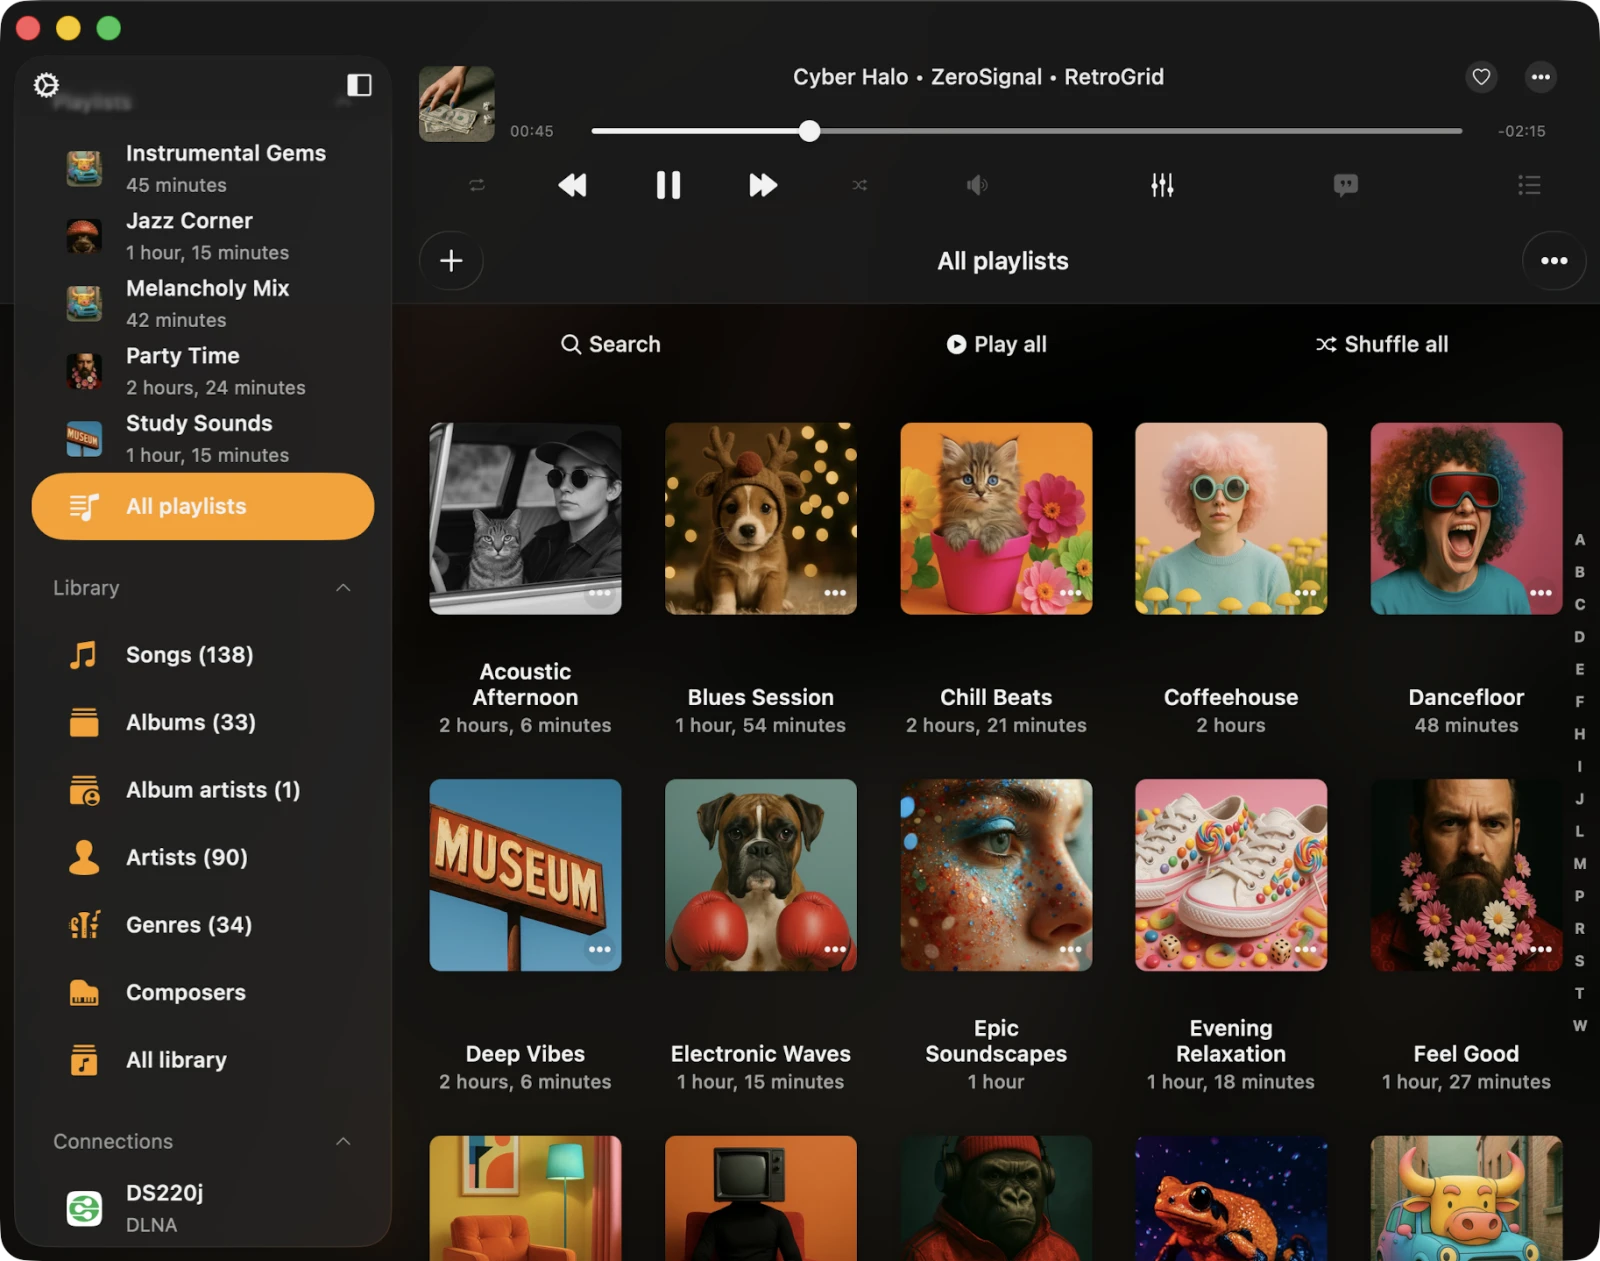
Playlists
In the Playlists section, you’ll find helpful tools to manage your music collections. This area shows all your playlists in one place. At the top, there’s a "…" button in the navigation bar that opens a menu with different playlist options, plus a toolbar with quick actions like Search, Play All, and Shuffle All. Each playlist also has its own "…" button next to its title, giving you more options just for that playlist.
Playlists in Flacbox can contain a mix of online cloud tracks, offline downloaded files, and local files from your device — all in one playlist — and play seamlessly together.
Creating a Playlist
Creating a new playlist is straightforward. You have two options: tap the + button, or tap the "…" button located in the upper-right corner of the navigation bar and choose New Playlist. Give your playlist a meaningful name, then tap Save.
This triggers the Add Songs dialog, where you can handpick the tracks you wish to include in your new playlist. Tracks are conveniently categorized by source type:
- Library — tracks already in your music library.
- Files in This Application — audio files in the app’s Documents folder (downloaded from cloud storage, imported via Wi-Fi Drive, or added through Finder File Sharing).
- Files on This Device — audio files located elsewhere on your device, not in this application.
- Connections — online files located within your connected cloud storage services.
By default, you can add a single track to a playlist only once. If you want to allow duplicates, enable this feature in Settings → Music Library → Playlists → Duplicates in a Playlist → Enable.
Import Playlist
In Flacbox, we’ve added M3U / M3U8 / CUE file import so you don’t have to recreate playlists manually after switching from another player.
First, go to the Playlists section. Then, tap the More button in the top-right corner. From the menu, select Import Playlist.
On the next screen, choose the file location. Supported options include:
- Connected cloud storage
- Files in the application
- Files on your device
Select connected cloud storage and open the folder containing the playlist file. Supported playlist file extensions include M3U, M3U8, and CUE. Select the playlist file and tap Done to confirm your selection.
The app parses the playlist file, creates a list of tracks, and locates those files on the storage to compile a final playlist, which is then imported into the music library. Important: the M3U / CUE file must contain the correct paths to the media files, and the files should actually exist at those paths on your storage. Read more about playlist import here.
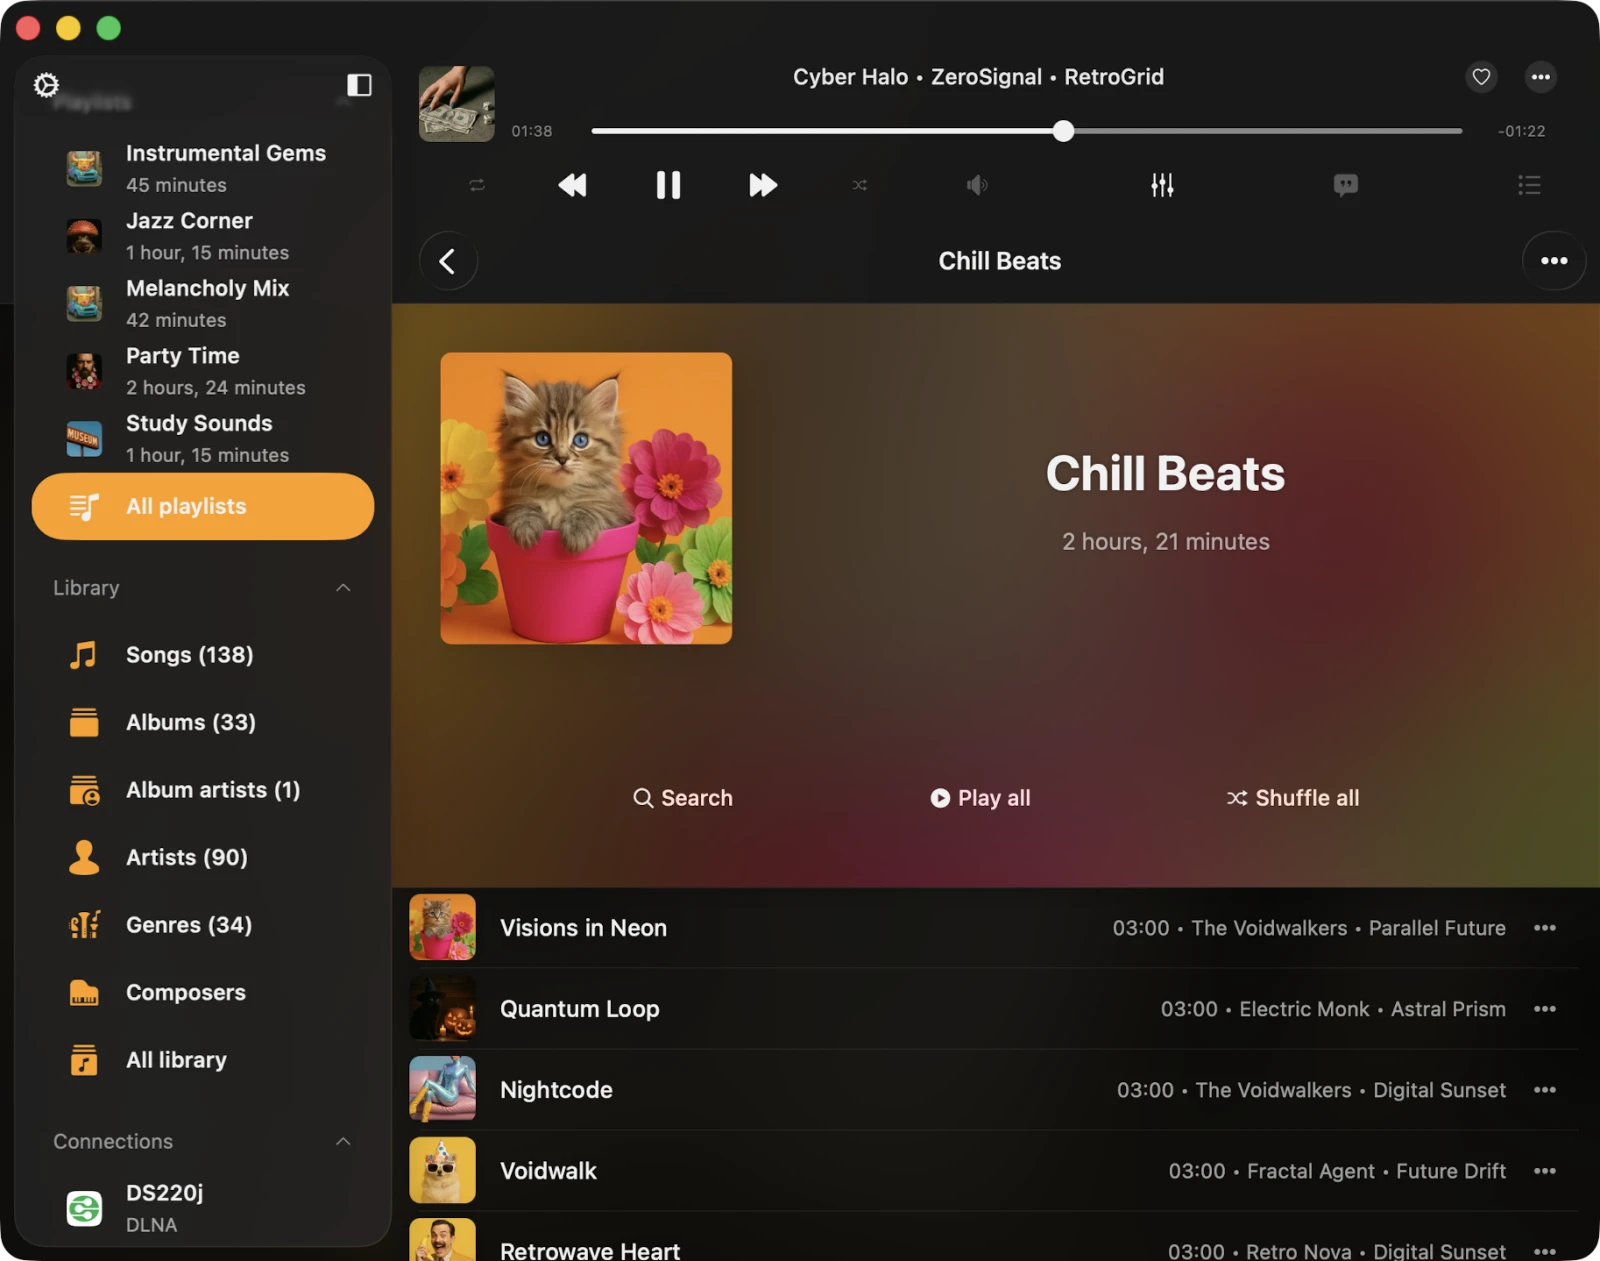
Playlist Detail Screen
When you open a playlist, the Playlist Detail screen appears. You’ll find a "…" button in the top-right corner with playlist options, and three buttons under the artwork: Search, Continue Playback, Play All, and Shuffle All. There’s also an Offline Mode checkbox to toggle full-playlist offline sync.
- Continue Playback — restore the last saved playback position for this playlist.
- Search — perform a search within the current playlist.
- Play All — add all tracks from the current playlist to the player queue.
- Shuffle All — like Play All, but shuffles the tracks before adding them to the audio player queue.
- Offline Mode — download all tracks from this playlist to local files. Any new items added to the playlist are also downloaded automatically.
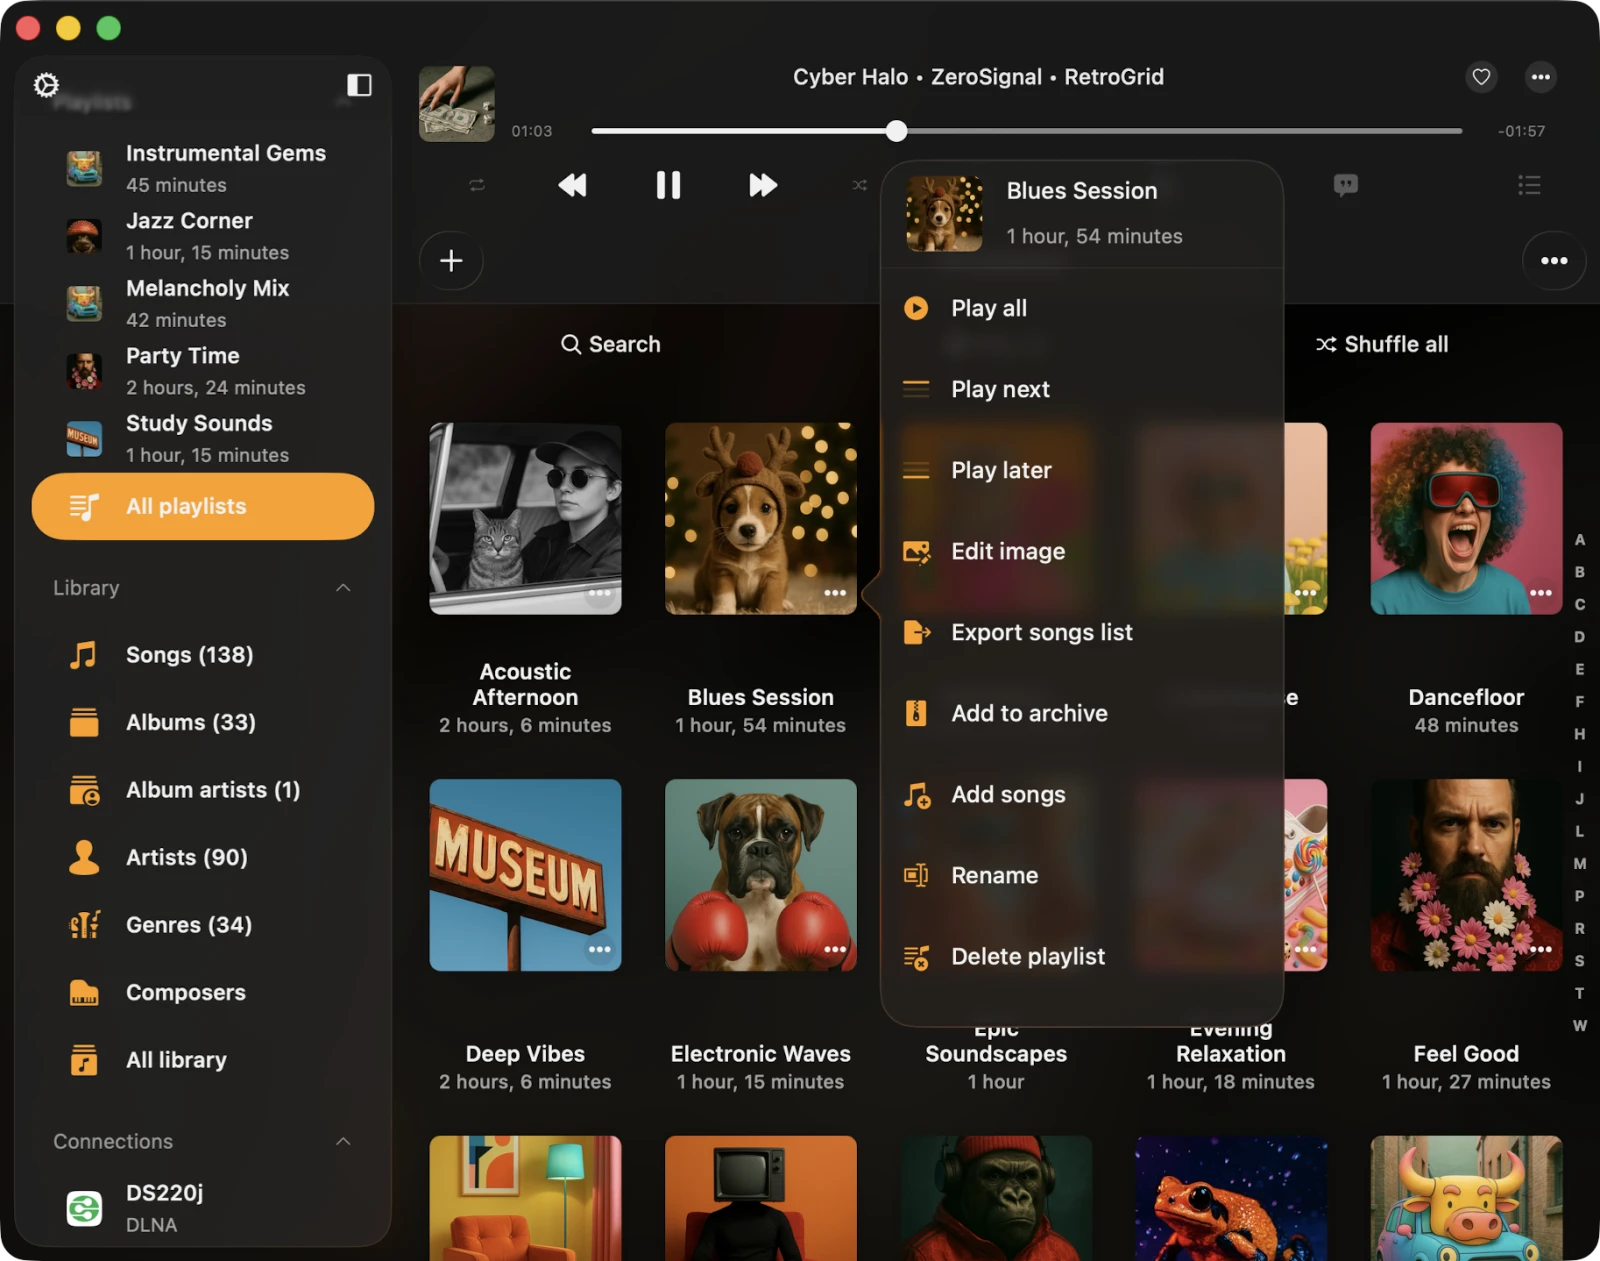
More Actions for a Playlist in the Playlists Screen
You can access actions for a playlist by tapping the "…" button near the playlist title. Available actions:
- Play All — adds playlist tracks to a fresh player queue.
- Play Next — adds playlist tracks to the top of the existing player queue.
- Play Later — adds playlist tracks to the bottom of the existing player queue.
- Edit Image — change the playlist’s artwork.
- Enable Offline Mode — turn on offline mode for the playlist. Both existing and new tracks are downloaded automatically. Read more about offline mode here.
- Export Songs List — export this playlist to M3U / M3U8 / CSV / TXT as described here.
- Add to Archive — archive this playlist (including m3u file, album cover, and all tracks) into a single ZIP as described here. Premium feature.
- Add Songs — add more songs to the current playlist.
- Rename — rename the playlist.
- Delete Playlist — delete the playlist from the music library. This action cannot be undone.
More Actions for a Playlist in the Playlist Detail Screen
You can access actions for a playlist by tapping the "…" button in the top-right corner. Available actions:
- Select — activate track-selection mode, useful for deleting multiple tracks from the playlist or changing their order.
- Play Next — add playlist tracks to the top of the existing player queue.
- Play Later — add playlist tracks to the bottom of the existing player queue.
- Add Songs — add new songs to the playlist.
- Rearrange Songs — manually change the order of songs in the playlist using drag-and-drop.
- Rename — rename the current playlist.
- Edit Image — change the album artwork for the current playlist.
- Export Songs List — export this playlist to M3U / M3U8 / CSV / TXT. Read more here.
- Add to Archive — ZIP the current playlist including all tracks and m3u file. Read more here.
- Sort — change the order of tracks in the playlist. Sorting options include Song Title, Song Number, Album, Artist, Album Artist, Genre, Composer, Rating, Year, Beats per Minute, Duration, File Name, File Modification Date, File Creation Date, and Manual. The Manual sort option allows manual reordering of songs using drag-and-drop.
- Search — search for a specific song within the current playlist.
- Grid / List — change the screen-layout presentation.
- Delete Playlist — delete the playlist from the music library. This action does not delete tracks from your storage, but it cannot be undone.
Changing Song Order in a Playlist
To change the order of songs in a playlist, tap the "…" button in the top-right corner and select Select to enter selection mode. Use the reorder control and drag-and-drop gestures near each track to move them up or down. Tapping the reorder control moves the track to the top of the list. To exit selection mode and apply changes, tap Done.
For an even simpler workflow on long playlists, choose More Actions → Rearrange Songs to enter dedicated drag-and-drop reorder mode.

Changing the Playlist Cover Image
To change the cover image of a playlist, tap the "…" button in the top-right corner and select Edit Image. Choose an image from the available sources (Photos, Files, cloud storage, or a generated artwork from a track in the playlist), then confirm by tapping Done.
Adding Songs to a Playlist
Open the playlist and tap the "…" button in the top-right corner, then select Add Songs to open a dialog. Choose the tracks you want to add and confirm by tapping Done.
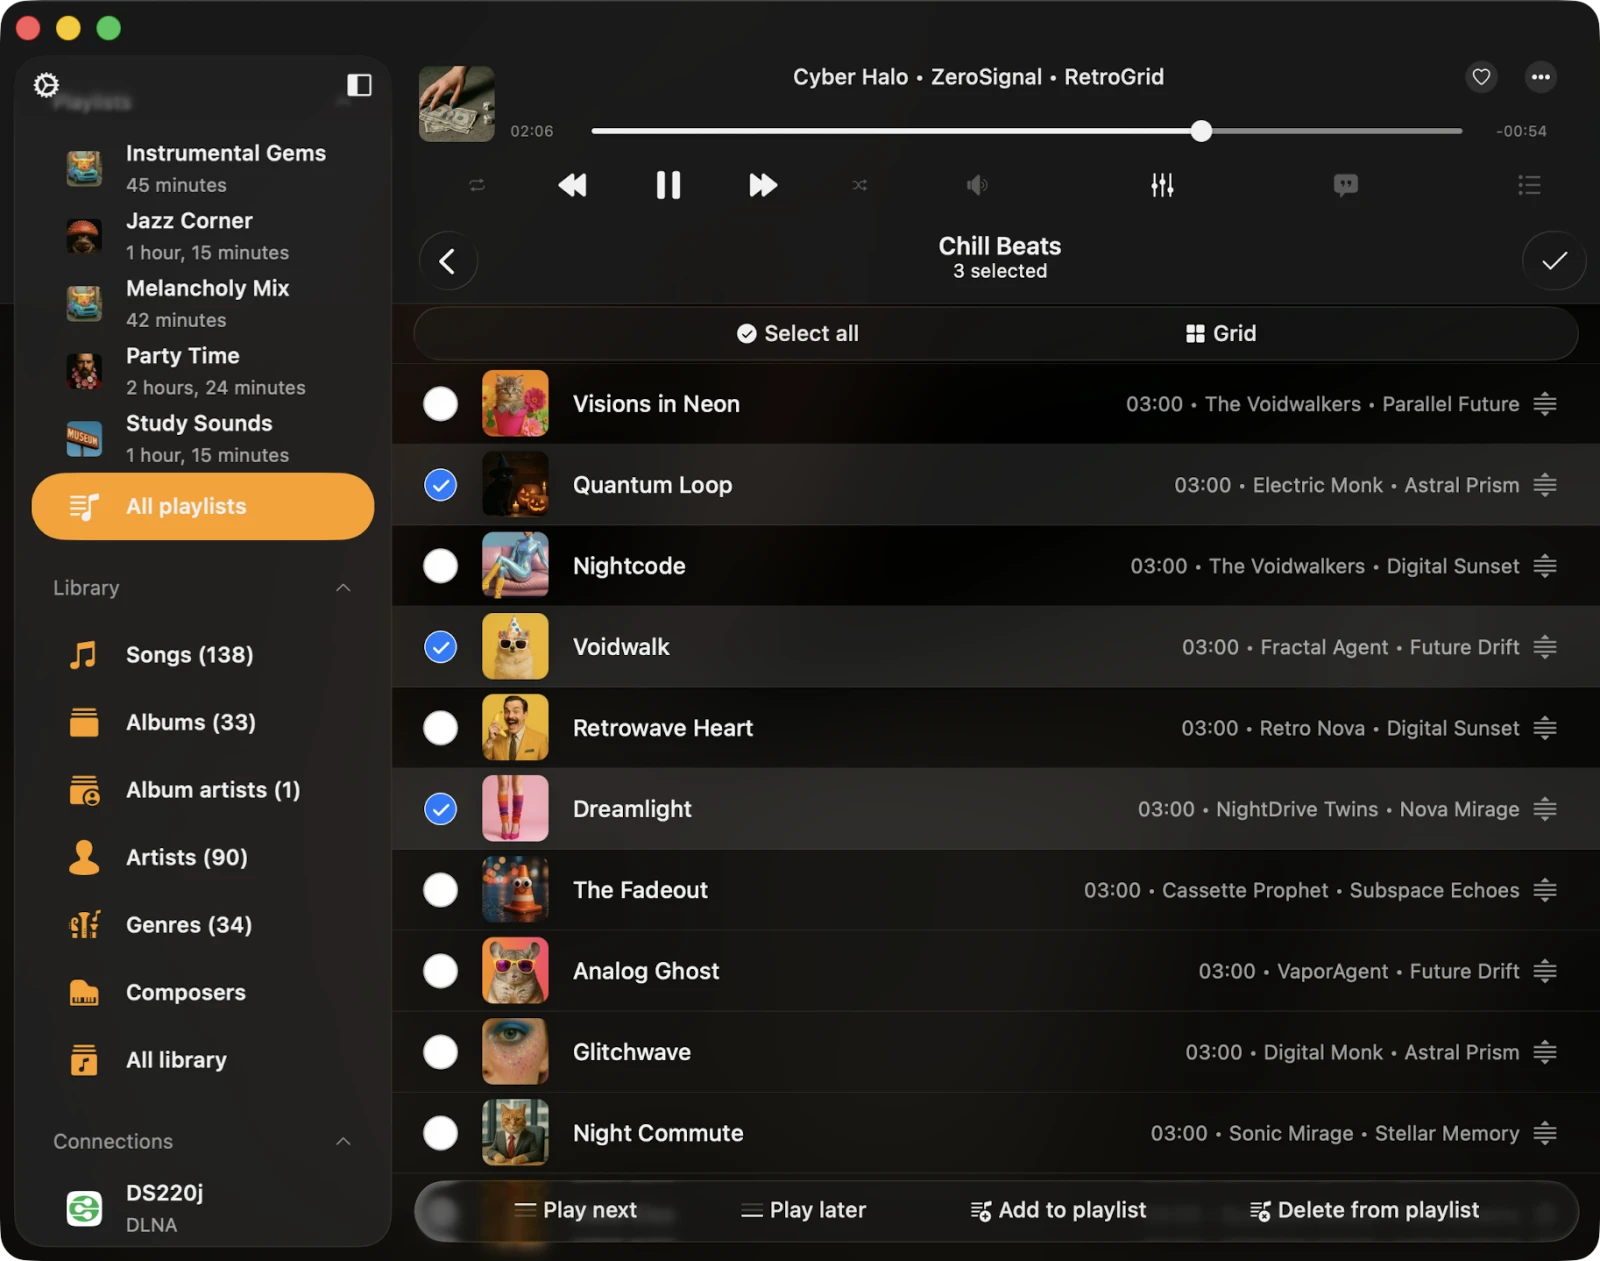
Deleting Multiple Songs from a Playlist
Open the playlist, tap the "…" button in the top-right corner, and select Select to enter selection mode. Choose the tracks you want to delete and tap Delete from Playlist at the bottom of the screen. Confirm by tapping Done.
Track Options
Each track in a playlist has a list of actions, accessible by tapping the "…" button. If you can’t see all actions, scroll down to view them. You can delete the track from the playlist, download it, edit audio tags, and more.
- Play Next — adds the track to the top of the player queue.
- Play Later — appends the track to the bottom of the player queue.
- Add to a Playlist — adds the track to another playlist.
- Add to Favorites — marks the track as a favorite for quick access.
- Download — makes the track available offline. It appears in the transfer queue and the Local Files tab in the Downloaded Music section of the music library.
- Edit Audio Tags — opens the built-in tag editor for changing track metadata.
- Open In — exports the track and opens it in another app.
- Show in Folder — reveals the folder where the audio file is located.
- Show in Finder — for files imported from your Mac, this reveals the folder where the audio file is located on your Mac.
- Delete from Playlist — deletes the track from the playlist.
- Delete from Cloud Service — deletes the track from the playlist and the associated cloud service. This action cannot be undone.
- Delete from Music Library — deletes the track from the music library, leaving the file on storage untouched.
Accessibility
Flacbox is fully accessible with VoiceOver technology, ensuring every component has a well-designed label and description. When VoiceOver is active, the app translates the user interface to Text Mode, displaying only accessible and useful elements to improve navigation speed and convenience. You can also activate Text Mode in Settings → Accessibility → Text Mode.
Adjusting Track Position in a Playlist with VoiceOver
- Open a playlist and tap the More button.
- Select Change Songs Order. The view switches into editing mode.
- Tap the reorder indicator icon near the track title to give it focus.
- Double-tap the reorder indicator icon quickly. On the second tap, do not release your finger — hold it until you hear a sound indicating the cell is ready to be moved.
- Now, you can move the cell to a new position.
Other components work as expected, using system-provided VoiceOver patterns.