Music Library
Managing your music library is a breeze with Flacbox, where you can effortlessly organize all your tracks — local FLAC, ALAC, DSD, MP3, M4A, OGG, WMA, APE, and dozens of other formats — into a single, searchable collection. You have two options for building your music library: manual addition (you pick exactly what gets added) or automatic synchronization (Flacbox scans designated cloud folders and adds new files automatically as they appear).
Manual Addition
To manually add tracks, tap the Add Music icon located in the top-left corner and pick folders or files from a connected cloud storage service or files located on your device. When you add tracks to the library, only links to those tracks are created — the actual files stay in their original locations to save valuable disk space. If you want to make tracks available offline, you can use the Download action from the options menu or enable Offline Mode for playlists and track collections.
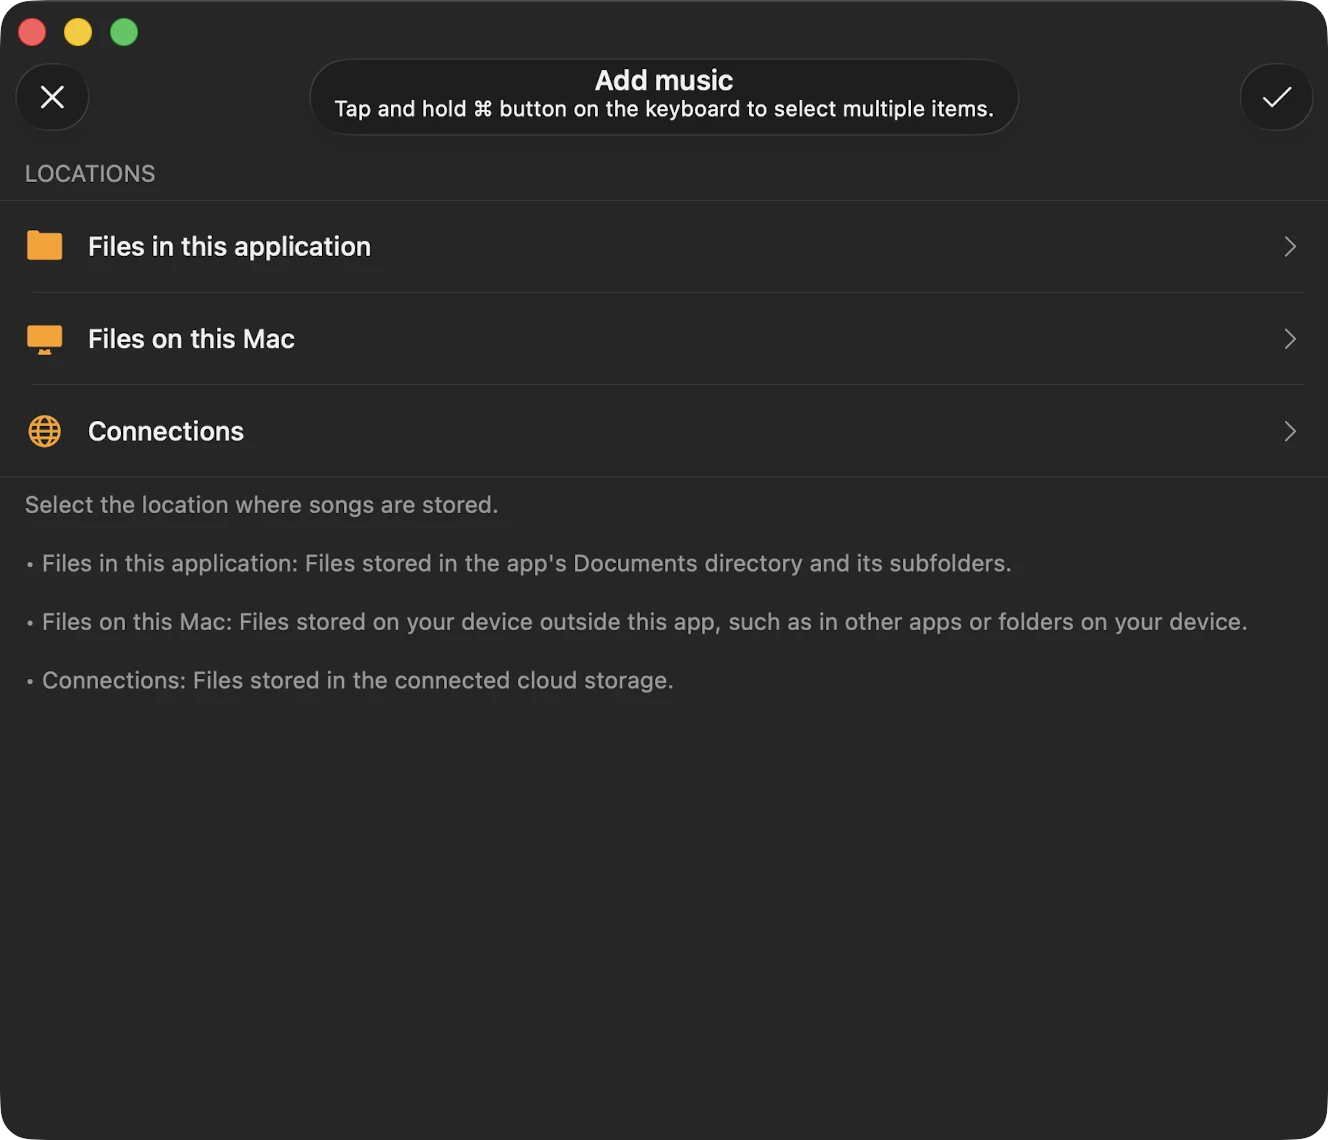
You can also drag-and-drop files into the library on the Mac version, or use Open Files… / Open Folder… from the system file picker on iPhone and iPad.
Continue Playback
Restore the audio player queue from the last saved position if this feature is enabled in the application settings. Enable both Save Audio Player State and Save Playback Position in Settings → Audio Player → General for the best experience. Once enabled, a Continue Playback button appears at the top of every folder, album, artist, genre, and playlist screen — tap it to jump straight back to the exact track and position you last left.
Locations
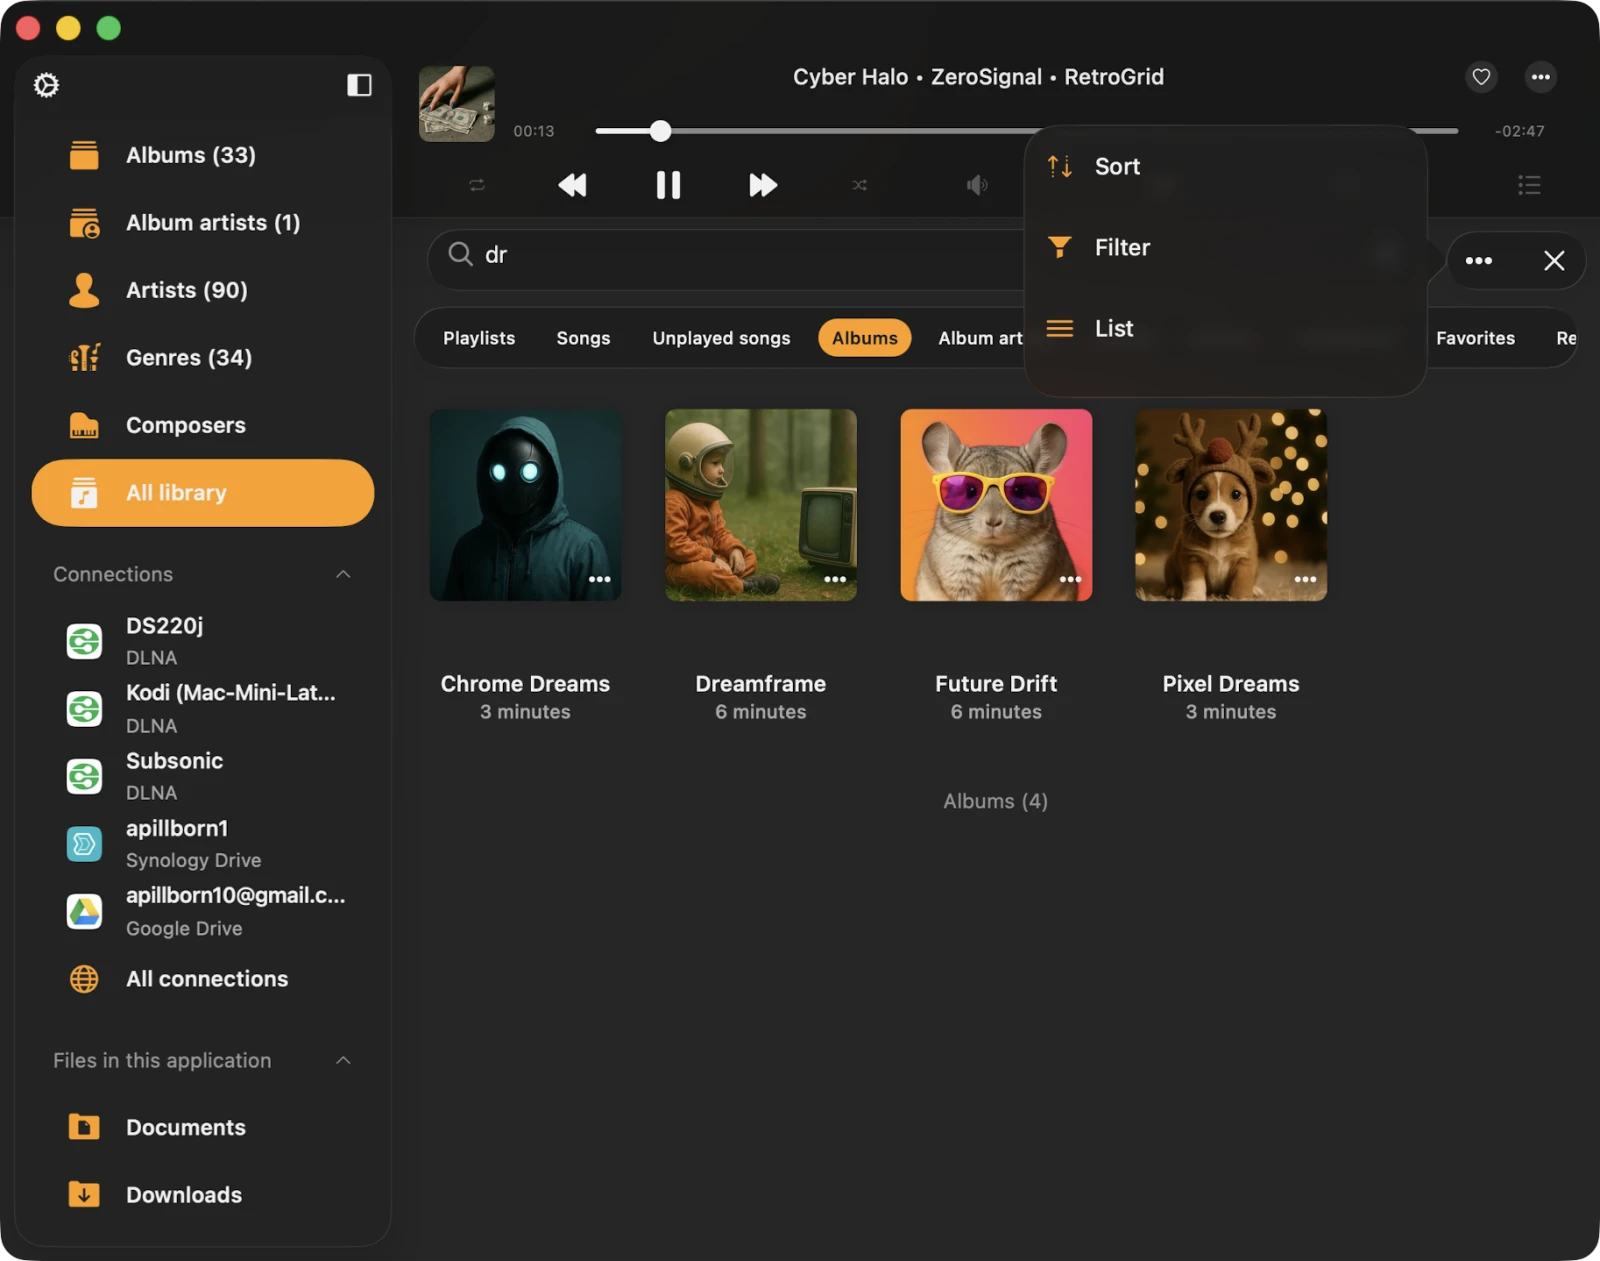
All the tracks in your library are thoughtfully grouped by source type and music tags. You can filter songs by location using the More Actions button in the top-right corner and selecting Filter.
Online Music
This section showcases music from your connected cloud storage services. The tracks here are streamed on demand; nothing takes up local storage until you explicitly download or enable offline mode.
Files in This Application
Here you can find music available for offline playback, sourced from your local files. This includes files in the app’s Documents directory — anything you downloaded, transferred via Wi-Fi Drive, or imported through Finder File Sharing.
Files on This iPhone / iPad / Mac
This category includes music imported into the application from your device, added through the Open Files… system dialog. The original files stay in their original location; Flacbox just keeps a link to them.
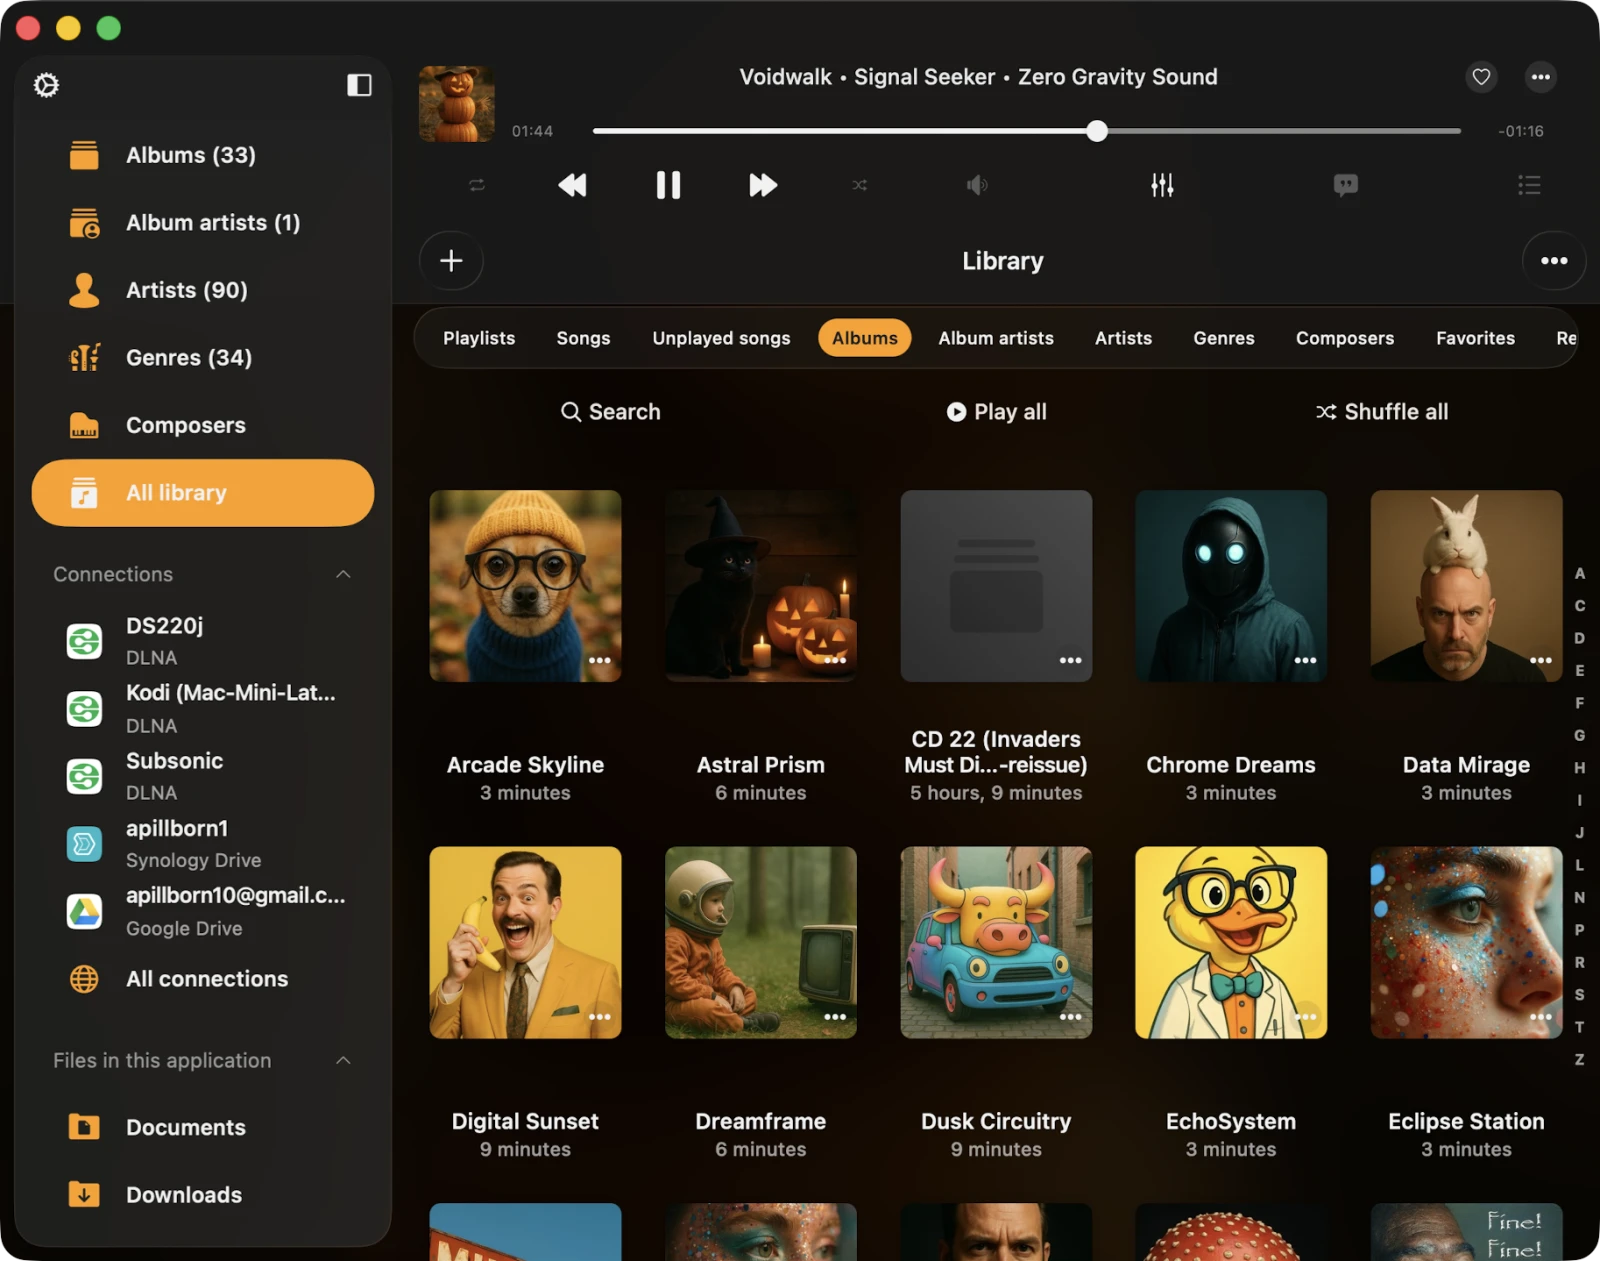
Categories
When you add tracks to your music library, the app automatically reads their audio tags and organizes them into categories such as Songs, Unplayed Songs, Albums, Album Artists, Artists, Genres, and Composers.
Tags Grouping
These categories help you organize your tracks by music tags. When you add tracks to the music library, the app reads their metadata and groups them by these categories. If you don’t see all your albums, ensure the app has scanned every track. You can check the scanning progress in Settings → Music Library → Metadata Reading → Number of Processed Files in Music Library. For local files, you can also rescan offline folders in Settings → Music Library → Offline Folders Sync → Start Local Folders Scanning. After the metadata reader completes all operations, you’ll see the following categories in your music library:
- Songs — all songs grouped by the TRACK_TITLE tag. You can check the sort order using the More Actions menu in the top-right corner.
- Unplayed Songs — all songs that have never been played.
- Albums — songs grouped by the ALBUM_NAME tag, ignoring artist, album-artist, and composer tags. If you have several albums with the same name but different artists, consider using the Exclusive Albums sorting described below.
- Album Artists — songs grouped by the ALBUM_ARTIST_TAG only. Useful for keeping compilations and collaborations cleanly separated from solo work.
- Artists — songs grouped by the ARTIST_TAG only.
- Genres — songs grouped by the GENRE tag.
- Composers — songs grouped by the COMPOSER tag — invaluable for classical music libraries where “composer” is the primary navigation axis.
Favorites
You can mark songs as favorites on the audio player screen or using the options menu. Favorites appear in their own section so you can find them in one tap.
Recents
This section displays all recently played tracks. You can customize how many items the recents list keeps in Settings → Library → Recents → Change List Size, and export the list to M3U / CSV / TXT to back up your listening history.
Bookmarks
You can create audio bookmarks while a song is playing and manage them on this screen — perfect for audiobooks, long mixes, lectures, or just marking the chorus of a favorite track. Detailed instructions on working with audio bookmarks are available here.
Top Toolbar
Located just beneath the navigation bar, the top toolbar offers several convenient actions: Search, Play All, Shuffle All, and Continue Playback. You can reveal or hide this toolbar with a simple swipe-down gesture.
Search
The search feature empowers you to locate a specific track, artist, album, or genre within your music library. Within the Search screen, you have access to Sort, Filter, and Grid / List view actions. Search runs locally against the music library database, so it works fully offline and returns results as you type.
Options Menu
Each song in your music library has a menu with more actions, accessed by tapping the three-dots button near the song title. These actions vary depending on whether it’s a single song or part of a collection.
For Individual Songs
- Play Next — adds the song to the top of the player queue.
- Play Later — appends the song to the bottom of the player queue.
- Add to Playlist — adds the song to a playlist.
- Add to Favorites — marks the song as a favorite for quick access.
- Download — saves the song to local files. It appears in the Local Files tab and the Offline Music section.
- Edit Audio Tags — opens the built-in audio tag editor to fix missing metadata; note that this will alter the song on your storage.
- Show in Folder — reveals the folder where the audio file is stored.
- Show in Finder — for files imported from your Mac, this action reveals the folder where the audio file is located on your Mac.
- Open In — exports the audio file to another app.
- Delete from Cloud Service — removes the file from both the music library and cloud storage. This action is irreversible.
- Delete from Music Library — deletes the song from your music library, but the file remains in storage. If automatic sync is enabled and the file exists on remote storage, it will reappear in your library after a sync operation.
For Song Collections
For song collections like Albums, Artists, Genres, or Composers, the options menu includes the following actions.
- Play All — replaces the player queue with songs from the selected collection.
- Play Next — adds the songs from this collection to the top of the player queue.
- Play Later — appends the songs from this collection to the bottom of the player queue.
- Add to Playlist — includes songs from this collection in a playlist, with the option to create a new one.
- Enable Offline Mode — downloads songs from this collection to local files. Files appear in the Local Files tab and the Offline Music section. If new items are added to the collection on the server, they’ll be downloaded automatically.
- Edit Image — change the album cover for the song collection.
- Add to Archive — bundle the entire collection into a single ZIP file for easy backup or transfer (Premium feature).
- Export Songs List — export the collection to M3U, CSV, or TXT for use in other players or for archiving.
- Delete from Music Library — removes the song collection from your music library. This action does not delete the actual files from storage. If automatic sync is enabled and the files exist on remote storage, they’ll reappear in your library after a sync operation.
Selection Mode
You can activate selection mode using the More Actions button in the top-right corner. In this mode, you can select multiple tracks at once and perform batch actions — add to playlist, mark as favorite, delete from library, download, and more.
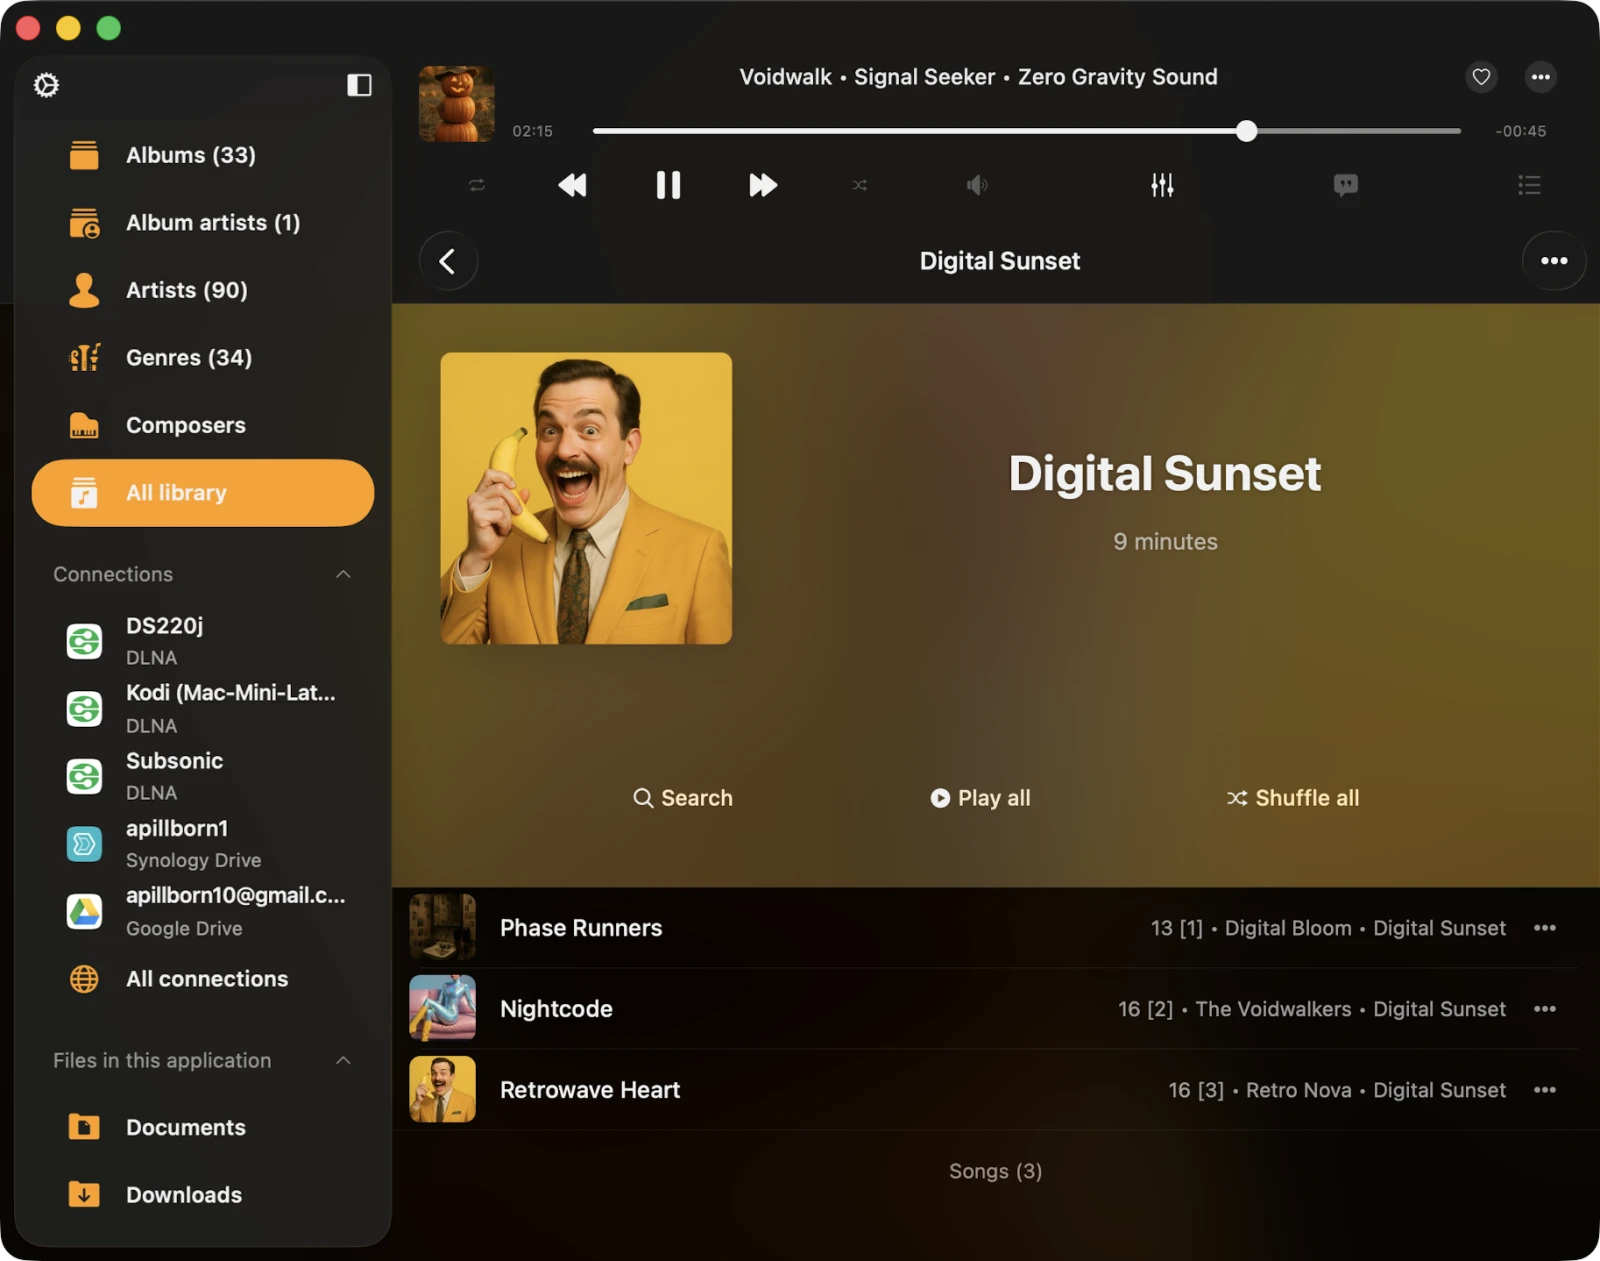
Album Detail
When you open the Artist, Album Artist, or Composer sections, you can see a switcher for Songs / All Albums / Exclusive Albums / Solo Albums.
- Songs — displays all songs where this Artist / Album Artist / Composer appears in the audio tags.
- All Albums — shows compilation albums and all albums where the artist is present at all.
- Exclusive Albums — shows albums where the specified artist is the only artist with that album name.
- Solo Albums — shows albums where only the specified artist’s tracks appear, even if other artists have albums with the same name.
This is especially useful for cleaning up cluttered “Various Artists” compilations in large libraries.
Settings
Tap More Actions → Settings to configure your music library preferences.
Metadata Reading
When you add tracks to the library, the metadata reader gets to work. This background process reads all metadata from your tracks and organizes them by Artist, Album, Genre, and Composer. You can adjust the speed of metadata reading to load data faster — be aware that faster reading uses more energy. You can also disable the metadata reader entirely and display file names instead of tag information.
Importantly, the metadata reader only updates metadata in your music library and does not alter the files stored in your cloud account or local storage. If you wish to edit metadata for audio files, you can do so using the built-in tag editor, which you can activate from the corresponding action in the options menu.
Available Modes for the Metadata Reader
- Deactivated — the metadata reader is off and file names are shown instead of audio-tag data.
- Current Song — the application reads metadata only for the currently playing song. Use this option if you have a slow network connection to prevent the metadata reader from sending many requests to the cloud server, which may cause playback interruptions.
- Playback Queue — the app reads metadata for all songs in the audio player queue.
- Library — the app reads metadata for all songs in the music library.
When the Metadata Reading in the Background switch is on, the metadata reader continues working in background mode. Note that if the app consumes a lot of energy during audio playback, the iOS operating system may suspend it.
So, if you have a large music collection, it’s advisable to use the desktop version of the application for metadata synchronization. You can then use the Data Backup and Restore feature in app settings to transfer the synchronized library from the desktop to mobile.
When the Normalize Metadata Encoding option is enabled, the app automatically normalizes metadata encoding for all songs in the music library. This fixes issues where audio-tag encoding is broken (such as after editing files on a Windows PC) and prevents incorrect characters from showing in track information.
The Reload Metadata action flags every file in your music library as having missing metadata, triggering the metadata reader to refresh every record.
Tap Start Metadata Reading to trigger the reader manually. The operation progress is displayed below.
Online Synchronization
Automatic online music sync allows you to add tracks from connected cloud services to the music library automatically. To activate this feature, head to Music Library Settings and select sync folders.
With this option enabled, the application scans all selected folders, identifies supported audio files, and seamlessly integrates them into your library. You can start or stop synchronization by tapping the corresponding menu action.
Online music synchronization operates exclusively when the app is in the foreground, which means syncing a large library can take some time. To speed up the process, leave your app open, connect it to a power source, and enable Screen → Always Active in application settings.
Alternatively, you can perform online music synchronization on the desktop version of the app and transfer the music library to the iOS version using the Backup & Restore feature.
You can also set how often you want to synchronize your online music library. If you set the interval to Immediately, online sync will start every time you open the application.
Offline Synchronization
Here you can configure offline music synchronization.
Synchronized Offline Folders
When you make a cloud folder available offline (via the More Actions menu), it appears in the Local Files → Offline Folders section. The app downloads its contents to your device. If you make changes to the folder in the cloud — like adding, removing, or updating files — the app detects those changes and updates the local copy automatically.
On this screen, you can manually start offline folder synchronization, reveal the offline folder in its enclosing folder, and disable offline mode for the folder. Disabling offline mode removes all local copies of files from your device.
Time Interval
You can set the time interval for how often the app should check offline folders for modifications.
Start Local Folders Scanning
This option scans all local folders located in the application’s Documents directory to find supported audio files. All these local files are seamlessly added to your music library. Local files located on your device but outside of this application must be added to the music library manually, as the app does not have access to files outside the application’s Documents directory due to iOS / macOS security restrictions.
Important
It is advisable to periodically initiate offline music synchronization to keep your music library updated with your local files.
Personalization
In this section, you can configure the music library screen style to suit your preferences. Three options are available: Plain Menu, Grouped Menu, Tabbed Menu. You can also enable or disable showing album covers in album detail screens.
Album Covers
Here, you can configure how the application loads and stores album artwork.
- Network Type — pick Wi-Fi or Wi-Fi & Cellular Data for cover downloads.
- Load Album Covers for Online Files — when enabled, embedded album covers are loaded for files stored in cloud storage. This may use additional network data.
- Search in the Folder — when enabled, if a track has no embedded cover, the app looks for JPEG or PNG images in the same folder and uses them as album artwork.
- Cover Quality — choose the quality of album covers stored on your device.
- Show in Folder — open the folder where album covers are cached so you can manage or back them up.
- Delete All — delete cached album covers to free up storage space and force the app to reload them on demand.
By default, the app checks for embedded album covers in your tracks and displays them if available. If there are no embedded album artworks and the Search in the Folder option is enabled, the app checks the enclosing folder for JPEG or PNG images and uses them as album artwork for all tracks in that folder.
Playlists
You can enable the option to add the same song to a playlist twice. By default, this option is disabled.
Recents
You can manage your recently played songs list.
- Delete List — delete the entire list of recently played songs.
- Change List Size — set the number of items that appear in the list.
- Export Songs List — export your recently played songs list to M3U, CSV, or TXT. Detailed instructions are available here.
Favorites
You can manage the list of your favorite songs.
- Simultaneous Editing — when enabled, adding a song to favorites adds it both in the music library and the files section at once.
- Delete List — delete the entire list of favorite songs.
- Export Songs List — similar to Recents, export the favorites list to M3U, CSV, or TXT.
Delete Library
This action will erase the music library database, but it will leave your music files untouched on storage.
Content Loading Limit
By default, the application uses pagination to reduce content loading time and keep large libraries responsive. However, you can disable this option and allow the application to load all available data at once. To do so, open application settings, scroll down to Personalization → Content Loading Limit, and choose Deactivated.