Local Files
The Local Files section serves as a hub for managing files located in the application’s Documents folder, as well as files added from your device that are available for offline playback.
This built-in file manager allows you to edit files (rename, move, copy, upload, delete), monitor transfers, and offers several methods to import audio files into the app — direct downloads from the cloud, offline-mode sync, USB flash drives, Wi-Fi Drive, and Finder File Sharing.
Download Files from Cloud Storage
You can add audio files to the app by downloading them from connected cloud storage services as described here.
Offline Mode
Automatically sync entire folders, playlists, albums, artists, or genres for offline playback as described here. Offline mode keeps your local copy in sync with the cloud — when new files are added on the server, they’re downloaded automatically.
Import Files from Your Device
Easily import files from your device as described here, or from an attached USB drive as described here. You can also connect a folder located on your device — Flacbox creates a link to it (read/write) so you can manage that folder’s contents directly from inside Flacbox.
iTunes / Finder File Sharing
Transfer files using a Lightning or USB-C cable as described here. On macOS Catalina and later, Finder replaces iTunes for this — the procedure is otherwise identical.
Wi-Fi Drive
Transfer files wirelessly using any desktop browser as described here. On macOS you can also mount Wi-Fi Drive directly in Finder (Go → Connect to Server…) and on Windows in File Explorer (Map Network Drive…).
Transfers Queue
In the top-left corner of the navigation bar, you’ll find a Transfers button. Tap it to access the transfers queue, where you can monitor and manage every download and upload — pause, resume, retry failed transfers, and view detailed progress per item. You can also adjust the transfer queue speed (maximum parallel tasks) and network type in Settings → File Manager.
Quick Access Section
At the top of the screen, a Quick Access section provides convenient links to your recent and favorite files and folders.
Recents
This section displays every recently opened file or folder, so you can jump back to your latest workspace with one tap.
Favorites
You can mark files or folders as favorites and access them in this section. You can also add a folder located on your device to your favorites. To do this, open the Favorites section, tap the three dots in the top right corner, and choose Add Folder. Follow the prompts to add a folder from your device to favorites for quick access.
Top Toolbar
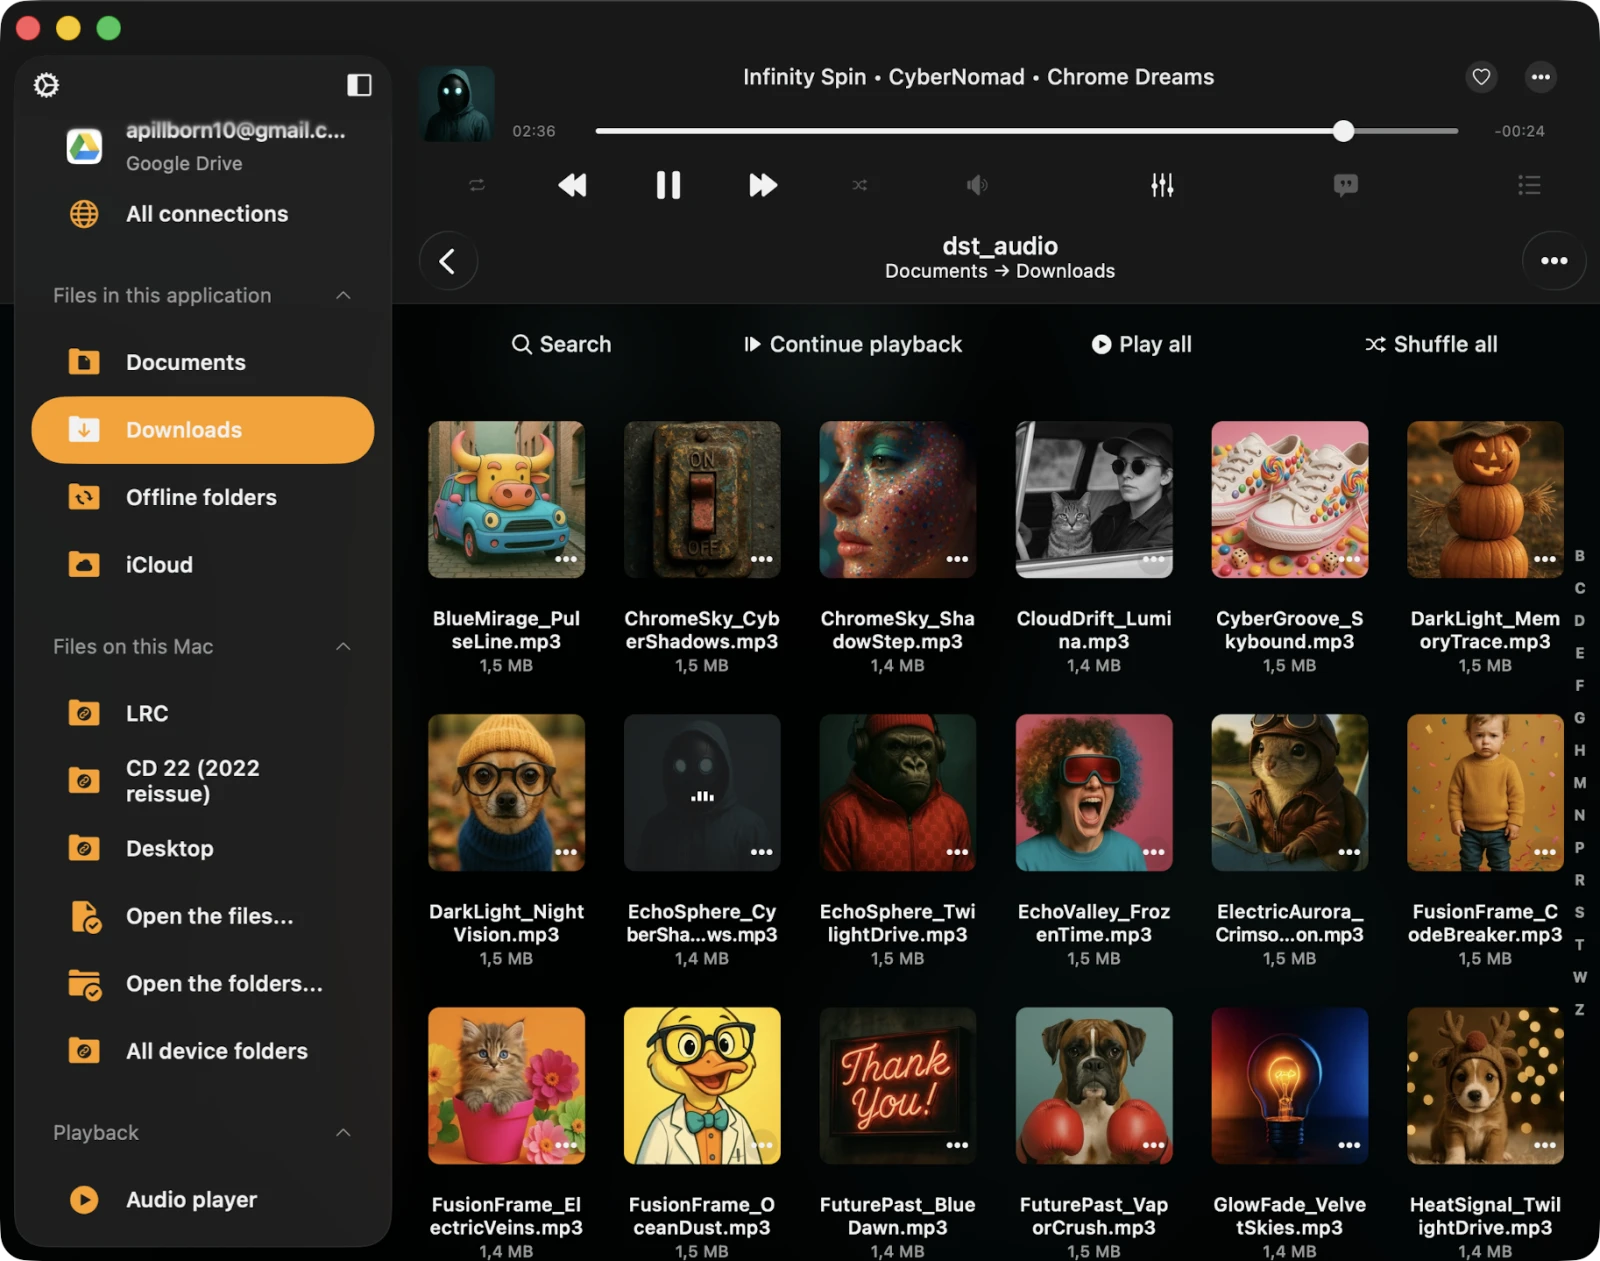
The top toolbar, located under the navigation bar, offers several actions:
- Search — perform a search within the current folder.
- Continue Playback — if enabled in the application settings, this feature restores the audio player queue and the last media position for the current folder, allowing you to resume where you left off.
- Play All — scan the current folder and its subfolders, then add files to the player queue with the current sort order.
- Shuffle All — similar to Play All, but shuffles files before adding them to the audio player queue.
You can show or hide the top toolbar using a swipe-down gesture.
Special Folders
Within the Local Files screen, you’ll encounter several special folders that Flacbox uses to organize content.
Downloads
All files downloaded from a cloud storage service will appear here by default. You can customize this behavior in Settings → File Manager → Save Downloaded Files To.
Audio Player
This is the audio player cache folder. By default, the audio player downloads upcoming songs in the player queue to apply crossfade and optimize playback. You can disable the audio player cache in app settings or simply delete this folder from Local Files to free up space.
iCloud
Place files in this folder, and they will sync across all your devices connected to the same iCloud account — handy for keeping a small set of must-have tracks available everywhere without uploading them to a third-party cloud.
Offline Folders
When you make a playlist, album, artist, or online folder available for offline use, all those files are downloaded into this folder. If you need to disable offline mode for specific items, you can use the More Actions menu or delete the corresponding folder located in Offline Folders.
Two Distinct Sections
The Local Files screen is organized into two distinct sections.
Files in This Application
Shows files and folders stored in the app’s Documents directory and iCloud Drive.
Files on This iPhone / iPad / Mac
Shows files located on your device but in different applications. You can import them into this application using the system file picker. To activate the picker, choose Open Files… to select files or Open Folders… to select folders. Detailed instructions on how to import local music stored on your iPhone or Mac are available here.
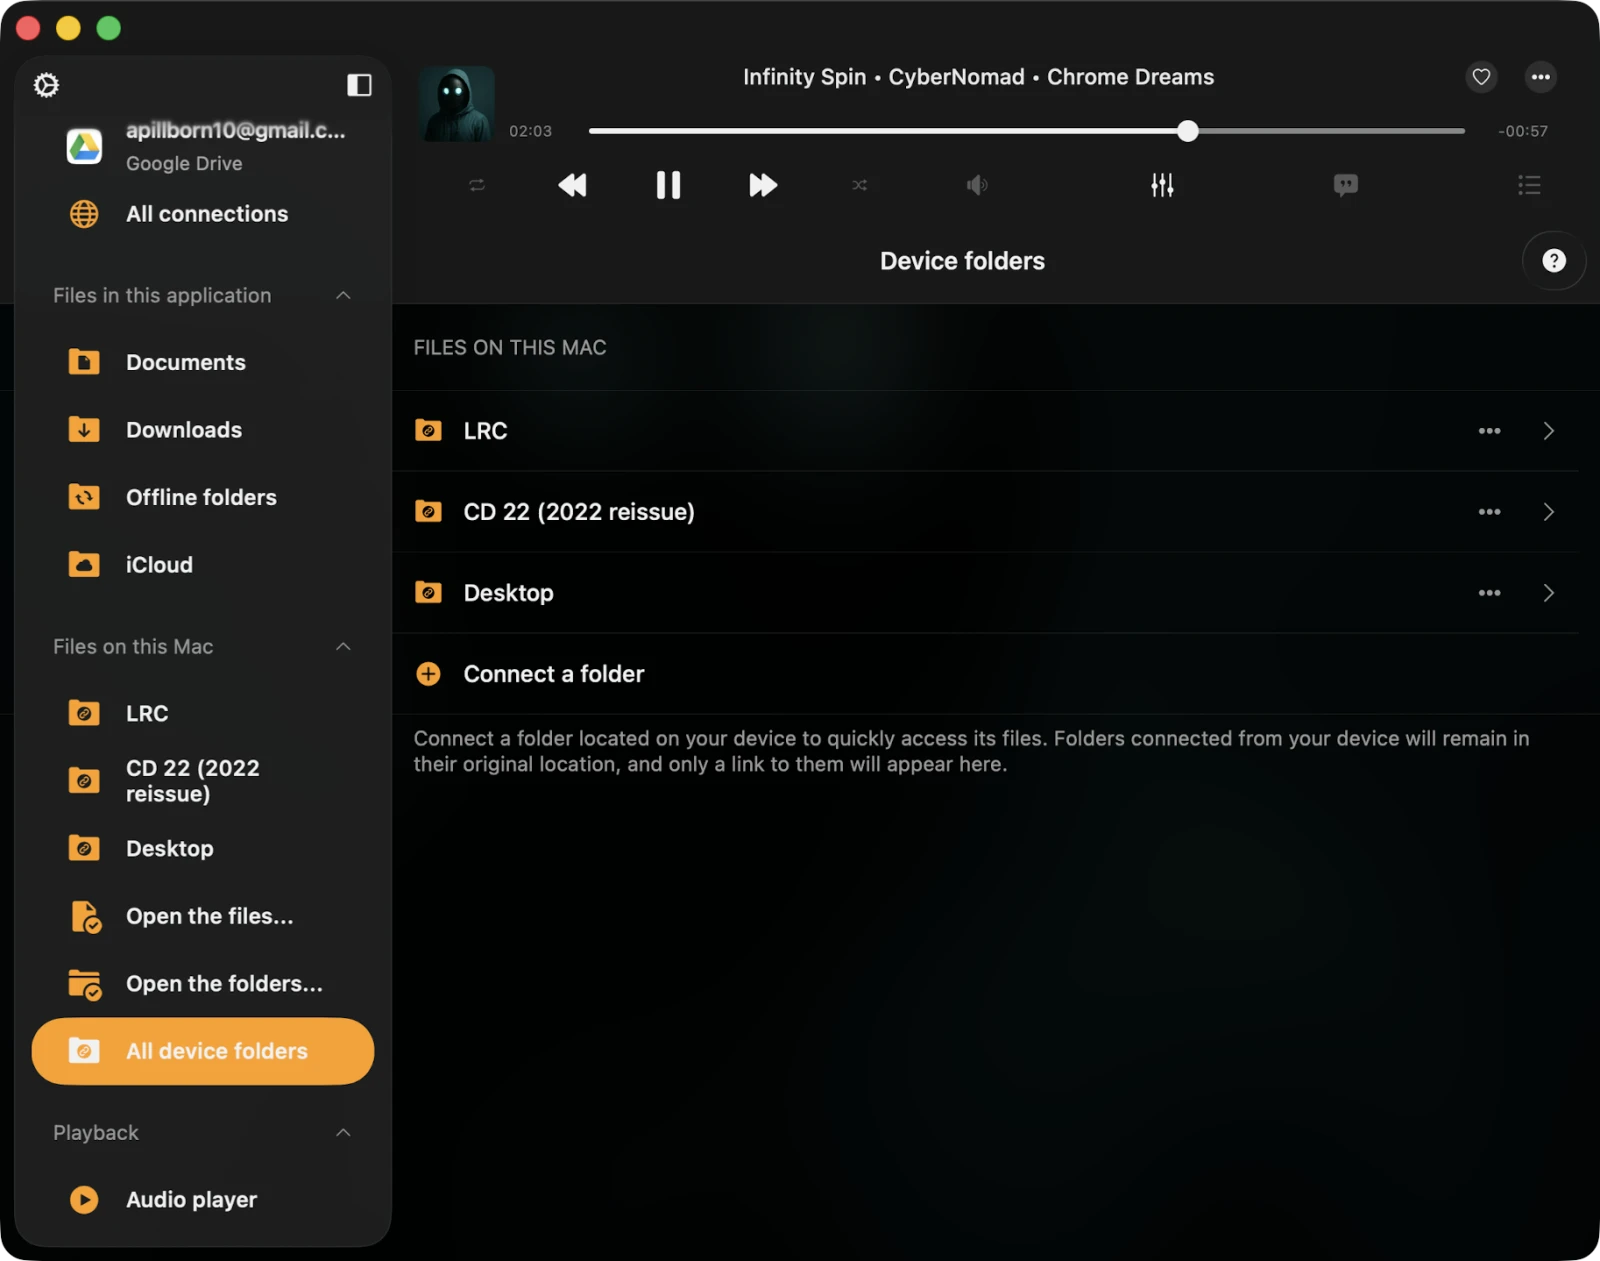
You can also connect a folder located on your device and have quick access to its content. Use the Connect a Folder menu item and choose a folder located on your device. Tap Done, and the app creates a link to that folder with read / write access, allowing you to manage files directly from this app. To disconnect a folder located on your device, tap the More Actions button and choose Disconnect.
Import Files Located on Connected USB Flash Drives
Detailed instructions on how to connect a USB flash drive to your iPhone and listen to music or manage files located on it are available here.
More Actions
The More Actions menu for the currently opened folder is located in the top-right corner and provides access to various actions.
- Select — switch to selection mode for files and folders.
- New Folder — create a new folder within the current folder.
- Search — activate the search function to find a specific file or folder.
- Sort — organize files by name, size, date, or using metadata information.
- List / Grid — change the content presentation from a table view to a grid view (or vice versa).
- Help — access help instructions.
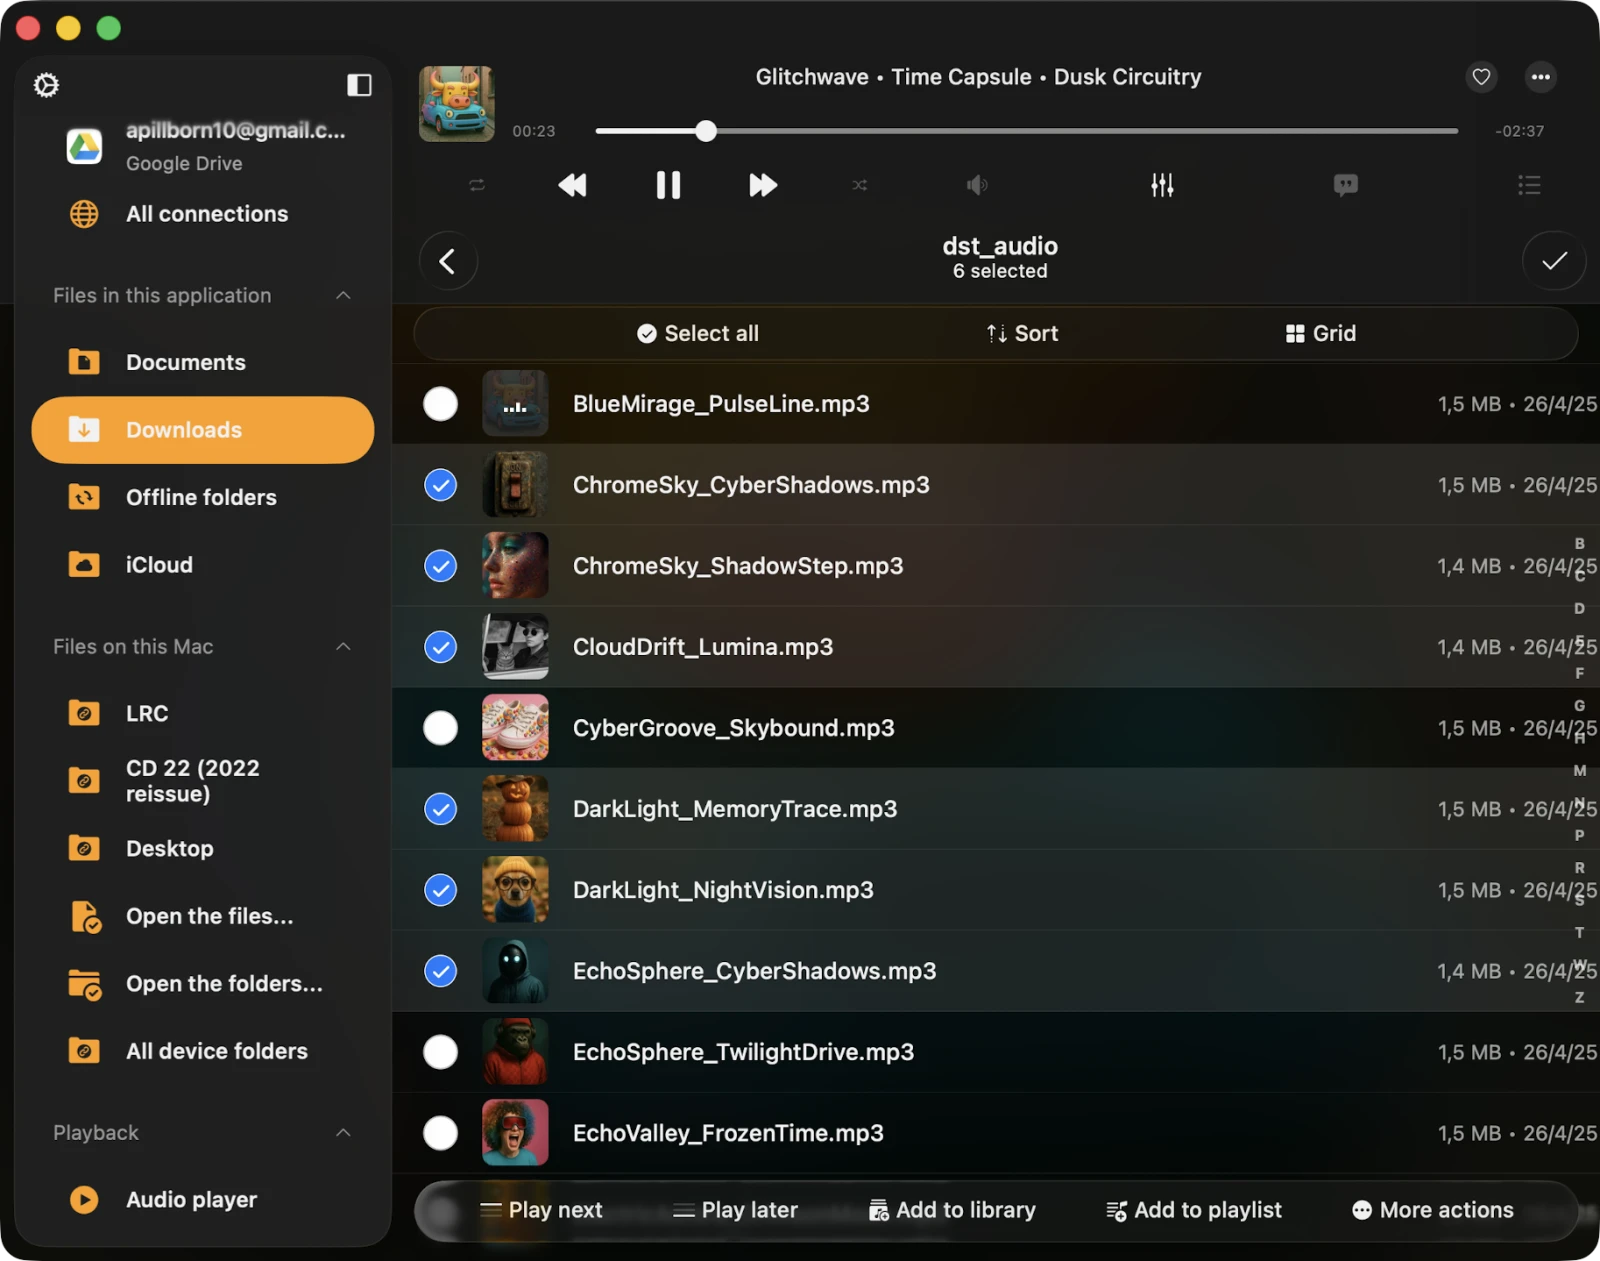
Selection Mode
If you need to edit several files, activate selection mode by tapping the More Actions button "…" on the navigation bar in the top-right corner and choosing the Select menu item. This displays checkboxes near each file. Select the desired files by tapping their checkboxes. You can perform the following actions on the selected files:
- Play Next — add selected files or folders to the top of the player queue with the current sort order.
- Play Later — add selected files or folders to the bottom of the player queue with the current sort order.
- Add to Music Library — include selected files or folders in the music library.
- Add to a Playlist — add selected files or folders to a playlist.
- Copy — create a copy of the selected file or folder.
- Upload — upload the selected file or folder to remote storage.
- Move — relocate the selected file or folder to a different location on the device.
- Rename — change the name of the selected file or folder.
- Delete — remove the selected file or folder from the device. This action is irreversible.
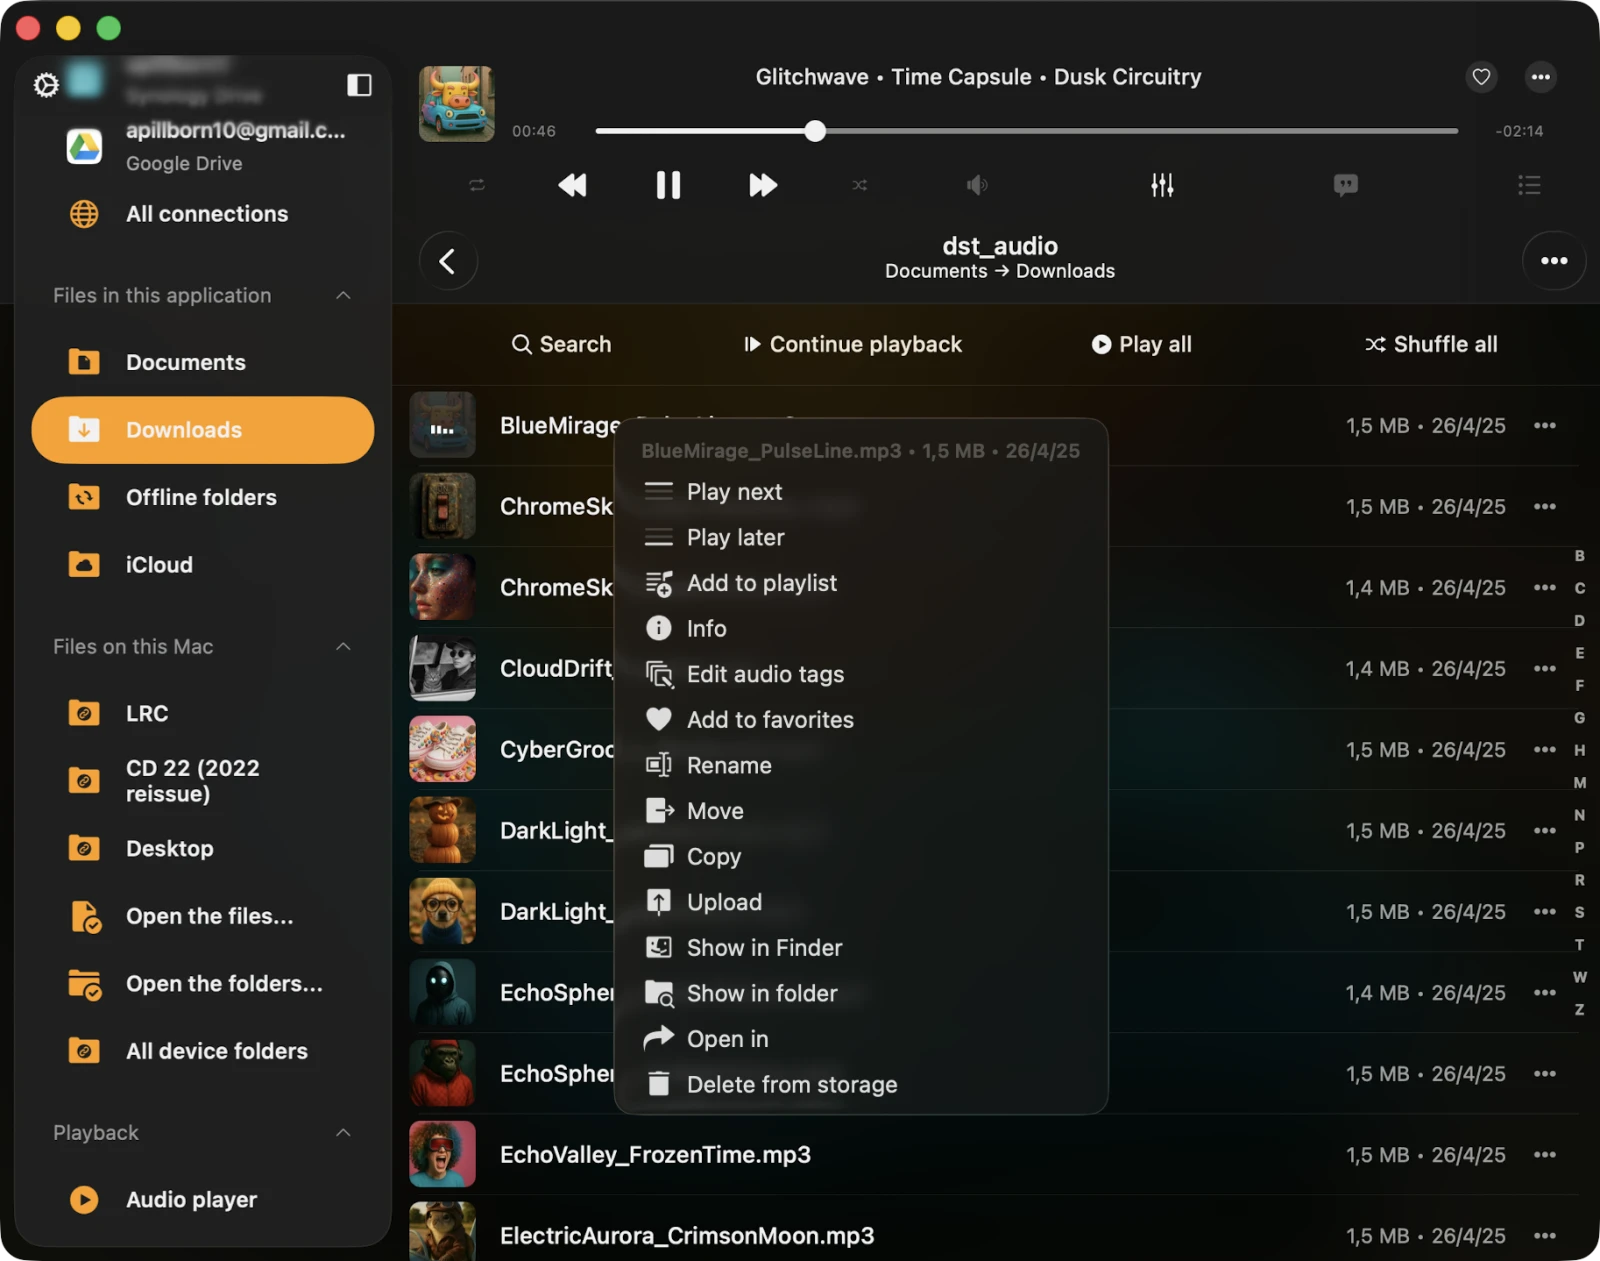
Options Menu
For every file or folder in the app, several actions are available, accessible by tapping the More button "…". If you don’t see all actions, scroll down to view them:
- Play All — replace the player queue with items from the selected folder.
- Play Next — add the file or folder to the top of the player queue.
- Play Later — add the file or folder to the bottom of the player queue.
- Add to Music Library — include selected files or folders in the music library.
- Add to a Playlist — add the file or folder to a playlist. If you create a playlist from a folder, a playlist name will be automatically assigned.
- Add to Favorites — mark selected files or folders as favorites.
- Edit Audio Tags — open the built-in tag editor to change audio tags for the selected file.
- Rename — modify the name of the selected file or folder.
- Move — relocate the selected file or folder to a different location on the device.
- Copy — create a copy of the selected file or folder.
- Upload — upload the selected file or folder to remote storage.
- Add to Archive — bundle the file or folder into a single ZIP file (Premium feature).
- Show in Finder — for files imported from your Mac, this action reveals the directory in Finder containing the file.
- Open In — export the file to another app.
- Delete — delete the file or folder from the device. This action is irreversible and you cannot restore deleted files.
Offline Folders
Offline mode is a handy feature that lets you access your favorite music even when you’re not connected to the internet. When you enable offline mode for any album, artist, playlist, genre, or remote folder, all the files within that collection are automatically downloaded to your device for offline playback. You can conveniently access these files in the Offline Folders section of the app.
What’s even more convenient is that when you add new files to the remote server in the folder you’ve marked for offline use, those new additions are also automatically downloaded to your device. This ensures that you have the latest music ready for offline enjoyment — perfect for travel, flights, or moving between Wi-Fi networks.
If you ever need to synchronize an offline folder from your cloud service manually, here’s how: simply tap the three dots in the top-right corner of the app and select Synchronize. This updates your offline collection with the latest tracks from the cloud service at your convenience.
For those who like to customize their experience further, you can adjust the synchronization timeout settings in the application settings to suit your preferences. This way, you have full control over when and how your offline collection is updated, ensuring you always have your favorite tunes available, even without an internet connection.
Detailed instructions on how to play offline music in Flacbox — including how to download and sync from the cloud to local files — are available here.
Personalization
By opening the application settings and going to Personalization → Local Files Screen Style, you can configure the Local Files presentation. Available options are:
- Plain Menu — shows folders located in the app’s Documents directory directly.
- Grouped Menu — shows screen content grouped by categories (Quick Access, Special Folders, Files in This Application, Files on This Device, and so on) for a tidier overview.