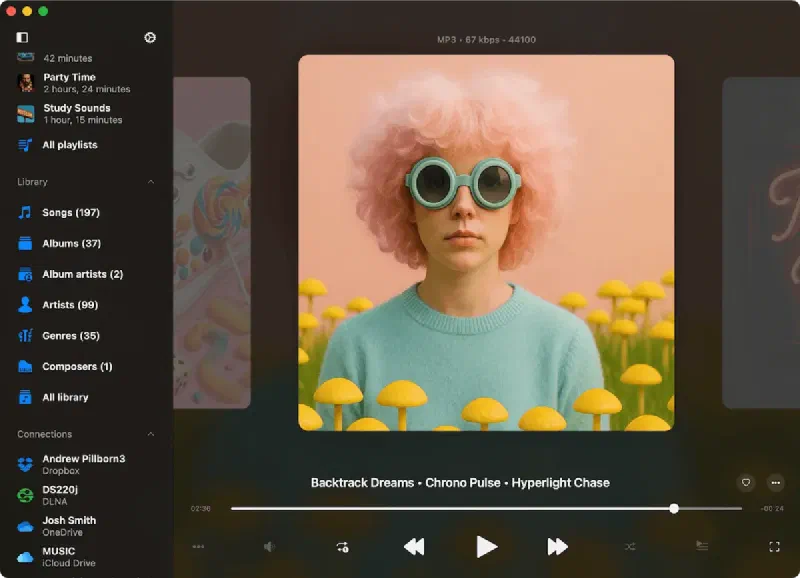
Evermusic
• Play music with crossfade, gapless playback, and equalizer
• Import M3U playlists and download songs for offline listening
• Stream music from cloud drives, NAS, computer, or USB flash drives
• View lyrics while listening and add audio bookmarks to resume anytime
Save Space on Device
Got 100Gb of music collected by years but only 32Gb of storage on iPhone? Just move all your tracks to the cloud and free up such valuable space for photos, videos and apps.
Instant Access to Tracks
With support of the most popular cloud services Evermusic allows you to pick one or multiple services and stream your music from the cloud. No more iTunes synchronization, your audio files get uploaded to the cloud from PC or Mac just like other files.
Offline Mode
Offline mode allows you to download favourite albums, tracks, genres and playlists for offline playback and listen to music, when you aren’t connected to the Internet.
Your Music in the Cloud
Create your own advanced music streaming service for free! Manage your massive music library, save device storage, and stream your favorite tracks directly from the cloud with smart buffering and seamless playback. Enjoy support for popular cloud services like iCloud, Google Drive, Dropbox, MEGA.nz, Box, OneDrive, and more.
Transfer Files Easily
Connect your Mac or PC and stream music directly from your home computer. Transfer audio files seamlessly between your computer and iOS device using Wi-Fi Drive or iTunes File Sharing. You can also link your NAS or a USB flash drive and access your library from anywhere.
Automatic Sync
Sync Manager automatically scans your cloud storage for audio files and updates your music library. The Metadata Loader organizes tracks by albums, artists, and genres using embedded audio tags.
Clean & Simple Design

Full Features Set
App Store Reviews
Pricing Plans
Free
• Contain Ads
• Playlists (10)
• Cloud services (3)
• Archive media collections (3)
• Favorites (1000)
• Songs in playlist (1000)
• Songs in queue (750)
• Offline folders (1)
• Offline albums (1)
• Automatic tags search (20)
• Export to M3U (5)
• Download files
• Export iTunes songs
Free
Premium Monthly
• Ad-free experience
• Unlimited playlists
• Unlimited cloud services
• Unlimited media archiving
• Unlimited favorites
• Unlimited songs in playlist
• Unlimited songs in queue
• Unlimited offline folders
• Unlimited offline albums
• Unlimited tags search
• Unlimited export to M3U
• Download files
• Export iTunes songs
• Export iTunes collections
• Download folders
• Download collections
• Full personalization
$1.99/month
Premium Yearly
• Ad-free experience
• Unlimited playlists
• Unlimited cloud services
• Unlimited media archiving
• Unlimited favorites
• Unlimited songs in playlist
• Unlimited songs in queue
• Unlimited offline folders
• Unlimited offline albums
• Unlimited tags search
• Unlimited export to M3U
• Download files
• Export iTunes songs
• Export iTunes collections
• Download folders
• Download collections
• Full personalization
7 days free, then $12.99/year
Premium Lifetime
• Ad-free experience
• Unlimited playlists
• Unlimited cloud services
• Unlimited media archiving
• Unlimited favorites
• Unlimited songs in playlist
• Unlimited songs in queue
• Unlimited offline folders
• Unlimited offline albums
• Unlimited tags search
• Unlimited export to M3U
• Download files
• Export iTunes songs
• Export iTunes collections
• Download folders
• Download collections
• Full personalization
$59.99/lifetime
Family Sharing: All purchases and subscriptions support Family Sharing, allowing you to share Premium access with your family.
Universal Access: Lifetime and subscription plans are shared between iOS and Mac devices using iCloud synchronization.
Pricing: Prices are shown in US dollars for the United States. Final pricing may vary based on your region.
Frequently Asked Questions
What is Evermusic?
You can easily download music to play offline, create and manage playlists, and use a built-in equalizer to enhance your listening experience.
It works with services like Google Drive, Dropbox, OneDrive, and more, so you can keep all your music in one place and access it from any device.
The app also supports various audio formats and lets you organize your music library by artist, album, genre, and composer.
You can sync your library between your cloud storage and your device, ensuring you always have your favorite tunes available.
Plus, with features like gapless playback, crossfade, and the ability to stream music to Chromecast and AirPlay devices, Evermusic offers a complete solution for all your music needs.
How does Evermusic work?
Evermusic works by connecting to various cloud storage services, such as Google Drive, Dropbox, OneDrive, and others, allowing you to access your music library from any device.
Once connected, you can browse and stream your music directly from the cloud, or download your favorite songs, albums, and playlists for offline playback.
The app supports multiple audio formats, making it easy to play any music file you have stored.
In addition to cloud integration, Evermusic offers powerful features to enhance your listening experience.
You can create and manage playlists, use the built-in equalizer to adjust sound quality, and enjoy seamless playback with features like gapless playback and crossfade.
The app also supports streaming to devices like Chromecast and AirPlay, letting you play your music on any compatible device.
With Evermusic, you can organize your music library by artist, album, genre, and composer, and keep it synchronized across your cloud storage and devices, ensuring you always have access to your favorite tunes.
Moreover, Evermusic allows you to play local files stored directly on your iPhone, iPad, or Mac.
You can easily import music from your device’s storage or from the iTunes music library.
This means you can enjoy your entire music collection, whether it’s stored in the cloud or locally on your device.
With Evermusic, all your favorite tracks are accessible in one convenient place.
Explore our how-to guides for more details:
- How to play music from iCloud Drive on my iPhone or Mac.
- How To Enable DLNA Media Server on Windows 10 and Play Your Music on iPhone.
- How to upload my files to the cloud storage and connect them to Evermusic, Flacbox, Evertag.
- How to transfer files wirelessly from a computer to an iPhone using WiFi-Drive.
- How to connect a USB flashcard to the iPhone and listen to music or manage files located on it.
- How to play music on iPhone from WD My Cloud Home.
Is Evermusic Free?
Lifetime purchases and subscriptions are shared between iOS and Mac, using iCloud to sync this information. If you have the Premium version on your iOS device, please ensure you have the latest version installed and that iCloud is enabled. Start the app on iOS and wait one minute for your purchase information to upload to iCloud.
Read more
What is the difference between Evermusic free and Evermusic Premium?
Evermusic Free
• Contains Ads: The free version displays ads to generate revenue, which can occasionally disrupt your music listening.
• Limited Playlists: You can create up to (10) playlists in the free version.
• Restricted Cloud Services: The free version supports up to (3) cloud services.
• Limited Favorites: You can add a maximum of (100) songs to your favorites in the free version.
• Playlist and Queue Limits: The free version has limits on the number of songs you can add to a single playlist (1,000) and the maximum number of songs in the player queue (750).
• Limited Offline Features: The free version has restrictions on offline access, including only (1) offline folder and the ability to download albums, artists, genres, playlists, and composers offline.
• No iTunes Music Collections Export: You cannot export collections from iTunes music to Local Files in the free version.
• Limited Tags Searching Features: Offers (20) automatic tags search requests and (20) album art search requests per day.
• Limited Media Collections Export: Allows (5) media collections (playlists, albums, artists, genres) exports to M3U/CSV/TXT per day.
• Limited Personalization Features: You can use only limited personalization options, and changing the app icon is also restricted.
Evermusic Premium
• Ad-free experience: Evermusic Premium eliminates ads, providing a seamless and uninterrupted music listening experience.
• Unlimited playlists: You can create an unlimited number of playlists with Evermusic Premium.
• Unlimited cloud services: Evermusic Premium allows you to connect to an unlimited number of cloud services, expanding your music library access.
• Unlimited favorites: You can add an unlimited number of songs to your favorites in Evermusic Premium.
• Playlist and queue flexibility: Evermusic Premium removes limitations on playlist and queue size, giving you more control over your music organization.
• Extensive offline features: Evermusic Premium offers advanced offline capabilities, including the ability to download folders, albums, artists, genres, playlists, and composers offline.
• iTunes music collections export: You can export collections from iTunes music to Local Files.
• Unlimited Tags Search: Offers unlimited automatic tags search requests.
• Unlimited Album Art Search: Offers unlimited album art search requests.
• Unlimited Media Collections Export: Allows unlimited media collections (playlists, albums, artists, genres) exports to M3U/CSV/TXT.
• Full Personalization: Provides full personalization options, including the ability to change the app icon.
Is Evermusic Safe?
Evermusic uses only official SDK and secure connections to interact with connected cloud services. Your login and password are not available for the application. All requests from the application to the cloud service are encrypted.
When you enter login and password the application shows you the official authorization page that is provided by the cloud service provider and all authorization process is made outside the application. The cloud service provider sends an auth-token to the application after successful authorization and that token is used to make API calls.
Auth-token is a digital key that allows third-party applications to interact with cloud storage. Auth-token is stored on your device in secure system storage called Keychain. You can download your files from the connected cloud service to the device and those files will be placed in the app “Documents” directory. You can remove that files anytime using the built-in file manager.
The application does not share any information from the connected cloud account. You can revoke access to your cloud account anytime by opening the account settings page on your web browser.
To reject auth-token login to your account on the web browser and navigate to the settings page. There you can find all third-party apps which are connected to your cloud account and remove any of them if you don’t want to use that application anymore.
You can also disconnect the connected cloud accounts in the application and auth-token will be also removed from your device. If you remove the application from your device all downloaded data and access tokens will be also removed.
How do I make a playlist on Evermusic?
- Open the Playlists section.
- Tap the “+” button or the “…” button in the top right corner and select “New Playlist."
- Enter a name for the playlist and tap “Save.” The “Add Songs” dialog will appear.
- Select the tracks you want to add to the playlist.
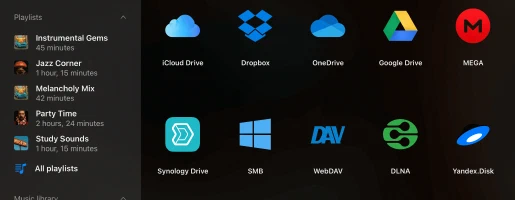
What cloud services does Evermusic support?
Currently, the application supports the most popular cloud services: iCloud Drive, Google Drive, Dropbox, OneDrive, Box, MEGA, Yandex.Disk, WD MyCloud Home, DLNA, MediaFire, WebDAV, SMB, pCloud, HiDrive, 百度网盘, My Cloud Home, InfiniCLOUD, Cloud Mail.ru, Put.io, MyDrive.
How can I use an equalizer?
- Open the Audio Player Screen.
- Tap on the “Equalizer” icon on the bottom of the screen.
- Toggle switch control in the top right corner on the equalizer screen to activate the equalizer.
- Select one of the available presets (rock, pop, dance, disco..) or change equalizer sliders to build your own preset.
Full tutorial available here:
How to use the audio equalizer on your iPhone, iPad, Mac with Evermusic and Flacbox
How do I enable offline mode in Evermusic?
-
Connect a Cloud Service:
• Go to the “Connections” tab.
• Select “Connect a cloud storage” and follow the prompts to connect your desired service. -
Navigate to Music Folder:
• Open the connected cloud storage and find your music folder. -
Enable Offline Mode:
• Tap the “More actions” button next to the folder name.
• Choose “Enable offline mode.”
• The selected folder and all its contents will be downloaded to “Local files” > “Offline folders.” -
Automatic Updates:
• The app will continuously scan for changes. New files added to the online folder will be automatically downloaded. -
Configure Scanning Timeout:
• Go to “Settings” > “File manager” > “Offline folders” > “Time interval” to set the scanning frequency. -
Manual Synchronization:
• To sync manually, go to “Settings” > “File manager” > “Offline folders” > “Synchronized offline folders.”
• Tap “More actions” and select “Start synchronization.”
How to play locally Downloaded music on iPhone?
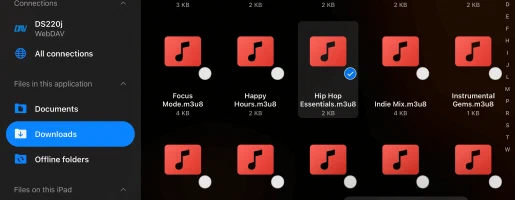
Once you’ve installed the application, open the “Local Files” screen and scroll down to the “Files on this iPhone” section.
From there, choose “Open files…” if you need to select several audio files or “Open folder…” if you want to pick a music folder.
The app will scan the folder’s content, and all found audio files will be selected.
Navigate to your music folder, tap “Open” to confirm your selection, and the files will be added to the player queue.
These files will be played directly from the selected location without being copied to the application bundle.
Adding a Folder to Favorites for Quick Access
Simplify the process by adding a folder located on your device to your favorites.
This way, you won’t need to repeat the steps every time you want to play music.
Open the “Local Files” screen, scroll to the “Quick Access” section, and tap “Favorites” to access the “Favorite Files” screen.
Tap the more actions button (three dots) in the top right corner and select “Add Folder."
Navigate to your desired folder and tap “Open” to confirm.
Your folder will be added to “Favorite Files,” providing quick access to your music.
Importing Local Files to the Music Library
If you prefer to organize your local files within your music library, open the “Music Library” screen, tap the three dots button at the top right corner, and select “+” (Add Music).
Choose the “Local Files” menu item, scroll down to the “Files on this iPhone” section, and tap “Open Files…”.
Select the files you want to add and tap “Open” to confirm.
The app will scan the selected files and add them to your music library, organizing them by metadata such as artist, album, and genre.
Adding Local Files to a Playlist
To add local files to a playlist, open the “Playlists” screen and tap the more button in the top right corner.
Select “+” (New Playlist), enter a name for your new playlist, and on the next screen, select the “Local Files” option.
Scroll down to the “Files on this iPhone” section and tap “Open Files…”.
Select the audio files you want to add and tap “Open” to confirm.
The files will be added to your playlist, where you can change the song order and perform other actions using the more button.
With these simple steps, you can unlock the full potential of your iPhone and Mac as the ultimate platforms for enjoying your cherished local music collection.
How can I resume a playlist from where I left off?
When you switch to another playlist and return, you will see four actions on the top toolbar under the album artwork: “Search,” “Continue Playback,” “Play All,” and “Shuffle All”.
Tap “Continue Playback” to resume the playlist from the last saved state and media position.
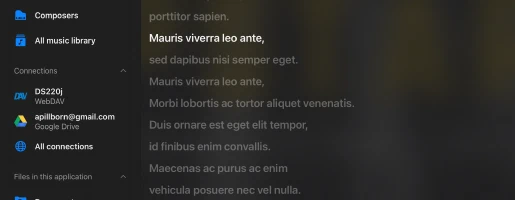
How to view lyrics for songs in Evermusic?
You can view embedded lyrics for tracks in the Evermusic app by following these steps:
- Start playing an audio file by tapping on it.
- Open the full-screen audio player.
- Tap the “More Actions” button in the top right corner to see the more actions menu.
- Select the “View Comments” menu item.
- On the track comments screen, you have three modes which you can change by scrolling to the right: “Comments”, “Embedded Lyrics”, and “LRC File”.
Modes:
- “Comments Mode”: Displays the content from the COMMENT field of your audio file.
- “Lyrics Mode”: Shows the embedded lyrics from your audio file. If your audio file has lyrics in the tags, they will appear here. This mode also supports timed text in LRC format. To edit the lyrics tag, use an external audio tag editor like Evertag. You can find LRC format lyrics for free on websites like Lyricsify. Copy the needed lyrics to your tags and save them to display later on this screen.
- “LRC File Mode”: Instead of editing audio files, you can place an LRC file in the same folder as the original audio file. Both files should have the same name but different extensions. When you swipe to the third page on the Comments screen, the app will search for the LRC file in the same directory and display its content.
How do I transfer music to Evermusic from my computer?
You can connect your computer or personal NAS using SMB, WebDAV, or DLNA protocols. Alternatively, use iTunes File Sharing to transfer music.
To connect a computer using SMB protocol tap “Connect a cloud service” → SMB.
Enter computer IP address and shared folder name in URL field using format smb://computer-ip-address/shared-folder-name,
enter login and password and tap “Done”.
If your connection is successful you will see connected storage in the “Cloud services” section.
A full tutorial available here:
Transfer your files from the computer to iPhone using SMB protocol
For WebDAV protocol, all steps are the same instead of the URL field.
URL should be in format http://server-name or https://server-name if the server supports SSL.
A full tutorial available here:
How to Connect NAS Storage Using WebDAV and Listen to Music on Your iPhone or Mac
Wi-Fi Drive is a popular technology that allows you to transfer files from your computer to an iOS device wirelessly using a desktop browser.
To use this feature your device and computer should be connected to the same Wi-Fi network.
Open “Connections” → “Computer” → “Connect using Wi-Fi” and enable the server.
After this open a desktop browser and enter the URL from the application.
You can drag-n-drop files from your computer to the opened web page and they will appear on the device.
More detailed tutorial available here:
How to transfer files wirelessly from a computer to an iPhone using WiFi-Drive
iTunes File Sharing is another technology that allows you to transfer files from computer to device using iTunes and lightning cable.
Just connect a device to the computer using a cable and run iTunes.
Open the iTunes → “Applications section” → and find Evermusic.
Tap on the app icon to see a shared folder.
Copy files from the computer to the shared folder on the device.
Detailed instruction available here:
How to play local files (iTunes files) on my iPhone
With DLNA you can also setup DLNA media server and stream your music from Window PC as described here:
How To Enable DLNA Media Server on Windows 10 and Play Your Music on iPhone
How to download music?
Before you can download music and listen to your music offline you should connect network account.
Just open the “Connections” screen and add your account.
Once you added a network account you can download your music from the cloud.
To download music from the cloud
– Open connected cloud service.
– Navigate inside the folder you want to download.
– Tap on the more actions button “…” in the top right corner and choose the “Select” menu item.
– Select files you want to download and tap on the “Download” button.
To enable offline mode for Artist/Playlist/Album/Genre
– Open Artists/Albums/Playlists/Genre Screen
– Tap the “Offline mode” checkbox
– Offline Artist/Album/Playlist/Genre will appear in the “Offline music” section of the music library
More detailed instruction about offline mode available here:
Play Offline Music in Evermusic & Flacbox: Download & Sync from Cloud to Local Files
Another available option is download music from Youtube and import it in Evermusic as described here:
How to Download Music From YouTube and Listen to Offline Music on iPhone
Does Evermusic support Apple CarPlay?
Yes, Evermusic fully supports Apple CarPlay. You can browse your music library, play local or offline files, connect to cloud storage, and control playback directly from your car’s infotainment screen.
The CarPlay interface includes dedicated tabs for Library, Connections, Local Files, and Settings, giving you full control over your music on the road. Playback controls, shuffle, repeat, and queue management are also available.
To use CarPlay, make sure Siri is enabled and your iPhone is connected via USB or wireless.
What audio formats does Evermusic support?
Here’s the full list of supported audio formats and their corresponding file extensions:
Supported Audio Formats:
• AAC (MPEG-4 Advanced Audio Coding)
• ALAC (Apple Lossless)
• AMR (Adaptive Multi-Rate)
• HE-AAC (MPEG-4 High-Efficiency AAC)
• iLBC (Internet Low Bitrate Codec)
• Linear PCM (Uncompressed, Linear Pulse Code Modulation)
• MP3 (MPEG-1 Audio Layer 3)
• μ-law and A-law
• IMA4 (IMA/ADPCM)
Supported Audio File Extensions:
mpeg, aifc, 3gp, avi, aif, latm, 3gpp, m4a, loas, cdda, aac, m4p, m4b, ac3, pls, mp4v, m3u, m4r, aiff, xhe, mp1, snd, mp2, wav, qt, wave, m3u8, m4v, mp3, 3g2, caf, mp4, flac, au, w64, ec3, adts, amr, vtt, mpa, aa
With this wide range of supported formats and file extensions, you can enjoy your music in the format of your choice.
User Guide
This guide will help you get the best out of Evermusic on your iPhone, iPad, or Mac. Learn how to stream music from the cloud, manage your audiobooks, and move music between devices. Evermusic gives you full control over your music collection in one easy app.