सेटिंग्स
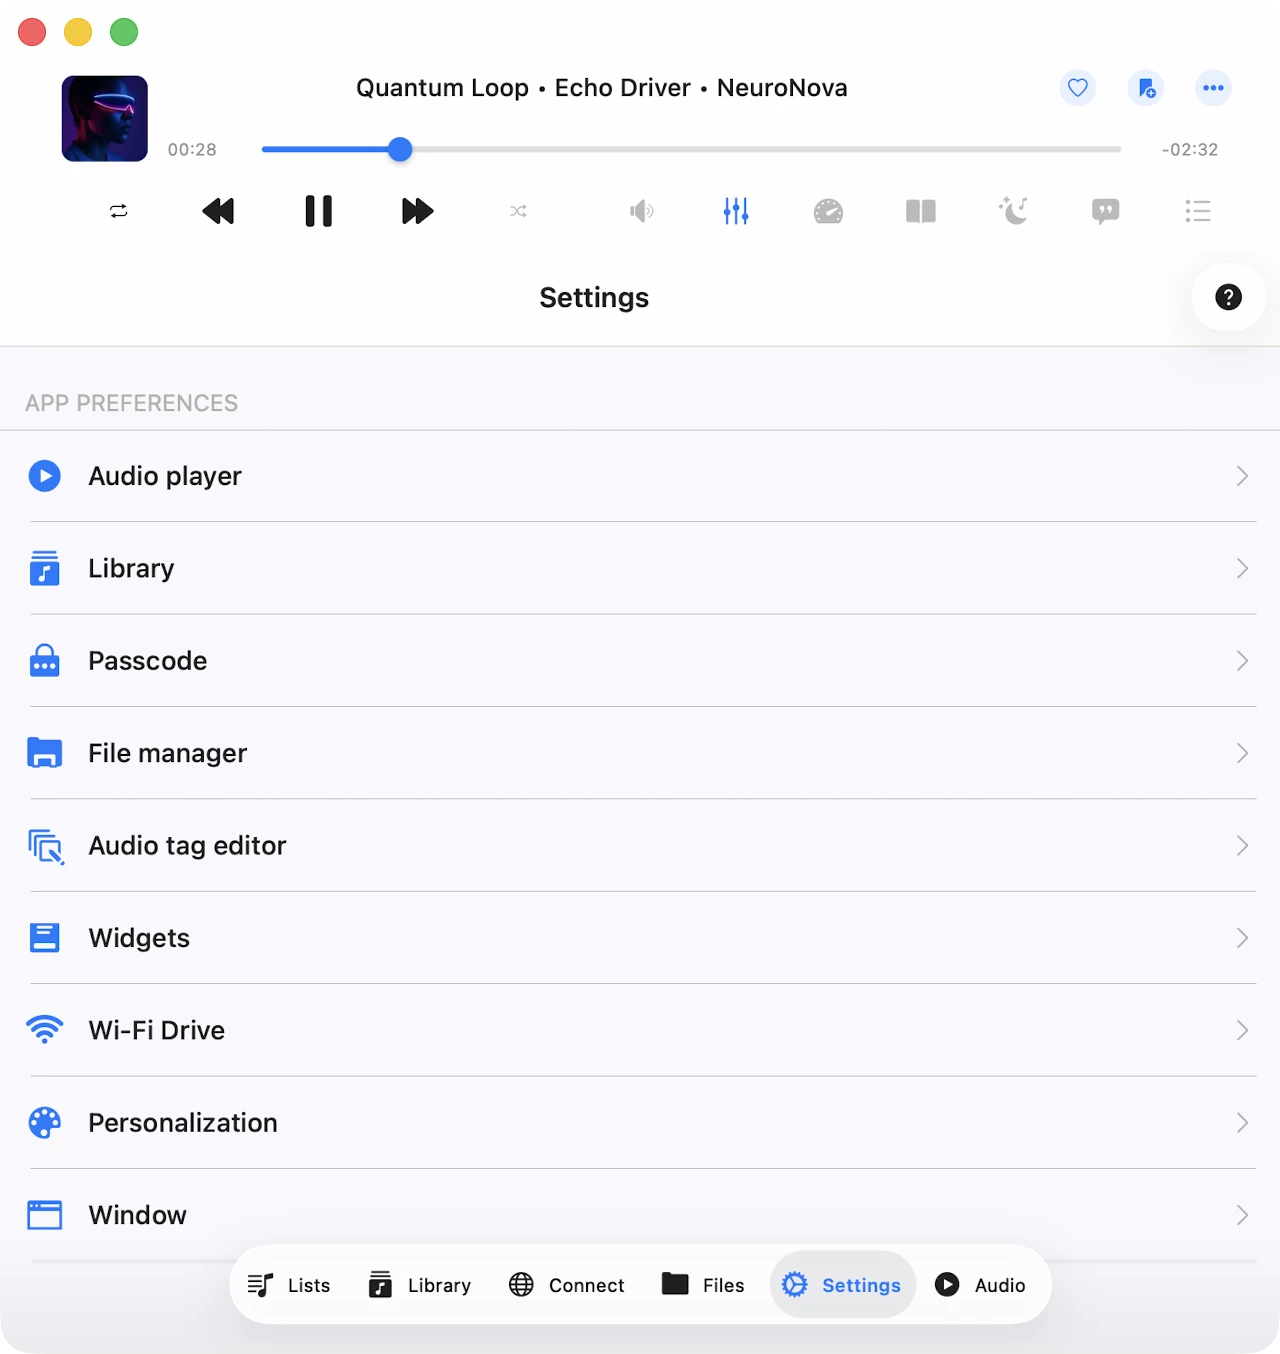
Settings screen Evermusic का control center है। यहां से आप Premium पर upgrade कर सकते हैं, audio player configure कर सकते हैं, अपनी music library manage कर सकते हैं, file manager set up कर सकते हैं, interface customize कर सकते हैं, widgets और CarPlay enable कर सकते हैं, अपना data backup कर सकते हैं, और help और legal information access कर सकते हैं। Sections headers के अंतर्गत grouped हैं: Purchases & updates, app preferences, Help, और Legal & privacy।
Purchases & Updates
Premium पर Upgrade करें
सभी limits remove करने के लिए Application को Premium version पर upgrade करें। Free version एक lifetime in-app purchase और दो subscription options offer करता है जो full feature set unlock करते हैं।
Family Sharing सभी purchases और plans के लिए enabled है, इसलिए आप Premium version अपने family members के साथ share कर सकते हैं।
Purchases और Premium version के बारे में अधिक यहां पढ़ सकते हैं: Evermusic और Evermusic Premium में क्या अंतर है.
Evermusic Free (Blue Icon) बनाम Evermusic Pro (Red Icon)
Evermusic App Store पर दो different icons / colors के अंतर्गत published है:
- Evermusic Free (blue icon) different bundle IDs वाले दो separate App Store apps में split है — एक iOS / iPadOS के लिए और एक dedicated macOS के लिए (Universal binary जो Apple Silicon और Intel Macs दोनों पर runs करता है)। Premium in-app purchases iCloud के माध्यम से iOS और Mac blue apps के बीच shared हैं — iPhone पर Premium buy करें और यह automatically Mac पर activate हो जाता है (और vice versa), जब तक दोनों devices same Apple ID के साथ iCloud enabled हो।
- Evermusic Pro (red icon) एक single App Store app है जिसका एक single bundle ID है जो iPhone, iPad, और Apple Silicon Macs (M1 और later) पर runs करता है। इसमें Evermusic Free के same functionality है activated Premium plan के साथ। Red app Intel Macs support नहीं करता, इसलिए इसकी price blue app में equivalent Premium purchase से slightly lower है। Evermusic Pro किसी भी user diagnostics या analytics बिल्कुल collect नहीं करता — analytics build में completely disabled है, कोई opt-in option नहीं है।
क्योंकि bundle IDs blue और red के बीच differ करते हैं, blue app में activated Premium in-app purchase red app को free में unlock नहीं करती, और vice versa। अगर आप already blue app का Premium activated के साथ उपयोग करते हैं, तो red app install करने की कोई जरूरत नहीं — आपके पास already सब कुछ है जो Pro offer करता है।
iOS और Mac के बीच Purchases Share करना
Lifetime purchases और subscriptions iCloud का उपयोग करके iOS और Mac के बीच shared हैं। अगर आपके पास iOS पर already Premium है, तो सुनिश्चित करें कि आपके पास latest version installed है और iCloud enabled है। iOS पर app start करें और अपनी purchase information iCloud पर upload होने के लिए एक minute wait करें।
आप app settings में Restore Purchases भी tap कर सकते हैं। उसके बाद, App Store से अपने Mac पर latest app version install करें और app start करें। सुनिश्चित करें कि internet connection है और दोनों devices पर same iCloud और App Store account से signed in हैं। App को iCloud से purchase information download करने के लिए एक minute wait करें। Premium version आपके Mac पर automatically activate होना चाहिए।
New Device पर Purchases Restore करना
New device पर अपनी purchase restore करने के लिए, Purchases → Restore Purchases का उपयोग करें। आप अपनी purchases की list देखेंगे। अगर कुछ missing है, तो verify करें कि device उसी iTunes account से connected है जो purchases make करने के लिए use किया गया था और iCloud enabled है।
Premium Free में Try करें
आप इस menu का उपयोग करके limited time के लिए free में Premium version पर upgrade कर सकते हैं। Premium temporarily unlock करने के लिए एक short advertisement watch करें या app को friends के साथ share करें।
Purchases
इस menu से previous purchases restore करें। अगर activation errors encounter हों, तो Restore Purchases at App Launch option enable करने की कोशिश करें।
Software Update
Check करने के लिए Software Update tap करें कि Evermusic का newer version available है या नहीं। App आपके installed version को App Store पर latest version से compare करेगी और जानकारी देगी अगर update recommended है।
क्या नया है
यह menu new version release होने के बाद available होता है। यह most recent update में included changes और new features का summary show करता है।
Audio Player सेटिंग्स
सभी audio player settings यहां grouped हैं: equalizer, crossfade playback, audio player cache, song loading, और अधिक। Settings logical sub-sections में organized हैं।
सामान्य
इस sub-section में general playback queue, audio output, और state-saving settings हैं।
Repeat Mode
Track finish होने पर audio player के behavior को specify करता है:
- Repeat All – आपके player queue के सभी tracks को loops करता है।
- Repeat One – केवल current track repeat करता है।
- Repeat Stop – current track ends होने पर playback pause करता है।
- Repeat None – आपके queue को बिना repeat किए play through करने देता है।
Shuffle Mode
Tracks को randomized order में play करता है। यह actually queue shuffle करता है और tracks new order में one by one play होते हैं। Available values: Shuffle off और Shuffle on।
Audio Processor
Possible values: AVFoundation और CoreAudio। Default रूप से, AVFoundation use होता है। iOS 17.0–17.6 पर AVFoundation के साथ एक known issue के कारण, crossfade playback और audio equalizer एक साथ use नहीं किए जा सकते। उन iOS versions पर crossfade और equalizer दोनों enjoy करने के लिए, CoreAudio audio processor पर switch करें।
अगर AVFoundation का उपयोग करके gapless playback के साथ issues experience करते हैं, तो CoreAudio भी try करें। CoreAudio की केवल limitations हैं कुछ radio stations की internet streaming और certain audio formats, क्योंकि यह हर system audio format support नहीं करता (जैसे M4A और कुछ अन्य)।
Audio Output Sample Rate
8 KHz से 384 KHz तक audio output sample rate set करें। यह option केवल तब available है जब CoreAudio processor selected हो।
Audio Output Number of Channels
Audio output number of channels set करें — MONO या STEREO। यह option केवल तब available है जब CoreAudio processor selected हो।
Audio Pitch Algorithm
Pitch correction के लिए use किया जाने वाला algorithm choose करें। Available values हैं Time Domain, Spectral, और Varispeed। Useful अगर आप playback speed adjust करते हैं और resulting audio quality control करना चाहते हैं।
Spatial Audio
Spatial audio supported headphones और speaker arrangements पर एक more immersive audio experience create करने के लिए psychoacoustic methods use करता है। Possible values: Deactivated, Mono and Stereo, Multichannel, Mono Stereo Multichannel।
Audio Output Mode
iOS पर only available। आपको mixed mode enable करने देता है ताकि इस application से audio अन्य applications के साथ blend हो। Mixed mode use करने के instructions यहां find कर सकते हैं।
Save Playback Position
Ensure करता है कि application आपकी music library के songs के लिए playback position save और restore करती है।
Save Audio Player State
Application close करने से पहले audio player state save करता है, जिससे जहां छोड़ा था वहां से resume करना easy हो जाता है।
एक बार ये दोनों features enable हो जाएं, कोई भी folder, album, artist, या genre खोलें। आप screen के top पर एक Continue Playback action, साथ ही last saved song और playback position देखेंगे। Restore करने के लिए Continue Playback tap करें। Individual file के लिए playback resume करने के लिए, simply उस file पर tap करें।
व्यक्तिगतकरण
Audio player screen का look customize करें, choose करें कि player, lock screen, और status bar पर कौन से controls visible हैं, और skip-time buttons configure करें।
Audio Player Screen Style
Audio player पर toolbars और main controls की positioning configure करें।
Album Covers Scrolling Style
Audio player screen पर album covers के लिए scrolling style choose करें।
Additional Elements
Audio player screen पर extra elements enable करें। Audio Format Info artwork के ऊपर now-playing track की technical info display करता है; Audio Volume Slider playback controls के नीचे audio output slider show करता है।
Main Screen Actions
Choose करें कि main audio player screen पर कौन से buttons visible हों। Available options में Repeat और Shuffle Mode, Next और Previous Song, Skip Time, Sleep Timer, Google Chromecast, AirPlay और Bluetooth, Audio Equalizer, Search, Bookmarks, Speed, Add Bookmark, Add to Favorites, Comments, और अधिक शामिल हैं।
Playback Controls on the Lock Screen
Choose करें कि lock screen पर कौन से extra controls enabled हों। Possible values: Skip Time, Add Bookmark, और Add to Favorites।
Skip Time Intervals
Forward और backward Skip Time buttons द्वारा use किए जाने वाले time intervals select करें।
File Loading
Songs stream करने के लिए use किया जाने वाला network type choose करें। Available options: Wi-Fi और Wi-Fi & Cellular Data।
Preloading Time
Buffering time interval set करें। अगर poor network connection है तो इस value को increase करें।
Use Direct URL
Enable होने पर, अगर server support करता है तो song load करने के लिए direct URL use होता है। यह song loading speed up कर सकता है लेकिन playback stability को slightly affect कर सकता है।
Optimize File Loading
Enable होने पर, system AVFoundation audio processor के लिए song loading optimize करता है, जो playback stability improve कर सकता है। App यहां described technology use करती है।
Audio Equalizer
Audio equalizer configure करें। Presets और EQ configurations के बारे में अधिक यहां पढ़ सकते हैं।
उपलब्ध उपकरण
AirPlay या Google Chromecast device से connect करें (iOS only)।
Playback Speed
Audio player playback speed adjust करें। More precise control के लिए, top right corner में configuration icon tap करके precise slider enable करें।
Crossfade Playback
Crossfade songs को एक continuous mix में seamlessly flow करने देता है — next song current one finish होने से कुछ seconds पहले play शुरू हो जाता है। Crossfade AirPlay और Google Chromecast के लिए available नहीं है। इस screen पर, choose करें कि current और next song कितने समय simultaneously play करें। अगर crossfade और audio equalizer एक साथ issues experience करते हैं, तो ऊपर described अनुसार audio processor switch करें।
Gapless Playback
Gapless playback ensure करता है कि songs बिना किसी interruption या silence के play करें। यह classical music, live recordings, और concept albums के लिए perfect है। अगर gapless playback के साथ issues हैं, तो ऊपर described अनुसार audio processor switch करें।
Playback Cache
Audio player queue के songs smooth playback के लिए automatically download होते हैं। अगर audio files manually download करते हैं, तो duplicates avoid करने के लिए यह option disable कर सकते हैं। आप यहां audio player cache size भी configure कर सकते हैं। Offline mode और playback cache के बारे में अधिक यहां पढ़ें: Evermusic & Flacbox में Offline Music Play करें: Cloud से Local Files पर Download & Sync.
Sleep Timer
Specified timeout के बाद playback stop करने के लिए timer enable करें। More precise control के लिए, top right corner में configuration icon tap करके precise mode enable करें।
Library
Music library settings — automatic sync, metadata reading, album cover loading, playlists, recents, और favorites — यहां हैं।
Metadata Reading
जब library में tracks add करते हैं, तो metadata reader उन्हें background में process करता है और Artist, Album, Genre, और Composer के अनुसार organize करता है। आप adjust कर सकते हैं कि data faster load करने के लिए metadata कितनी quickly read होती है (अधिक battery की cost पर)। आप metadata reader entirely disable भी कर सकते हैं और tag information के बजाय file names show कर सकते हैं।
Metadata reader केवल music library database update करता है; यह आपके cloud account या local storage में stored files alter नहीं करता। अगर audio file metadata edit करनी है, तो options menu में corresponding action के माध्यम से built-in tags editor use करें।
जब Metadata Reading in the Background on है, reader background mode में काम करना continue रखता है। अगर app playback के दौरान बहुत अधिक energy use करती है, तो iOS उसे suspend कर सकता है।
अगर large music collection है, तो application के desktop version पर metadata synchronization perform करना advisable है। आप फिर Backup & Restore feature का उपयोग करके synchronized music library iOS पर transfer कर सकते हैं।
जब Normalize Metadata Encoding enabled है, app automatically सभी songs के लिए metadata encoding normalize करती है। यह उन issues fix करता है जहां audio tag encoding broken है (उदाहरण के लिए Windows PC पर files editing के बाद) और track information में incorrect characters appear होने से prevent करता है।
Reload Metadata आपकी music library के हर file को missing metadata वाले के रूप में flag करता है, जो metadata reader को हर record refresh करने के लिए cause करता है।
Start Metadata Reading metadata reader manually trigger करता है। Progress action के नीचे show होती है।
Online Synchronization
Automatic online music sync connected cloud services के tracks को music library में automatically add करता है। इसे enable करने के लिए, music library settings open करें और sync folders select करें।
यह option enabled होने से, application selected folders scan करती है, supported audio files identify करती है, और उन्हें आपकी library में add करती है। Corresponding menu action के साथ synchronization start या stop करें।
Online sync केवल तब run होती है जब app foreground में हो, इसलिए large library synchronize करने में time लग सकता है। Process speed up करने के लिए, app open रखें, power source connect करें, और settings में Screen → Always Active enable करें।
Alternatively, app के desktop version पर online sync perform करें और Backup & Restore का उपयोग करके music library iOS पर transfer करें।
आप यह भी choose कर सकते हैं कि online sync कितनी बार run हो। Interval Immediately पर set करने से हर बार application open करने पर sync trigger होती है।
Offline Synchronization
Offline music synchronization configure करें।
Synchronized Offline Folders
जब आप cloud server पर online folder को available offline mark करते हैं (More Actions menu का उपयोग करके), यह यहां appear होता है। Folder content Local Files → Offline Folders पर download होता है। जब online folder changes हो (files added, removed, या updated), app changes check करती है और आपके device पर local copy update करती है।
इस screen पर आप manually offline folder synchronization start कर सकते हैं, offline folder को उसके enclosing folder में reveal कर सकते हैं, और folder के लिए offline mode disable कर सकते हैं। Offline mode disable करने से आपके device से files के सभी local copies remove हो जाती हैं।
Time Interval
Choose करें कि app कितनी बार modifications के लिए offline folders check करे।
Start Local Folders Scanning
Application Documents directory में सभी local folders को supported audio files के लिए scan करें। Found files automatically music library में add होती हैं। आपके device पर लेकिन application Documents directory के बाहर located files को manually music library में add करना होगा, क्योंकि iOS/macOS security restrictions के कारण app उन्हें access नहीं कर सकती।
Important: अपनी music library को अपनी local files के साथ updated रखने के लिए periodically offline music synchronization initiate करना advisable है।
व्यक्तिगतकरण
Music library screen style configure करें। तीन options available हैं: Plain menu, Grouped menu, और Tabbed menu। आप album details screen में album covers enable या disable भी कर सकते हैं।
Album Covers
Choose करें कि application album artwork कैसे load और store करती है।
- Network type — cover downloads के लिए Wi-Fi या Wi-Fi & Cellular Data pick करें।
- Load Album Covers for Online Files — enabled होने पर, cloud storage में stored files के लिए embedded album covers load होते हैं। यह additional network data use कर सकता है।
- Search in the Folder — enabled होने पर, अगर track में embedded cover नहीं है, तो app same folder में JPEG या PNG images देखती है और उन्हें album artwork के रूप में use करती है।
- Cover Quality — अपने device पर stored album covers की quality select करें।
- Show in Folder — वह folder open करें जहां album covers cached हैं ताकि आप उन्हें manage या backup कर सकें।
- Delete All — storage free करने और app को on demand reload करने के लिए cached album covers delete करें।
प्लेलिस्ट्स
Same song को playlist में दो बार add करने का option enable करें। Default रूप से, यह option disabled है।
हाल के
अपनी recently played songs list manage करें।
- Delete List — recently played songs की पूरी list delete करें।
- Change List Size — list में appear होने वाले items की number set करें।
- Export Songs List — अपनी recently played songs list को M3U, CSV, या TXT के रूप में export करें। Detailed instructions यहां available हैं।
पसंदीदा
अपने favorite songs की list manage करें।
- Simultaneous Editing — enabled होने पर, song को favorites में add करने से यह music library और files section दोनों में simultaneously add होता है।
- Delete List — favorite songs की पूरी list delete करें।
- Export Songs List — Recents की तरह, favorites को M3U, CSV, या TXT के रूप में export करें।
Delete Music Library
Music library database erase करें। आपकी storage पर music files untouched रहती हैं।
Passcode
अगर आप अपना application data protect करना चाहते हैं तो password protection screen activate करता है।
File Manager
File Manager section control करता है कि files कैसे transfer, store, और preview होती हैं।
File Transfers
अपने device पर files download करने के लिए अपनी network preference choose करें।
Maximum Number of Parallel Tasks
Parallel download threads की number set करें। Higher number downloads speed up करता है लेकिन अधिक battery require करता है।
File Transfer Tasks
Currently active upload और download tasks display करता है।
Background Transfers
App background में होने पर downloads allow करें। अगर background transfers बहुत अधिक energy consume करती हैं, तो iOS app suspend कर सकता है।
Save Downloaded Files To
Default downloads directory choose करें, या app को हर बार prompt करें।
Synchronized Offline Folders
Selected folders के लिए offline sync manage करें। Offline sync enable करने के लिए, folder के बगल में three-dots button tap करें और Available Offline Mode select करें। Cloud folder में add की गई new files automatically आपके device पर download होती हैं। Offline modes के बारे में अधिक यहां पढ़ें।
Time Interval
Choose करें कि offline folders कितनी बार synchronized हों। Immediately हर बार app open करने पर sync trigger करता है।
Show Full Filenames
File manager में extensions सहित complete filenames show करें।
Edit Online Files
Connected cloud services के लिए online file editing disable करके read-only mode पर switch करें और accidental deletions prevent करें। यह action user interface से file editing operations remove करता है।
Copy Files When Opening
Specify करें कि app other applications से imported files handle कैसे करती है।
Thumbnails for Files
Storage space free करने के लिए generated file thumbnails manage और delete करें।
Delete Temporary Files
Storage space reclaim करने के लिए application cache folder clear करें।
Audio Tags Editor
Built-in audio tags editor configure करें।
Album Cover Scaling
Choose करें कि album cover audio tags में save होने पर कौन सा scaling method use होता है।
Update Online Files
Enable होने पर, application online file की editing finish करने के बाद cloud server पर उसकी metadata automatically update करती है।
Delete File After Editing Online
Choose करें कि cloud server पर online file की edit finish करने के बाद application downloaded copy delete करे या नहीं।
Main Screen Buttons
Choose करें कि audio tags editor के main screen पर कौन से buttons visible हों।
Widgets
App playback के दौरान widget data update करे इसके लिए widgets enable करें। Widget updates additional energy require करती हैं, इसलिए इसे केवल तभी enable करें अगर आप actually अपने Home Screen या Lock Screen पर widgets use करते हैं।
Evermusic widgets के बारे में अधिक Navigation guide में पढ़ सकते हैं।
CarPlay
यहां CarPlay settings change करें। यह menu CarPlay interface के अंदर भी available है ताकि आप driving के दौरान experience adjust कर सकें।
Sort
सभी CarPlay screens के लिए sort options configure करें।
Content Loading Limit
Choose करें कि app CarPlay screen पर pagination use करती है या नहीं। Pagination limited memory और large libraries वाले devices पर menus responsive रखती है।
Menu Icons Gradient Color
CarPlay home screen के लिए color scheme select करें।
Show Images
Large libraries पर loading speed optimize करने और memory usage reduce करने के लिए CarPlay screen पर images disable करें।
Pause Playback When Connected
अपने device को CarPlay से connect करने पर sudden loud audio avoid करने के लिए इसे enable करें।
Wi-Fi Drive
Desktop web browser का उपयोग करके computer से अपने device पर files transfer करने के लिए Wi-Fi Drive activate करें। Wi-Fi Drive use करने के बारे में detailed instructions यहां available हैं।
व्यक्तिगतकरण
User interface को अपनी preferences के अनुसार customize करें।
Application Icon
अपने Home Screen के लिए alternate application icon choose करें।
Color Scheme
User interface theme pick करें और dark mode enable करें। Default select होने पर, application device-wide appearance settings follow करती है।
Background Style
Application का background style modify करें। Currently केवल option है Blurred Album Cover, जो currently playing track की artwork को blurred app background के रूप में use करती है।
Appearance of Items in the List
Lists में items कैसे displayed होते हैं tune करें। Small screens पर useful — आप app को content के आधार पर automatically row height adjust करने दे सकते हैं, या list cells में smaller icons show कर सकते हैं ताकि text को अधिक space मिले।
Content Loading Limit
Default रूप से application content loading speed up करने के लिए pagination use करती है। आप सब कुछ एक साथ load करने के लिए pagination disable कर सकते हैं।
Local Files Screen Style
Local Files section का presentation style change करें।
Music Library Screen Style
Music Library screen का look customize करें।
Audio Player Screen Style
Audio Player screen का look configure करें।
Context Menu Style
More Actions button tap करने पर show होने वाले context menu का style choose करें।
Window
Mac और Catalyst पर available। Default size और launch behavior जैसी window-related preferences configure करें।
Screen
Choose करें कि application use करते समय screen active रहनी चाहिए या नहीं। Large libraries scan करते समय या prolonged tag-editing work करते समय useful।
Accessibility
User interface में सभी images hide करने के लिए Text Mode activate करें। Text Mode automatically तब enabled होता है जब VoiceOver active हो और very small या text-only setups के लिए भी useful है।
Language
Application language change करें और system default override करें। Currently app निम्नलिखित localizations support करती है: Afrikaans, Akan, Albanian, Amharic, Arabic, Armenian, Assamese, Aymara, Azerbaijani, Bambara, Bangla, Basque, Belarusian, Bosnian, Bulgarian, Burmese, Catalan, Cebuano, Chinese Simplified, Chinese Traditional, Corsican, Croatian, Czech, Danish, Dhivehi, Dogri, Dutch, English, Esperanto, Estonian, Ewe, Filipino, Finnish, French, Galician, Ganda, Georgian, German, Greek, Guarani, Gujarati, Haitian Creole, Hausa, Hawaiian, Hebrew, Hindi, Hmong, Hungarian, Icelandic, Igbo, Iloko, Indonesian, Irish, Italian, Japanese, Javanese, Kannada, Kazakh, Khmer, Kinyarwanda, Korean, Krio, Kurdish, Kurdish Sorani, Kyrgyz, Lao, Latin, Latvian, Lingala, Lithuanian, Luxembourgish, Macedonian, Maithili, Malagasy, Malay, Malayalam, Maltese, Māori, Marathi, Mizo, Mongolian, Nepali, Northern Sotho, Norwegian Bokmål, Nyanja, Odia, Oromo, Pashto, Persian, Polish, Portuguese, Punjabi, Romanian, Russian, Samoan, Sanskrit, Scottish Gaelic, Serbian, Shona, Sindhi, Sinhala, Slovak, Slovenian, Somali, Southern Sotho, Spanish, Sundanese, Swahili, Swedish, Tajik, Tamil, Tatar, Telugu, Thai, Tsonga, Turkish, Turkmen, Ukrainian, Urdu, Uyghur, Uzbek, Vietnamese, Welsh, Xhosa, Yiddish, Yoruba, Zulu.
Backup & Restore
अपने सभी application data backup करें या उसे किसी अन्य device पर migrate करें। आप choose कर सकते हैं क्या include करना है:
- Database — आपकी सभी music library tracks और playlists। Offline tracks backup size manageable रखने के लिए include नहीं हैं।
- Album Covers — आपके सभी cached album covers।
- सेटिंग्स — आपकी सभी application settings।
Backup operation start करने के लिए Backup Application Data tap करें। Application data एक single file में written होता है जिसे आप बाद में new device पर या app reinstall करने के बाद application state restore करने के लिए use कर सकते हैं।
New device पर application data restore करने के लिए, connected cloud service या iCloud का उपयोग करके backup file को new device पर move करें और new device पर open करें।
हमारे पास यहां detailed step-by-step guide है: Evermusic में Devices के बीच Music Library Transfer कैसे करें: Step-by-Step Guide.
Help
App का effectively उपयोग करने पर assistance और guidance के लिए application guide open करें।
Frequently Asked Questions
FAQ section में common questions के answers find करें।
Send Feedback
Feedback है या assistance चाहिए? App से directly हमारी support team को अपना feedback send करें।
Share This App
Word spread करने में मदद करने के लिए application अपने friends के साथ share करें।
Discover More Apps
Everappz की अन्य apps explore करें।
Terms and Conditions
Application use करने के terms और conditions outline करता है। Application use करने से पहले कृपया इसे पढ़ें।
Privacy Policy
हमारी data handling practices समझने के लिए privacy policy page visit करें। Application use करने से पहले कृपया इसे पढ़ें।
Analytics and Data Collection
Check करें कि analytics और data collection के लिए कौन सी services enabled हैं और जो नहीं चाहते उन्हें deactivate करें।
Evermusic Free (blue icon) में, analytics और diagnostics default रूप से enabled हैं app improve करने में मदद करने के लिए — आप उन्हें यहां किसी भी समय turn off कर सकते हैं। Evermusic Pro (red icon) में कोई भी analytics या diagnostics नहीं हैं — section empty (या hidden) है क्योंकि कुछ भी collect नहीं होता, और कोई opt-in option नहीं है।
Legal Notices
Application में use की गई हर library के बारे में information, साथ ही app version number और build information contain करता है।