नेविगेशन
Evermusic एक intuitive user interface प्रदान करता है जो native Music app से closely मिलती-जुलती है। जो चीज़ इसे कई popular music apps से अलग करती है वह है इसका built-in file manager, जो users को audio files edit करने और उन्हें cloud storage से transfer करने की शक्ति देता है।
Evermusic की functionality दो distinct components में thoughtfully divided है: Music Library, “Music Library” और “Playlists” tabs के माध्यम से conveniently accessible, और Files section, “संपर्क” और “Local Files” tabs के अंतर्गत।
Sections
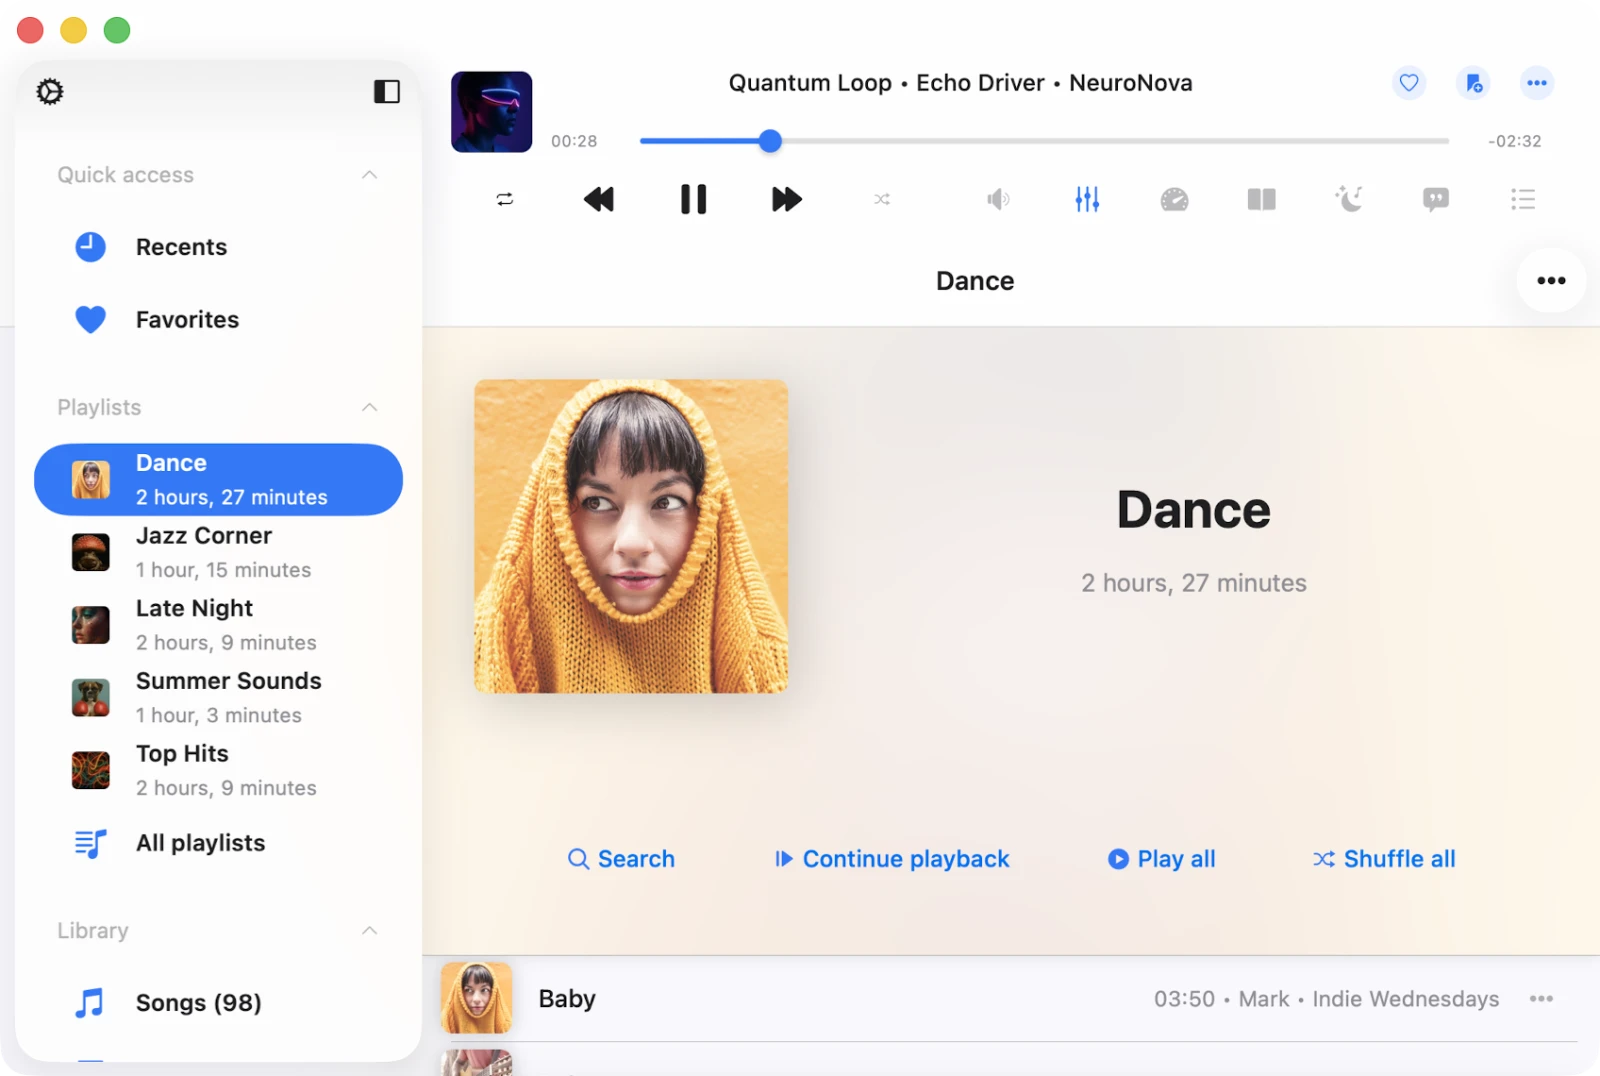
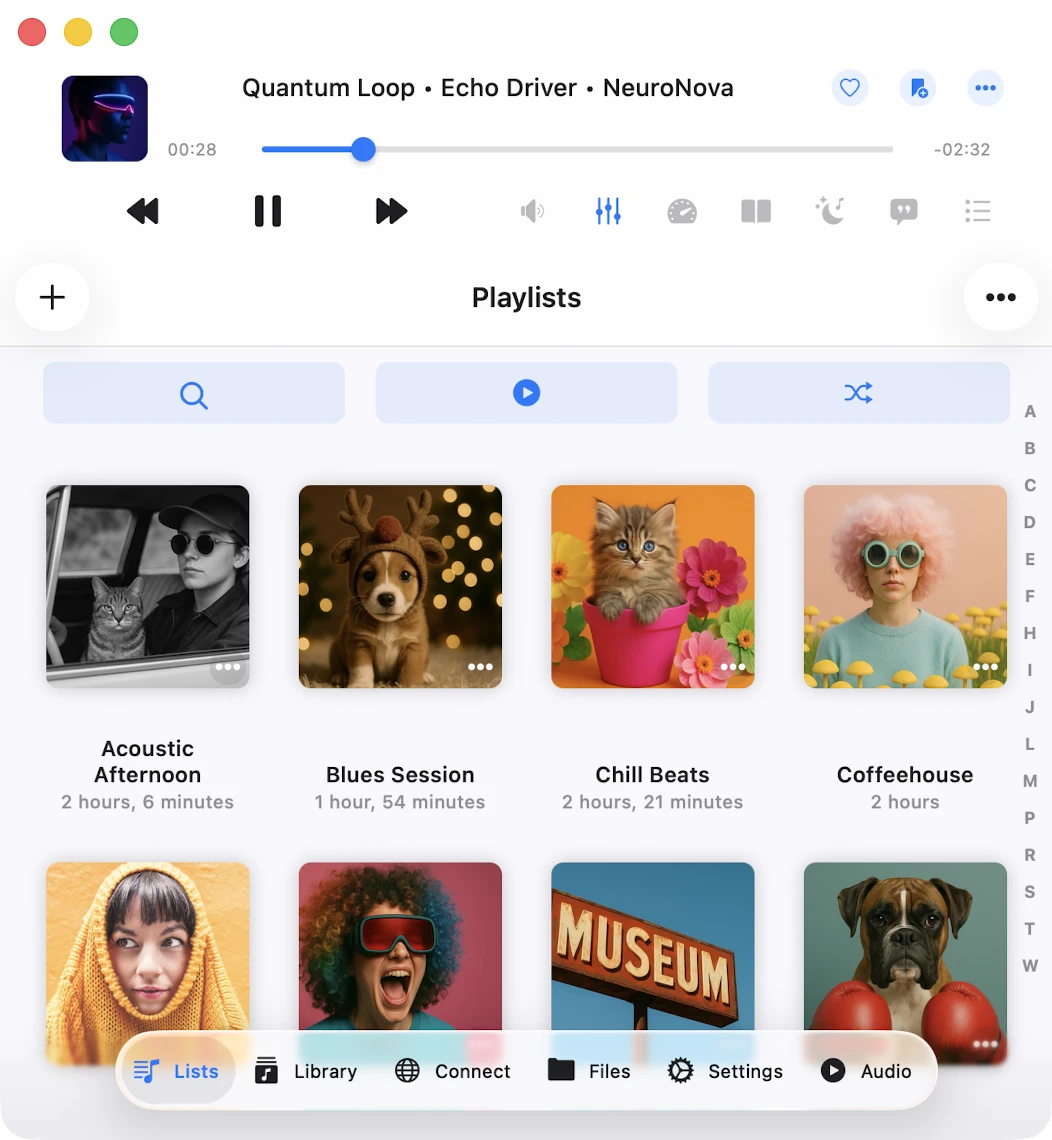
चाहे आप iPhone, iPad, या Mac पर compact mode में हों, सभी app features screen के bottom पर tab bar के माध्यम से easily accessible हैं। iPad और Mac users के लिए, same menu screen के left side पर मिल सकता है। यह thoughtful organization सभी app features को easily accessible sections में categorize करता है, एक user-friendly और efficient experience सुनिश्चित करते हुए।
संपर्क: आप इस screen पर Google Drive, MEGA, OneDrive, और Dropbox जैसी cloud storage services, साथ ही आपका computer और personal NAS effortlessly connect कर सकते हैं।
प्लेलिस्ट्स: अपनी सभी playlists यहां manage करें, जहां आप create, edit, remove, song orders change कर सकते हैं, offline mode enable कर सकते हैं, और player queue में songs add कर सकते हैं।
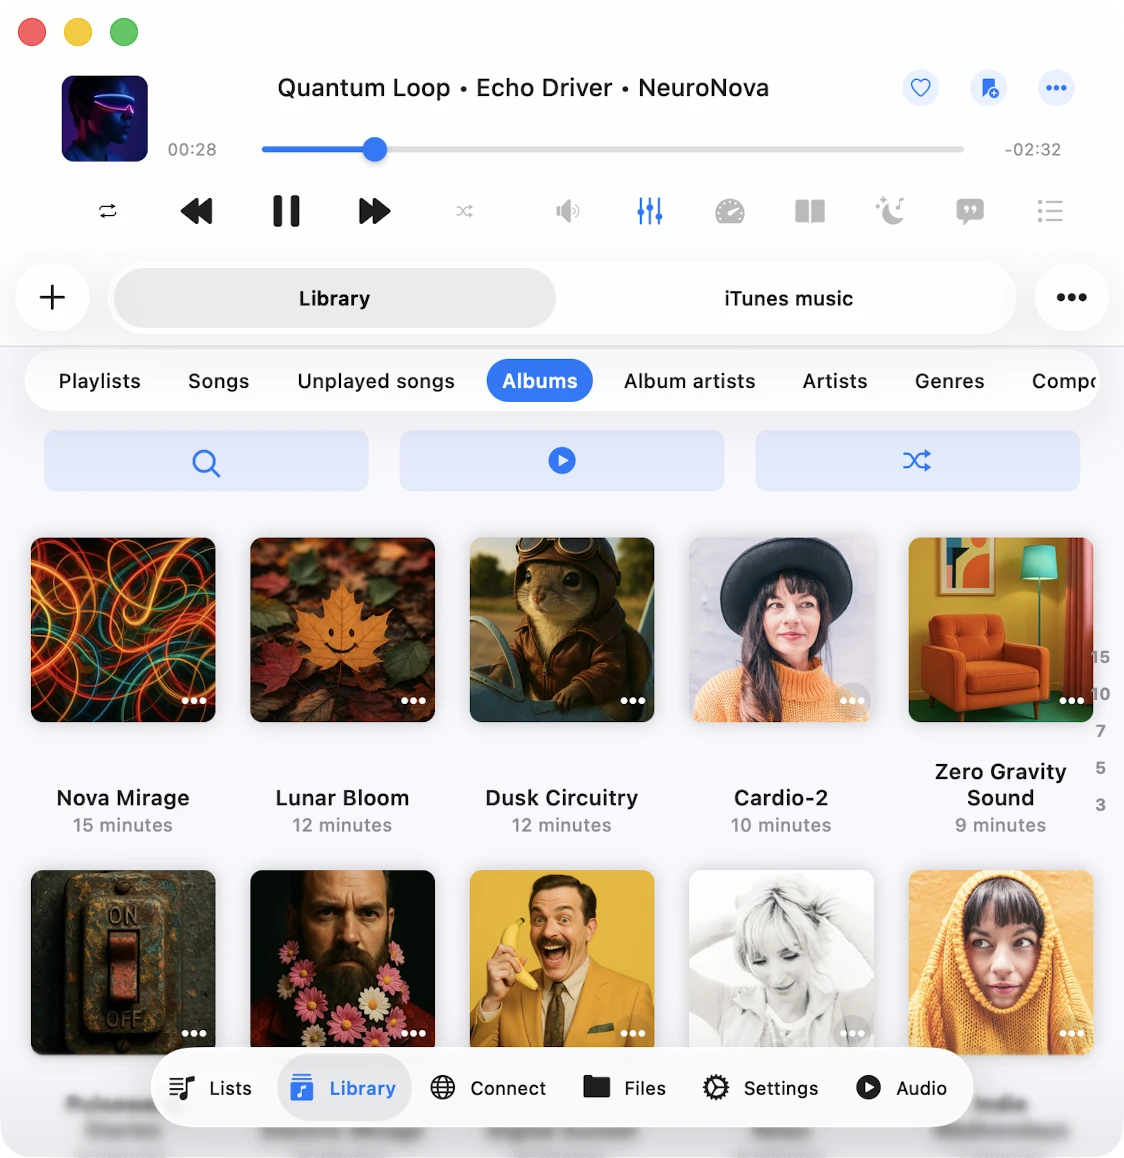
Library: यह section सभी available tracks को neatly display करता है, Artist, Genre, और Album के अनुसार grouped। आप अपनी music library में songs manually या automatically add कर सकते हैं, और इसमें iPod tracks और downloaded music शामिल हैं।
Local Files: अपनी downloaded files effortlessly locate करें और oversee करें, transfer queue पर control के साथ। आप इन local files को file management actions की range का उपयोग करके edit कर सकते हैं। Transfer queue access करने के लिए, ‘Local Files’ screen के top left corner में spinning arrows icon पर टैप करें।
Local files section दो categories में divided है: Files in this application, application के Documents directory के भीतर local files displaying करता है, और Files on this iPad/iPhone/Mac, device पर लेकिन application के Documents directory के बाहर located local files revealing करता है।
सेटिंग्स: Application settings modify करें, जिसमें crossfade playback, music library sync, player cache, album artwork cache, user interface, और localization जैसे popular options शामिल हैं।
Quick Access: अपने favorite और recently played tracks और files पर seamlessly navigate करें। Mac और iPad users के लिए, एक dedicated section available है, जबकि iPhone users उन्हें conveniently screen के top पर located ‘Local Files,’ ‘संपर्क,’ और ‘Music Library’ sections के भीतर find कर सकते हैं।
iPhone पर Mini Player
Full-screen player activate करने के लिए mini player icon टैप करें और इसे hide करने के लिए swipe-down gesture का उपयोग करें। iPad और Mac पर, mini player screen screen के top पर located है और main menu के माध्यम से full-screen player opening करने पर hidden किया जा सकता है।
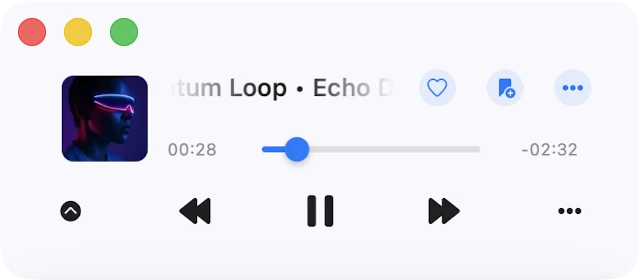
Mini Player Window (Mac Exclusive)
अपने Mac पर mini player window access करने के लिए, simply अपना cursor app window के bottom-right edge पर move करें और इसे smallest possible size पर resize करें। फिर, mini-player window activate करने के लिए collapse button (downward arrow के रूप में depicted) टैप करें। Mini player window को अन्य windows के ऊपर हमेशा रखने के लिए, अपने Mac के top menu bar पर navigate करें, ‘Window’ select करें, और फिर ‘Show Window Always On Top’ choose करें। यह feature audio lectures सुनने के लिए useful है बिना interruptions के।
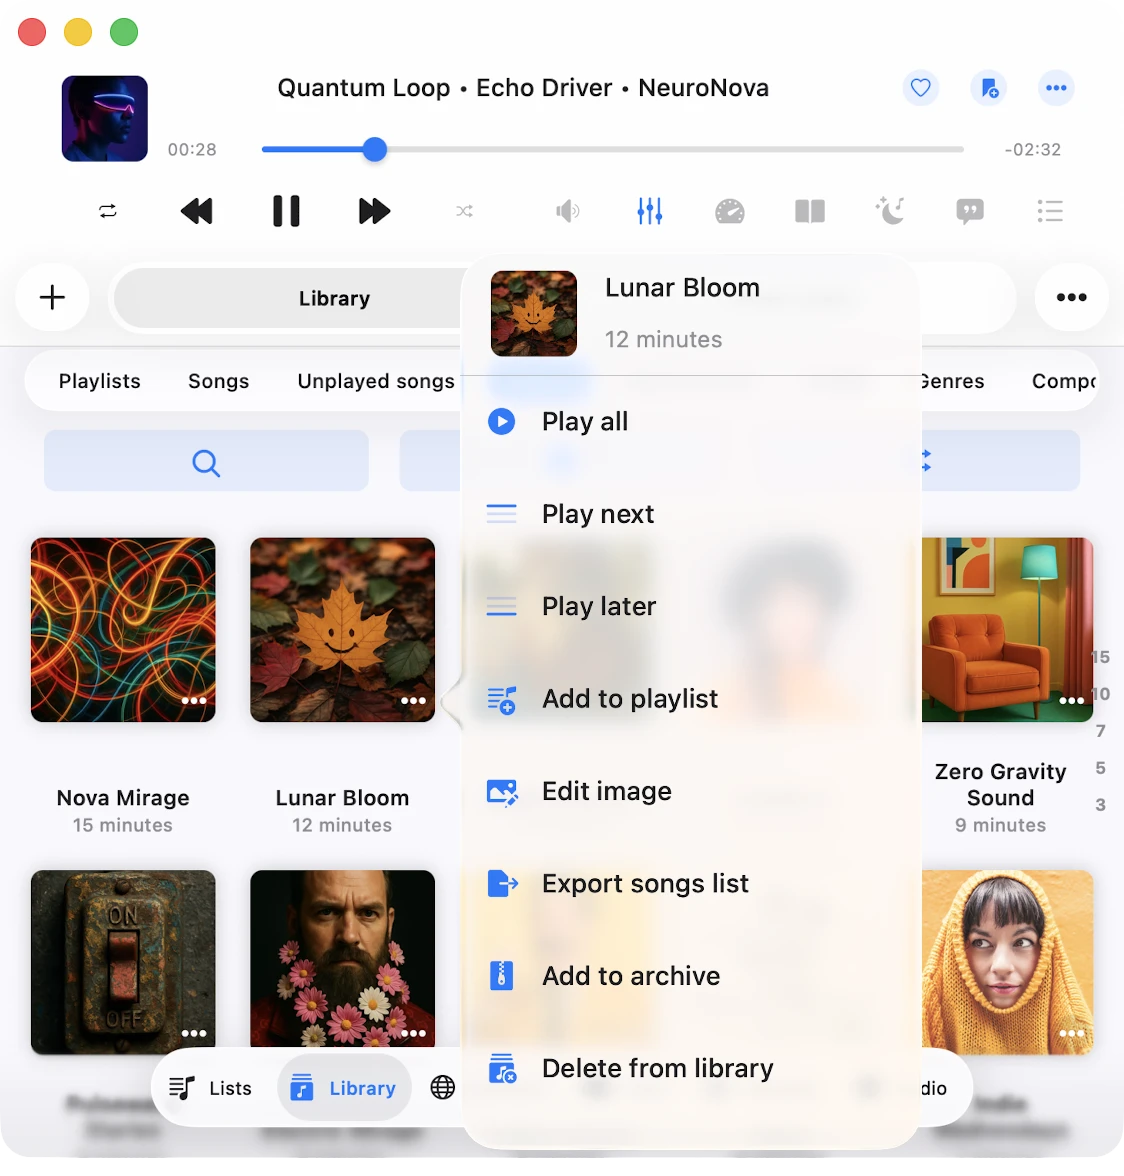
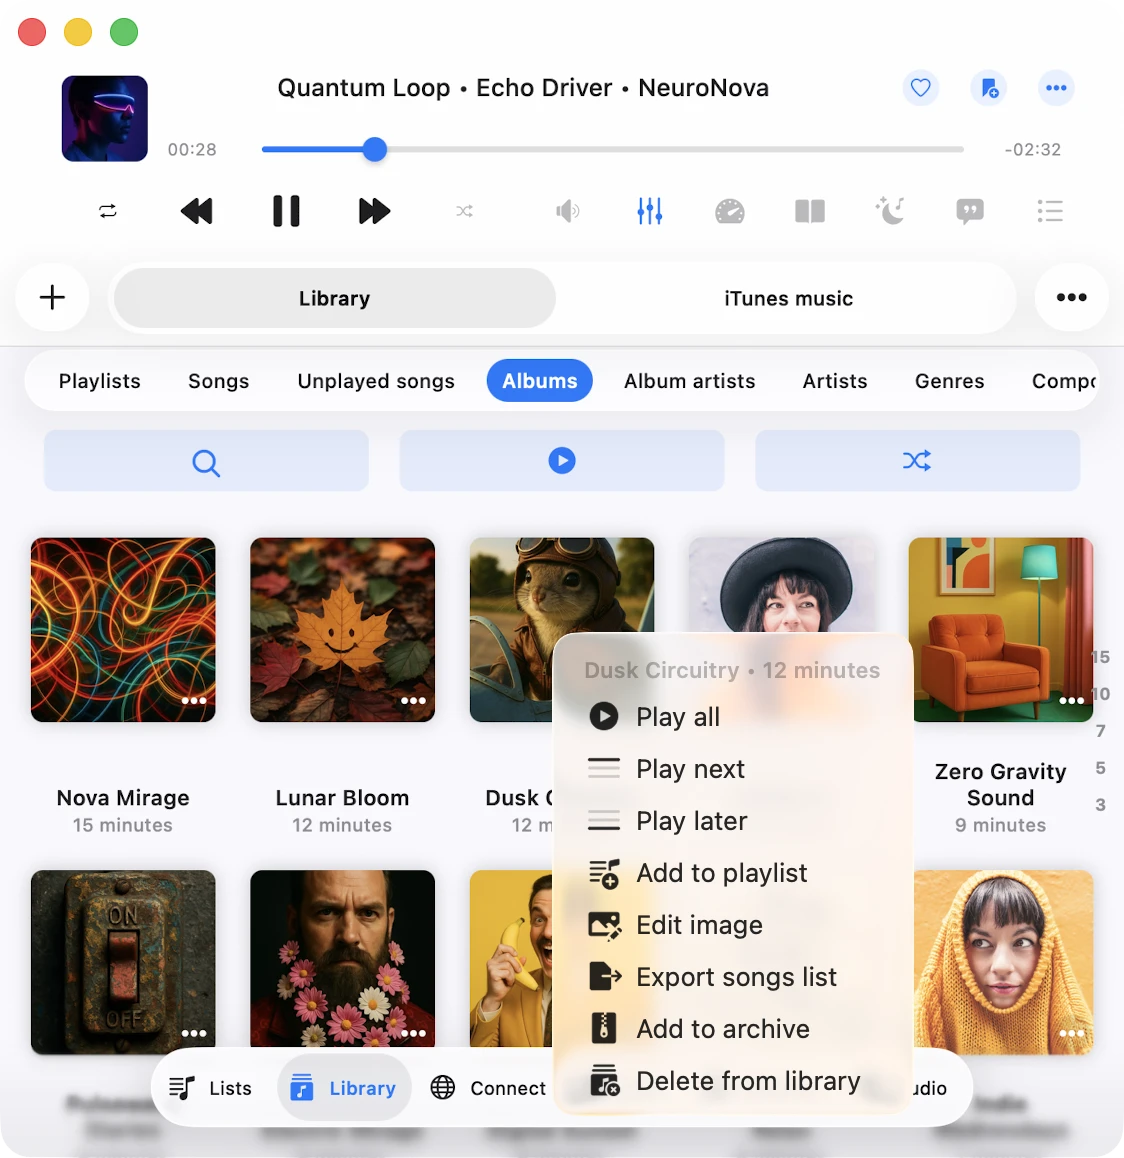
अधिक क्रियाएँ
Screen पर virtually every content item एक “अधिक क्रियाएँ” button feature करता है। सभी available actions access करने के लिए उस पर टैप करें।
Top Toolbar
Top toolbar, navigation bar के ठीक नीचे conveniently situated, कई useful actions तक quick access प्रदान करता है। आप इस toolbar को straightforward swipe-down gesture के साथ easily reveal या conceal कर सकते हैं। यहां actions की list है।
- खोजें: Current context के भीतर search begin करें।
- Continue Playback: Evermusic एक seamless ‘Continue Playback’ feature offer करता है, जिसे last saved position से current directory, album, artist, या playlist के लिए audio player के state को effortlessly restore करने के लिए designed किया गया है। यह functionality application settings में enabled होने पर available है।
- सभी चलाएं: Current page के सभी tracks को audio player queue में easily add करें, current sort order maintain करते हुए।
- सभी फेरबदल करें: Current page के सभी tracks को audio player queue में add करें, एक delightful listening experience के लिए adding से पहले उन्हें shuffle करते हुए।
Context menu
Context menu devices across seamless interaction के लिए additional options और actions तक quick access provide करता है।
iOS पर Context menu
Tap and Hold: Context menu reveal करने के लिए cells, mini player, या compact player पर tap and hold करें।
macOS पर Context menu
Right Mouse Click: Context menu show करने के लिए cells, mini player, या compact player पर right-click करें।
Accessibility
हमारा app VoiceOver technology के साथ fully accessible है, हर component में well-designed label और description सुनिश्चित करते हुए। VoiceOver active होने पर, app user interface को text mode में translate करती है, navigation speed और convenience improve करने के लिए केवल accessible और useful elements display करती है। आप सेटिंग्स > Accessibility > Text Mode में text mode भी activate कर सकते हैं।
VoiceOver के साथ sliders adjust करने के लिए
- Slider Select करें: VoiceOver तक slider announce होने तक left या right swipe करें।
- Value Adjust करें: Slider पर double-tap करें और hold करें, फिर value अधिक quickly adjust करने के लिए up या down drag करें। जैसे आप adjust करते हैं VoiceOver नया value announce करेगा।
VoiceOver के साथ playlist में track position adjust करने के लिए
- एक playlist open करें और “More” button टैप करें।
- “Change Songs Order” select करें। View editing mode पर switch हो जाएगी।
- Track title के पास reorder indicator icon टैप करें उसे focus देने के लिए।
- Reorder indicator icon quickly double-tap करें। Second tap पर, अपनी finger release न करें — hold करें जब तक आप एक sound न सुनें जो indicate करे कि cell move के लिए ready है।
- अब, आप cell को new position पर move कर सकते हैं।
अन्य components expected रूप से काम करते हैं, system-provided VoiceOver patterns का उपयोग करते हुए।
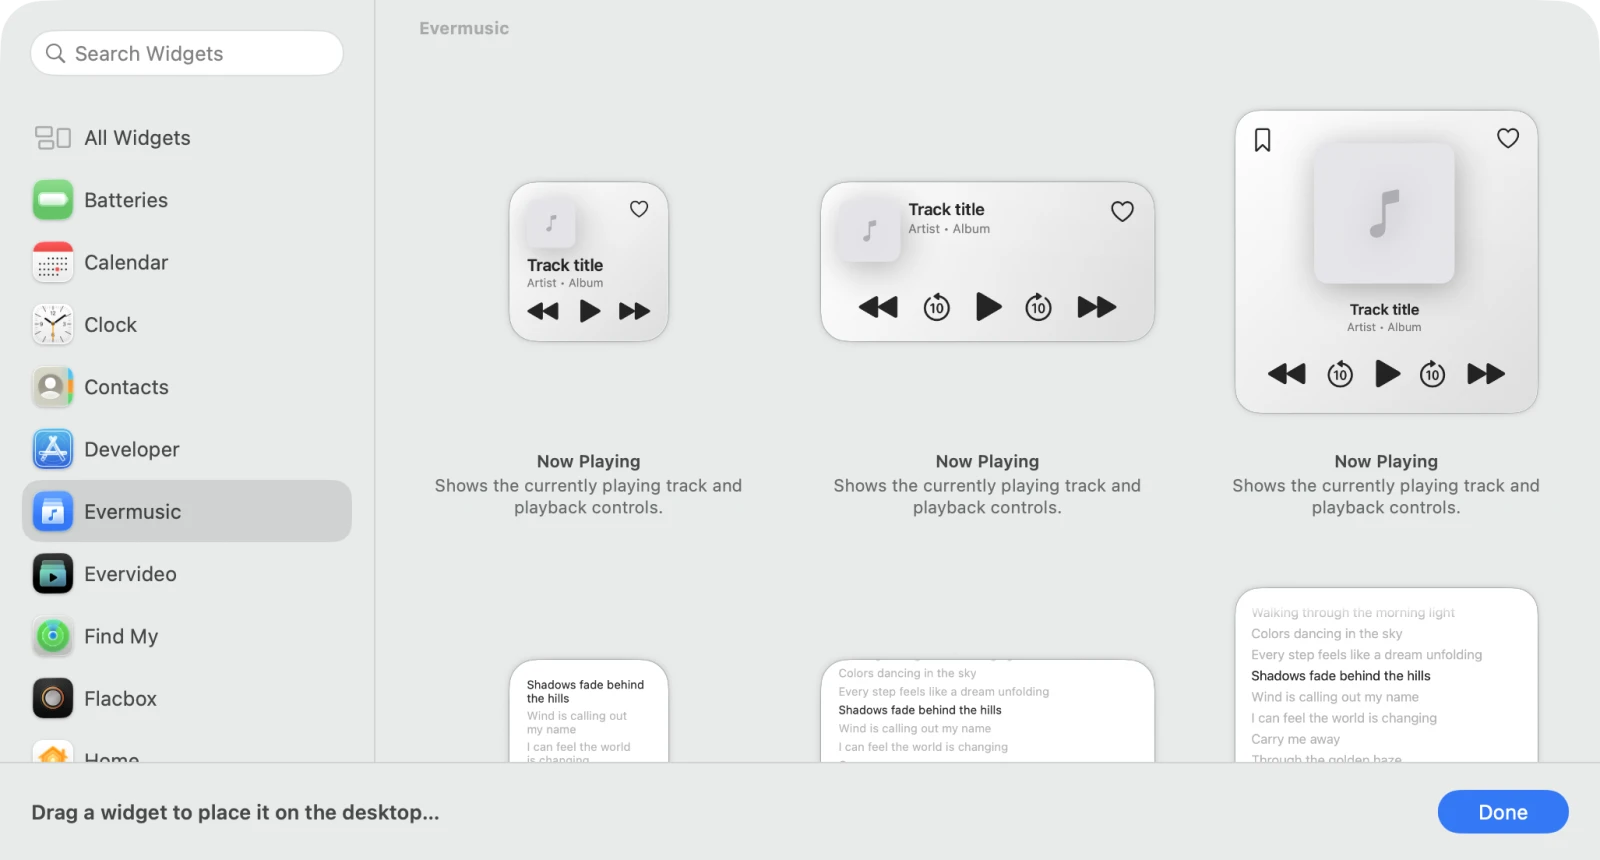
Widgets
Evermusic चार Home Screen / Lock Screen widgets के साथ आता है जो app के key parts को हर Apple platform पर surface करते हैं — playback देखने या control करने के लिए Evermusic open करने की जरूरत नहीं:
- Now Playing — current track artwork, title, artist, और live playback controls (play/pause, next, previous)। Queue advance होते ही real time में updates।
- पसंदीदा — आपके starred songs at a glance। Straight in the player open करने के लिए entry टैप करें।
- Lyrics — currently playing track के lyrics (embedded या LRC), larger sizes में line-by-line scrolling।
- Recently Played — सबसे recently play किए गए songs तक quick access, one-tap resume के साथ।
सभी चार widgets Small, Medium, और Large sizes में available हैं ताकि आप वह layout pick कर सकें जो आपकी screen पर fit हो।
iPhone पर widget add करें (Home Screen)
- Home Screen पर किसी empty area को touch और hold करें जब तक icons jiggling शुरू न हो जाएं।
- Top-left corner में + (Edit) button टैप करें, फिर Add Widget टैप करें।
- Evermusic (या Evermusic Pro) search करें और उसे टैप करें।
- Now Playing, Favorites, Lyrics, या Recently Played के बीच choose करने के लिए left/right swipe करें, फिर एक size pick करें (Small / Medium / Large)।
- Add Widget टैप करें, इसे जहां चाहें position करें, और Done टैप करें।
iPhone पर widget add करें (Lock Screen)
- Customize appear होने तक Lock Screen touch और hold करें, फिर Customize → Lock Screen टैप करें।
- Clock के नीचे widget area टैप करें और list से Evermusic pick करें।
- Widget choose करें और Done → Set as Wallpaper Pair (या Set as Current Wallpaper) टैप करें।
iPad पर widget add करें
iPad दोनों Today View widgets और Home Screen widgets support करता है:
- Icons jiggle होने तक Home Screen touch और hold करें।
- Top corner में + → Evermusic search करें → एक widget और size pick करें → Add Widget।
iPadOS 15+ पर आप multiple Evermusic widgets vertically stack भी कर सकते हैं ताकि same slot में Now Playing, Favorites, और Recently Played के बीच swipe कर सकें।
Mac पर widget add करें
- Desktop पर right-click करें (macOS Sonoma या newer) और Edit Widgets choose करें, या Notification Center open करें और bottom पर Edit Widgets click करें।
- Widget gallery में Evermusic search करें।
- Widget को अपने desktop या Notification Center पर drag करें, एक size pick करें, और Done click करें।
CarPlay dashboard पर Evermusic widgets add करें
iOS 17 से शुरू करते हुए, CarPlay compatible Lock Screen / Home Screen widgets को directly CarPlay dashboard पर support करता है (maps, calendar, और now-playing के साथ multi-tile screen)। Evermusic widgets वहां automatically show up होते हैं एक बार आपके iPhone पर install होने पर:
- अपने iPhone पर, Lock Screen layout में Evermusic widget add करें (Customize → Lock Screen → widget slot → Evermusic) जैसा ऊपर described है। Same widget instance CarPlay पर mirror होता है।
- अपने iPhone को USB या wireless CarPlay के माध्यम से अपनी car से connect करें।
- CarPlay screen पर, bottom-left corner में Dashboard icon (four-tile grid) टैप करें।
- Edit mode enter करने के लिए dashboard tiles में से किसी को tap और hold करें, फिर उस tile पर + टैप करें जिसे आप change करना चाहते हैं।
- Available CarPlay widgets की list से Evermusic pick करें और Now Playing, Favorites, Lyrics, या Recently Played choose करें।
- Done टैप करें — widget हर future CarPlay session के लिए dashboard पर pinned रहेगा।
CarPlay widget आपका music change होने पर live update होता है और large-fingertip friendly है ताकि आपको car screen पर look down नहीं करना पड़े जबकि driving।
Apple CarPlay
Evermusic में एक fully-featured Apple CarPlay interface (iOS only) है जो car display के लिए optimized है। एक बार आपका iPhone compatible CarPlay head unit से connected हो — USB या wirelessly — Evermusic CarPlay app grid में Apple Music और Spotify के साथ appear होता है, road पर आपकी cloud library stream करने के लिए ready।
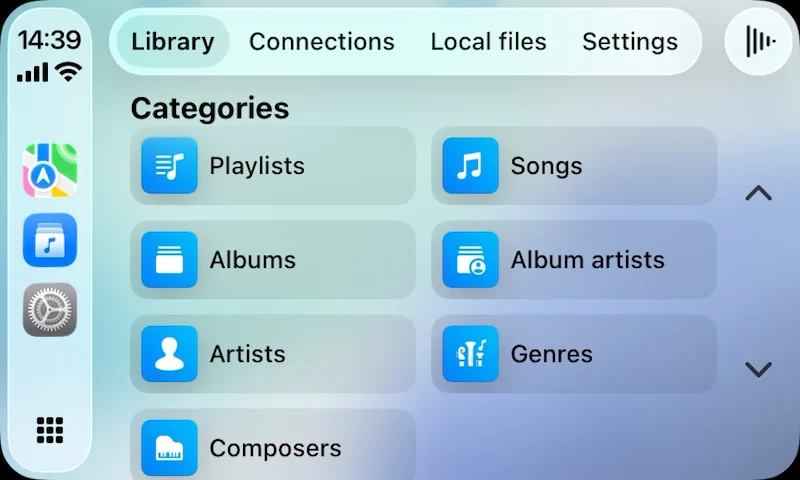
CarPlay में आपको क्या मिलता है
CarPlay UI आपकी library के most-used parts को एक layout में mirror करता है जिसे Apple ने car के लिए tune किया है। Main menu से आप browse कर सकते हैं:
- Library — Songs, Albums, Album Artists, Artists, Genres, Composers, Recently Played, Favorites.
- प्लेलिस्ट्स — हर playlist जो आपने created या imported की (offline-synced playlists सहित)।
- Local Files — app के Documents directory में folders और आपके Offline Folders।
- संपर्क — आपके connected cloud accounts ताकि आप parking में Google Drive, Dropbox, iCloud Drive, MEGA, Synology, या किसी अन्य source से directly एक song pick कर सकें।
हर track Evermusic के full audio engine के माध्यम से play होता है — 10-band equalizer, crossfade, gapless playback, spatial audio, और playback-speed control सहित — इसलिए car में जो music आप सुनते हैं वह आपके phone पर same sound करता है, बिना किसी extra setup के।
Now Playing template
Standard CarPlay Now Playing template आपको steering-wheel-friendly controls देता है जो हर driver expect करता है: large artwork, Play / Pause, Previous / Next, scrubber, और एक Up Next queue। आप सेटिंग्स → Audio Player → Personalization → Playback Controls on the Lock Screen में Lock Screen / CarPlay action set के लिए Add Bookmark और Add to Favorites भी enable कर सकते हैं ताकि आप road से अपनी eyes हटाए बिना tracks star कर सकें।
Safe-driving tips
CarPlay आपका attention road पर रखने के लिए designed है — और Evermusic same principles follow करता है। Safe रहने के लिए इन habits का उपयोग करें:
- घर पर playlists pre-build करें। Road पर dozens of albums browse करना distracting है। Advance में कुछ “drive” playlists बनाएं और हर पर Offline mode enable करें ताकि वे tunnels और rural areas में बिना cell signal के भी play करें।
- “Pause playback when connected” enable करें सेटिंग्स → CarPlay → Pause playback when connected में। यह CarPlay attach होते ही Evermusic को stop करता है ताकि आपको headphones-era levels से sudden volume blast न मिले।
- Voice control use करें। अपने steering wheel पर voice command button press करें या कहें “Hey Siri, play my Drive playlist in Evermusic” — Siri Intents support का मतलब है आप screen touch किए बिना playback start, tracks skip, और volume adjust कर सकते हैं।
- CarPlay dashboard पर Now Playing widget pin करें (ऊपर section देखें) ताकि pause या skip करने के लिए full app open न करना पड़े — अधिकांश actions dashboard से one tap पर हैं।
- Metadata reader speed lower करें। अगर आप large library के साथ cellular data पर हैं, तो सेटिंग्स → Music Library → Metadata Reading को Current Song पर set करें ताकि app background में हजारों cloud requests pull न करे जबकि आप drive करते हैं।
- CarPlay में images disable करें जब आपकी library बहुत बड़ी हो। सेटिंग्स → CarPlay → Show images → Off slower head units पर lists snappy रखता है और visual clutter कम करता है।
- Driving के दौरान Lyrics widget न पढ़ें। Red light पर या passenger के साथ safe है, लेकिन otherwise अपना attention road पर रखें और बजाय सुनें।
अगर drive के दौरान कुछ odd लगे, तो हमेशा safest fix है pull over करना और iPhone directly use करना — speed पर head unit के साथ fiddle न करें।