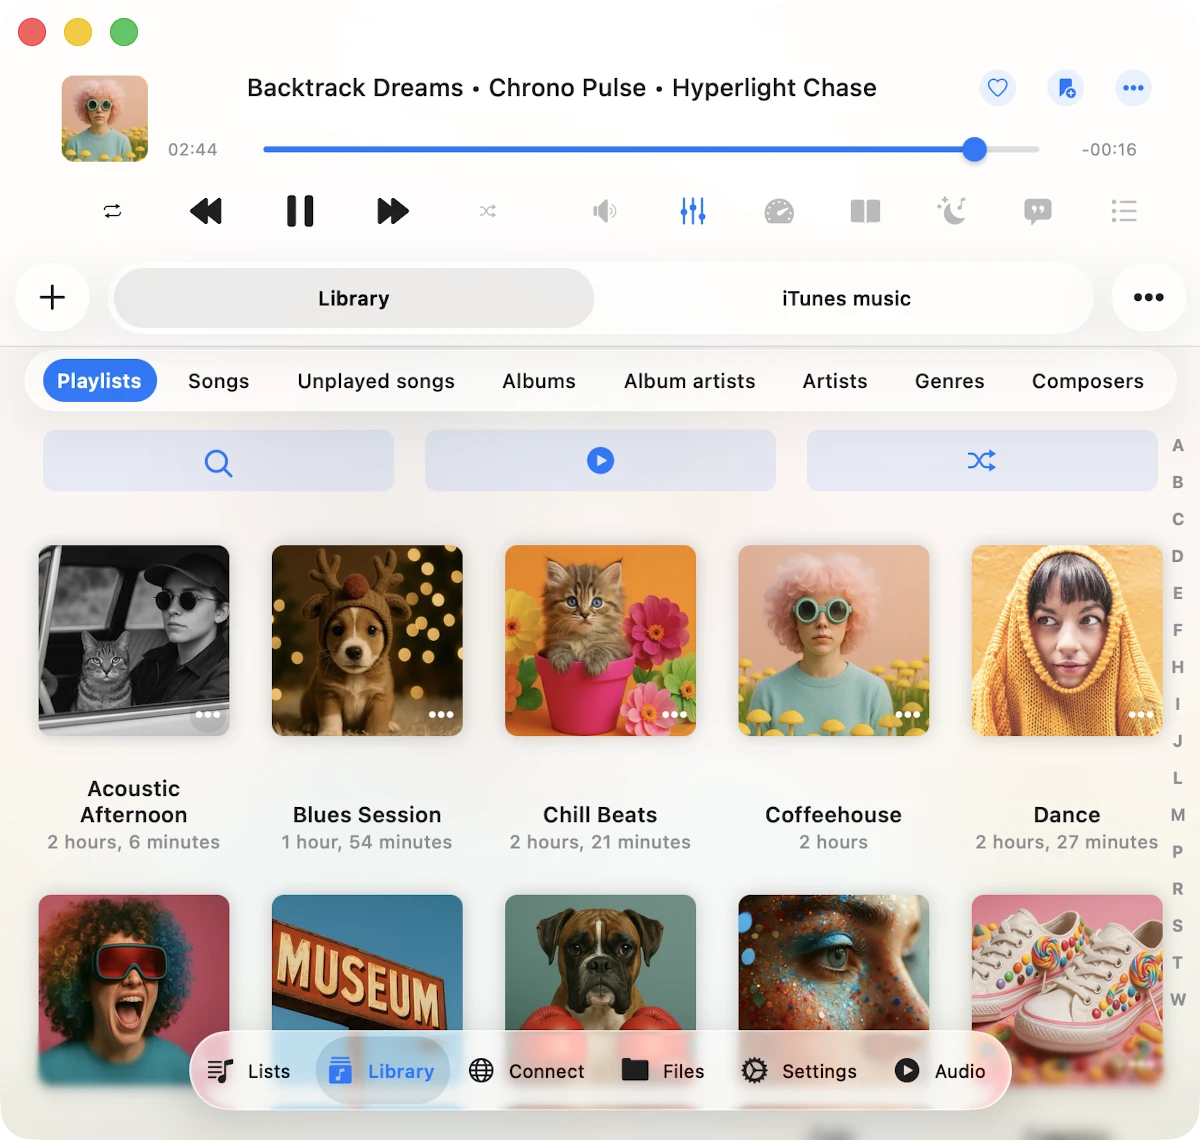
म्यूजिक लाइब्रेरी
Evermusic के साथ अपनी music library manage करना आसान है, जहां आप अपने सभी tracks को effortlessly organize कर सकते हैं। आपके पास अपनी music library build करने के दो options हैं: manual addition या automatic synchronization।
Manual Addition
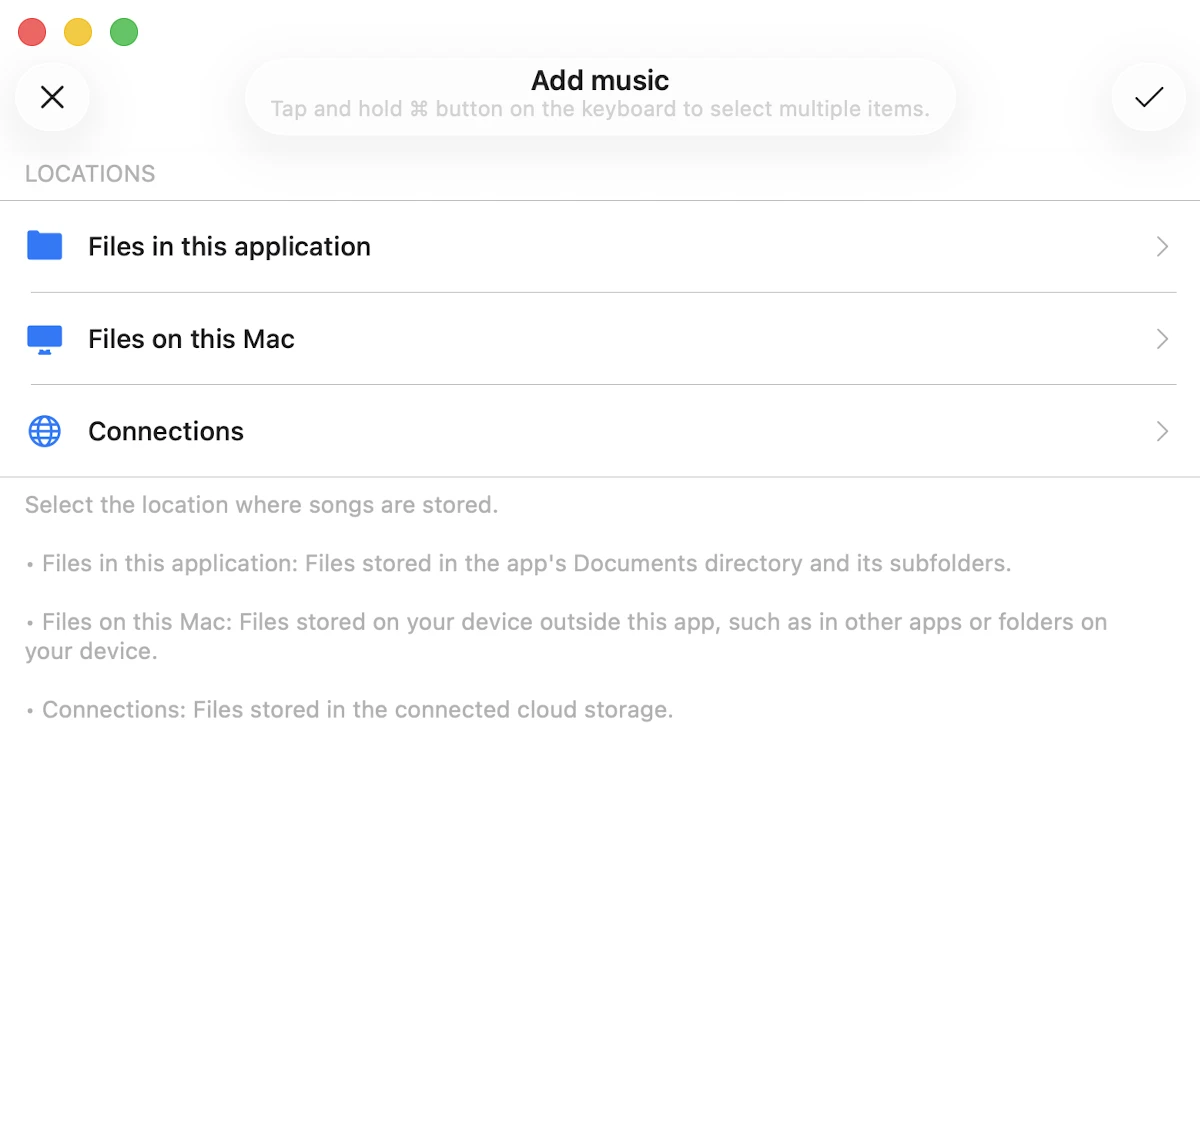
Tracks manually add करने के लिए, “Add music” menu item पर टैप करें और connected cloud storage service या आपके device पर located files से folders/files select करें। जब आप library में tracks add करते हैं, तो केवल उन tracks के links create होते हैं, actual files उनके original locations पर preserve होती हैं जो valuable disk space बचाता है। अगर आप tracks offline उपलब्ध करना चाहते हैं, तो आप options menu से download action का उपयोग कर सकते हैं या playlists और track collections के लिए offline mode enable कर सकते हैं।
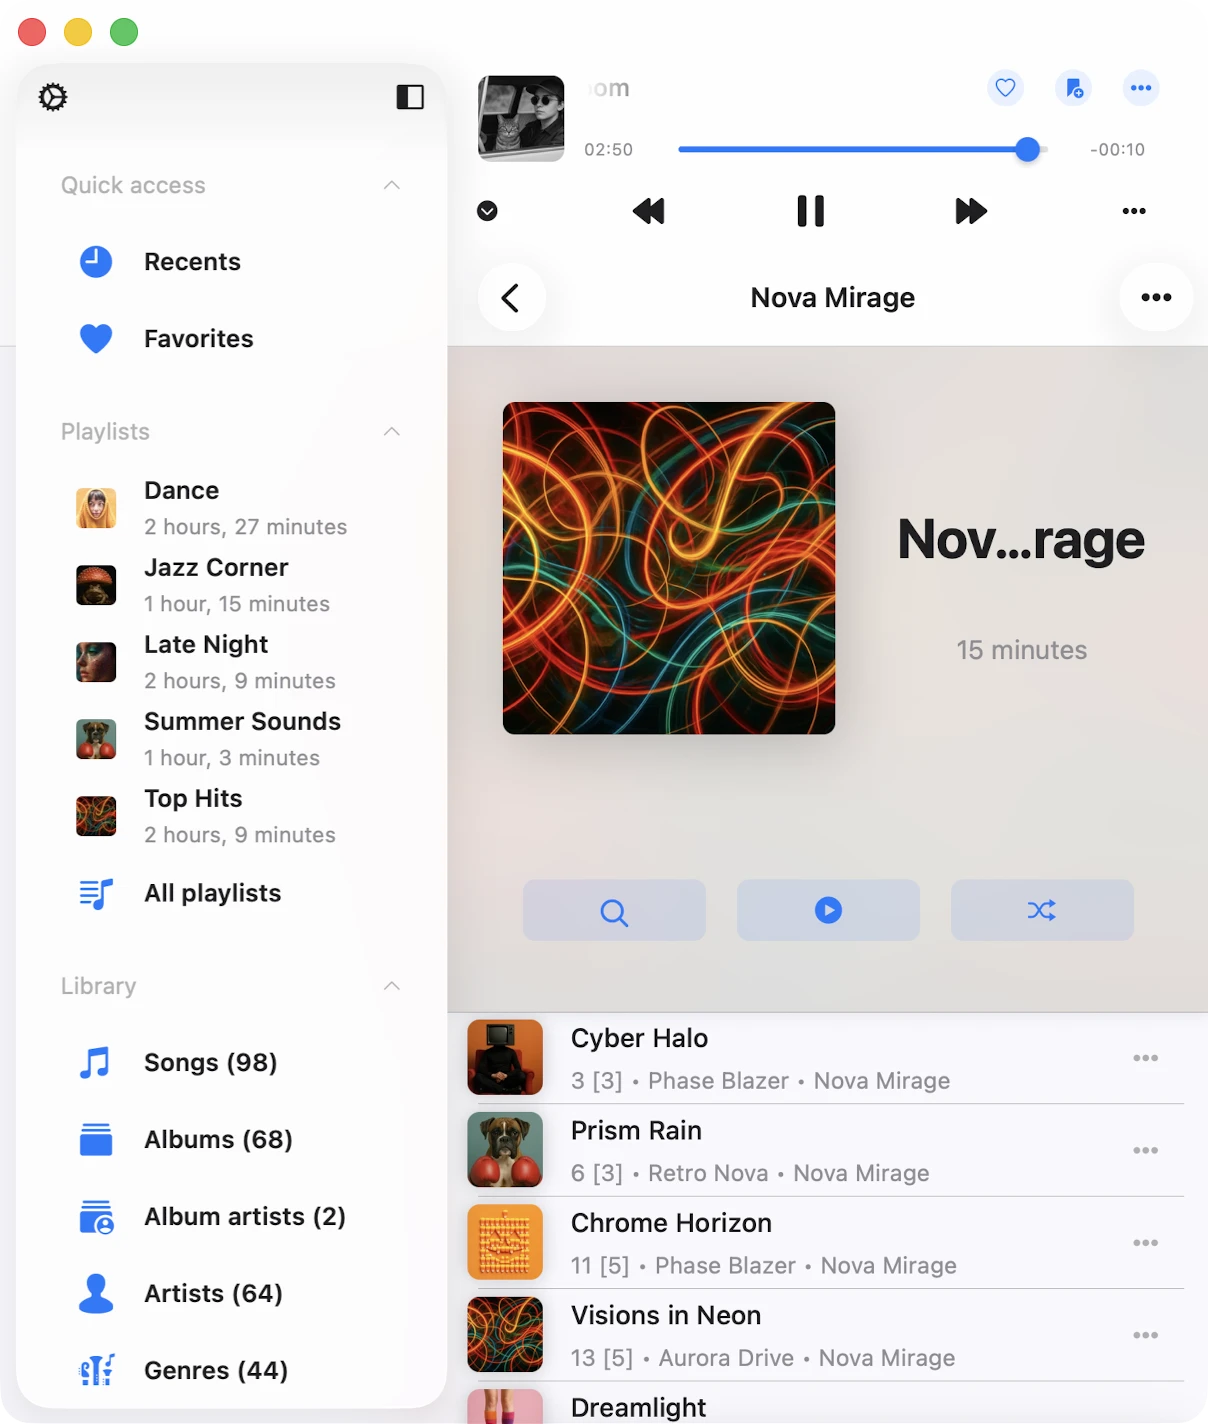
Quick Access
Music library menu के top पर, आपको एक quick access section मिलेगा जो आपके favorites, recents, और audio bookmarks तक convenient links provide करता है।
पसंदीदा
आप audio player screen पर या options menu का उपयोग करके songs को favorites के रूप में mark कर सकते हैं।
हाल के
यह section सभी recently played tracks display करता है।
बुकमार्क्स
आप song play होने के दौरान audio bookmarks create कर सकते हैं और उन्हें इस screen पर manage कर सकते हैं। Audio bookmarks के साथ काम करने के बारे में विस्तृत निर्देश यहां मिल सकते हैं।
Continue Playback
अगर यह feature application settings में enabled है तो last saved position से audio player queue restore करें।
Locations
आपकी library के सभी tracks source types और music tags द्वारा thoughtfully grouped हैं।
Online music
यह section आपकी cloud storage services से music showcase करता है।
इस application में Files
यहां आप offline playback के लिए available music find कर सकते हैं, आपकी local files से sourced। इसमें app के documents directory में files शामिल हैं।
इस iPhone/iPad/Mac पर Files
इस category में application में आपके device से ‘Open files…’ system dialog के माध्यम से added music include है।
iTunes music
यह section आपके device के iPod library में imported music show करता है। कृपया ध्यान दें कि Apple Music के tracks यहां available नहीं हैं।
Categories
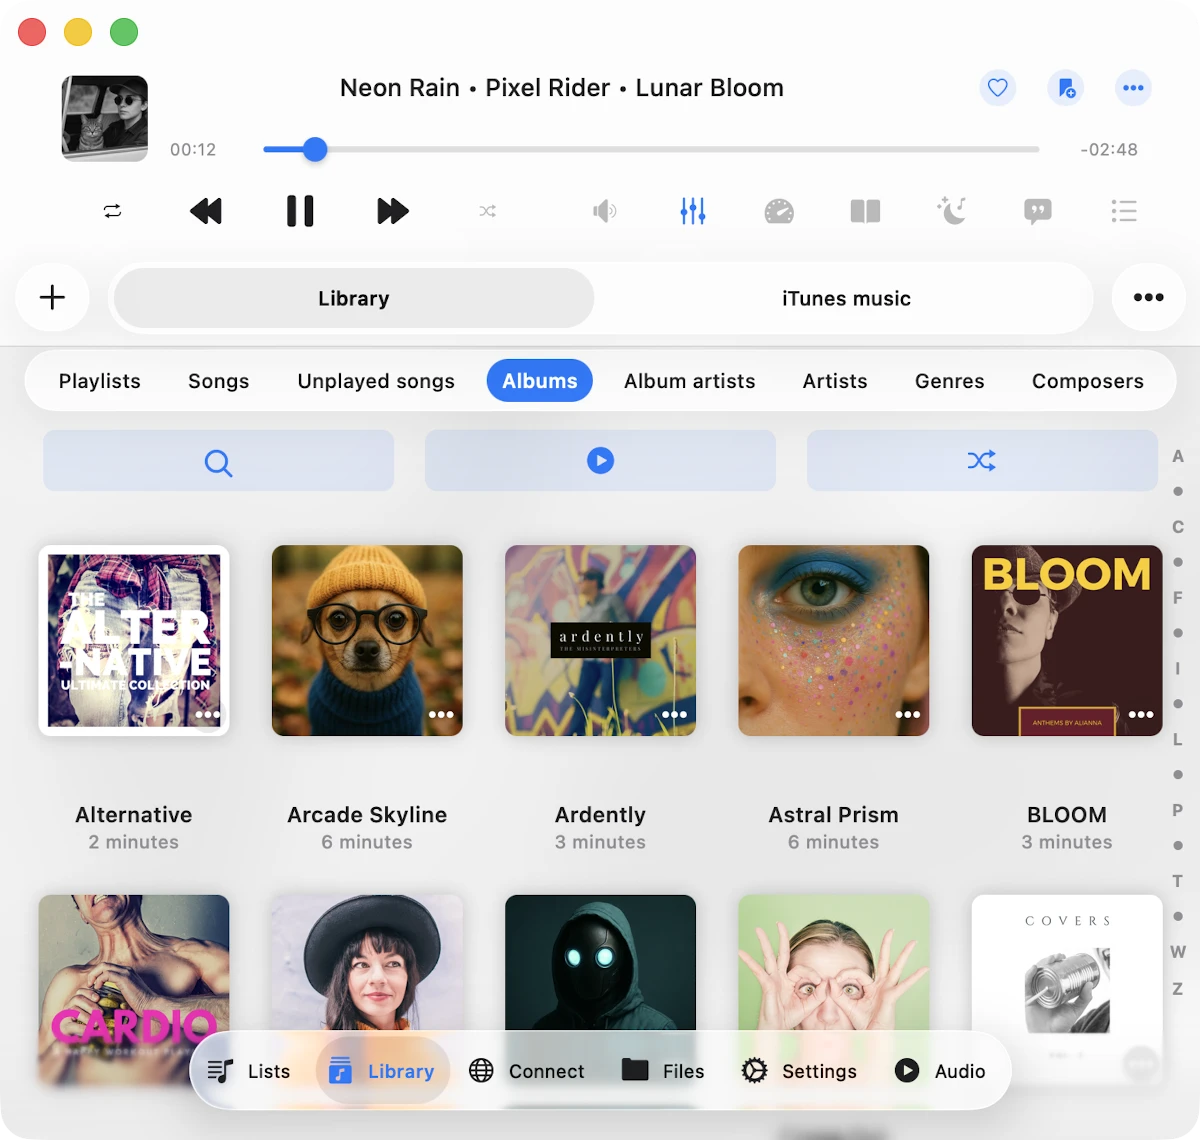
जब आप अपनी music library में tracks add करते हैं, तो app automatically उनके audio tags पढ़ती है और उन्हें Songs, Unplayed Songs, Albums, Album Artists, Artists, Genres, और Composers जैसी categories में organize करती है।
Top Toolbar
Navigation bar के ठीक नीचे located, top toolbar कई convenient actions offer करता है: “खोजें,” “सभी चलाएं,” “सभी फेरबदल करें,” और “Continue playback।” आप इस toolbar को simple swipe-down gesture के साथ reveal या hide कर सकते हैं।
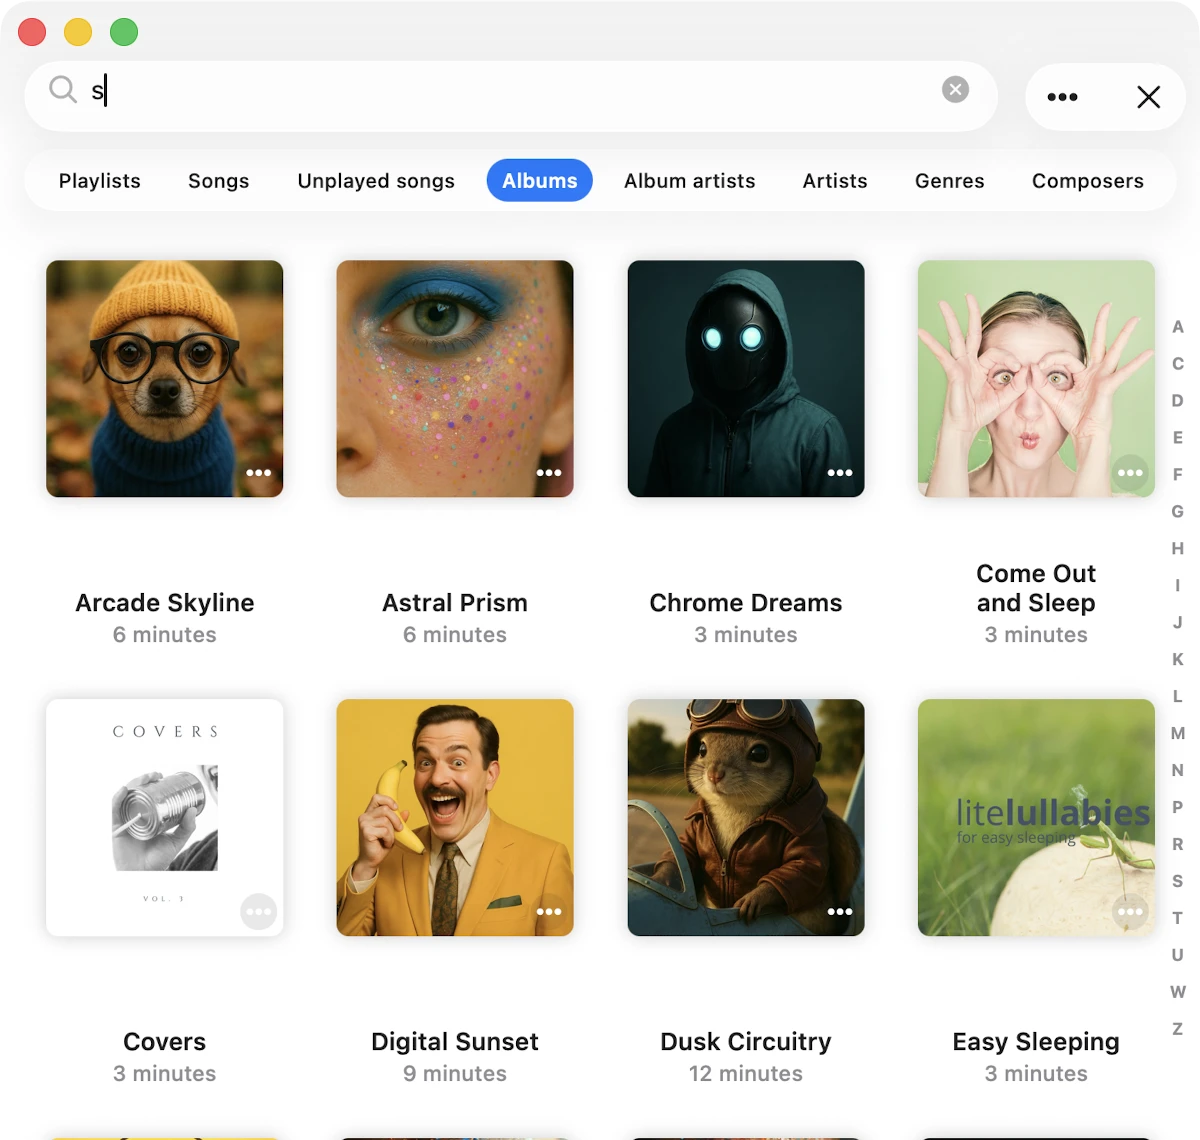
खोजें
Search feature आपको अपनी music library के भीतर specific track, artist, album, या genre locate करने में empower करता है। “Search screen” के भीतर, आपको निम्नलिखित actions access हैं: “Sort,” “Filter,” “Grid/List।”
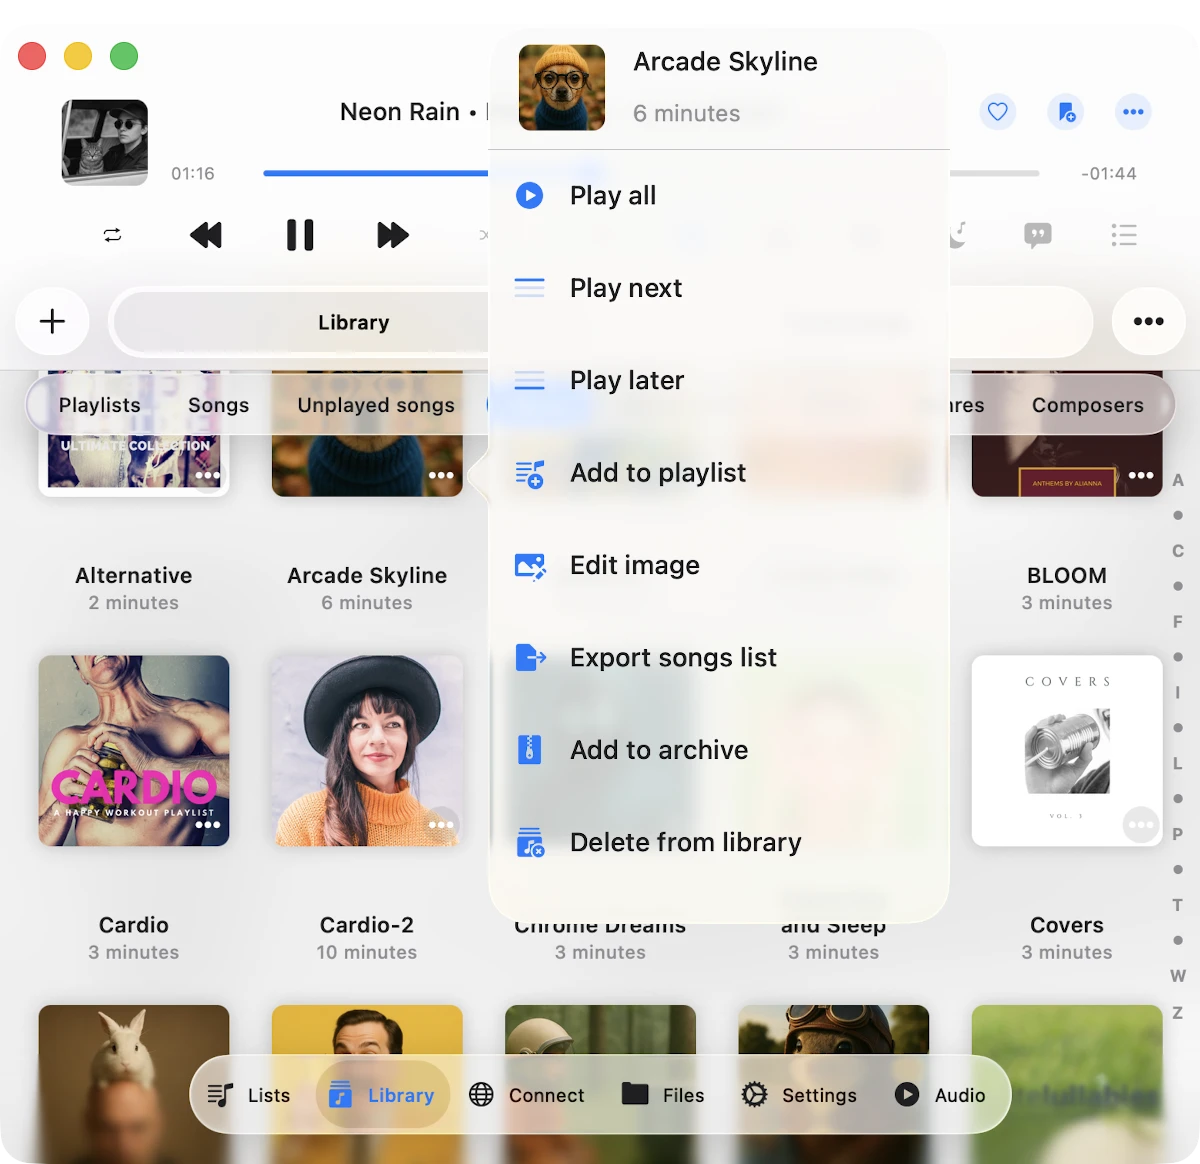
Options Menu
आपकी music library का हर song एक more actions menu boast करता है, song title के पास three dots button टैप करके accessed। ये actions depend करती हैं कि यह single song है या collection का हिस्सा।
Individual Songs के लिए
- Play next: Song को player queue के top पर adds करता है।
- Play later: Song को player queue के bottom पर appends करता है।
- Playlist में जोड़ें: Song को playlist में adds करता है।
- पसंदीदा में जोड़ें: Quick access के लिए song को favorite के रूप में marks करता है।
- डाउनलोड करें: Song को local files में saves करता है। यह “Local Files” tab और “Offline music” section में appear होता है।
- ऑडियो टैग संपादित करें: Missing metadata fix करने के लिए built-in audio tags editor खोलता है; ध्यान दें कि यह आपके storage पर song alter करेगा।
- Show in folder: जहां audio file stored है उस folder को reveal करता है।
- Show in Finder: आपके Mac से import की गई files के लिए, यह action आपके Mac पर audio file located folder को reveal करता है।
- Open in: Audio file को किसी दूसरे app में exports करता है।
- Delete from cloud service: File को music library और cloud storage दोनों से removes करता है, और कृपया ध्यान दें कि यह action irreversible है।
- Delete from music library: Song को आपकी music library से deletes करता है, लेकिन file storage में रहती है। अगर automatic sync enabled है और file remote storage पर exists करती है, तो sync operation के बाद यह आपकी library में reappear होगी।
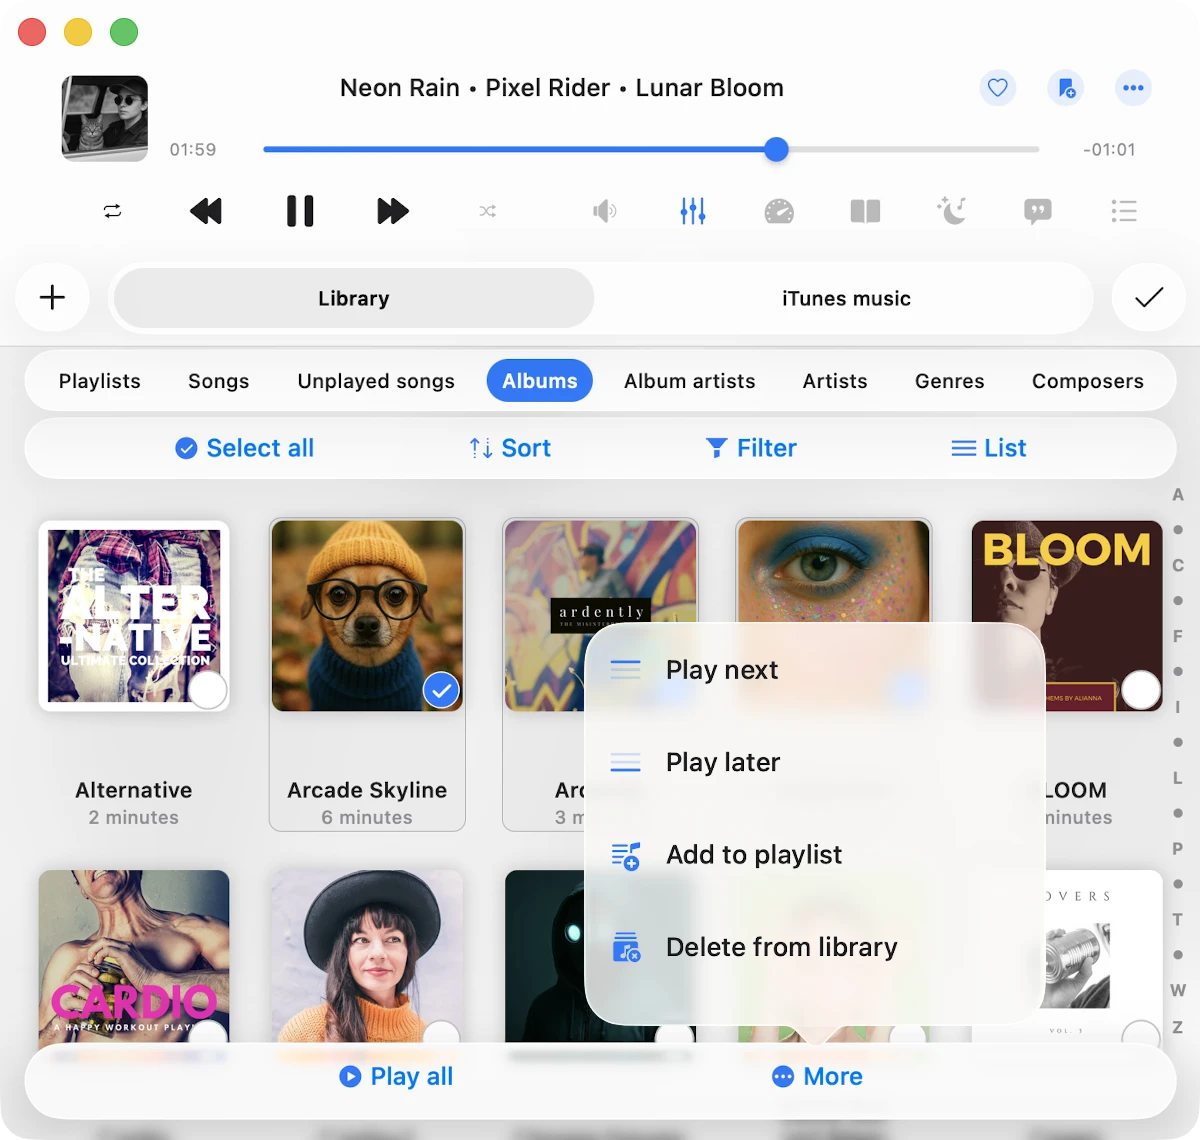
Song Collections के लिए
Albums, Artists, Genres, या Composers जैसी song collections के लिए, options menu निम्नलिखित actions include करता है।
- सभी चलाएं: Player queue को selected collection के songs से replaces करता है।
- Play next: इस collection के songs को player queue के top पर adds करता है।
- Play later: इस collection के songs को player queue के bottom पर appends करता है।
- Playlist में जोड़ें: इस collection के songs को playlist में includes करता है, new playlist create करने के option के साथ।
- Offline mode enable करें: इस collection के songs को local files में downloads करता है। ये downloaded songs “Local Files” tab और आपकी Music Library के “Offline music” section में appear होंगे। अगर server पर collection में new items add होते हैं, तो वे automatically “Local Files” पर download होंगे।
- Edit image: Song collection के लिए album cover change करने की अनुमति देता है।
- Delete from music library: Song collection को आपकी music library से removes करता है। हालांकि, यह action storage से actual files delete नहीं करता। अगर automatic sync enabled है और files remote storage पर exist करती हैं, तो वे sync operation के बाद आपकी library में reappear होंगी।
Selection mode
आप top right corner में More Actions button का उपयोग करके selection mode activate कर सकते हैं। इस mode में, आप multiple tracks select कर सकते हैं और विभिन्न actions perform कर सकते हैं।
Tags Grouping
ये categories आपके tracks को music tags द्वारा organize करने में मदद करती हैं: Songs, Albums, Album Artists, Artists, Genres, Composers। जब आप music library में tracks add करते हैं, तो app tracks के metadata पढ़ती है और उन्हें इन categories द्वारा group करती है। अगर आपको सभी albums नहीं दिखते, तो सुनिश्चित करें कि app ने सभी tracks scan किए हों। आप सेटिंग्स -> Music Library -> Metadata Reading -> Number of Processed Files in Music Library में scanning progress check कर सकते हैं। Local files के लिए, आप सेटिंग्स -> Music Library -> Offline Folders Sync -> Start Local Folders Scanning में offline folders rescan भी कर सकते हैं। Metadata reader सभी operations complete करने के बाद, आप अपनी music library में निम्नलिखित categories देख सकते हैं।
- Songs: सभी songs TRACK_TITLE tag द्वारा grouped हैं। आप top right corner में More Actions menu का उपयोग करके sort order check कर सकते हैं।
- Unplayed songs: सभी songs TRACK_TITLE tag द्वारा grouped हैं और play नहीं हुए।
- Albums: Songs ALBUM_NAME tag द्वारा grouped हैं, जबकि artist, album artist, और composer tags skip होते हैं। अगर आपके पास same name लेकिन different artists वाले कई albums हैं, तो नीचे described Exclusive Albums sorting का उपयोग consider करें।
- Album Artists: Songs ALBUM_ARTIST_TAG से only grouped हैं।
- Artists: Songs ARTIST_TAG से only grouped हैं।
- Genres: Songs GENRE tag द्वारा grouped हैं।
- Composers: Songs COMPOSER tag द्वारा grouped हैं।
Album Detail
जब आप Artist, Album Artist, या Composer sections खोलते हैं, तो आप Songs/All Albums/Exclusive Albums/Solo Albums के लिए एक switcher देख सकते हैं।
- Songs: सभी songs display करता है जहां यह Artist/Album Artist/Composer audio tags में set है।
- All Albums: Compilation albums और सभी albums show करता है जहां artist present है।
- Exclusive Albums: वे albums show करता है जहां specified artist उस album name वाला केवल artist है।
- Solo Albums: Albums show करता है जहां केवल specified artist के tracks displayed हैं, even if अन्य artists के same name वाले albums हैं।
Tools and preferences
यह section आपकी library manage करने और content quickly find करने वाली actions show करता है।
खोजें
आप इस feature का उपयोग अपनी music library में किसी भी song, artist, album, या genre को quickly find करने के लिए कर सकते हैं।
सेटिंग्स
अपनी music library preferences configure करने के लिए “सेटिंग्स” menu item टैप करें।
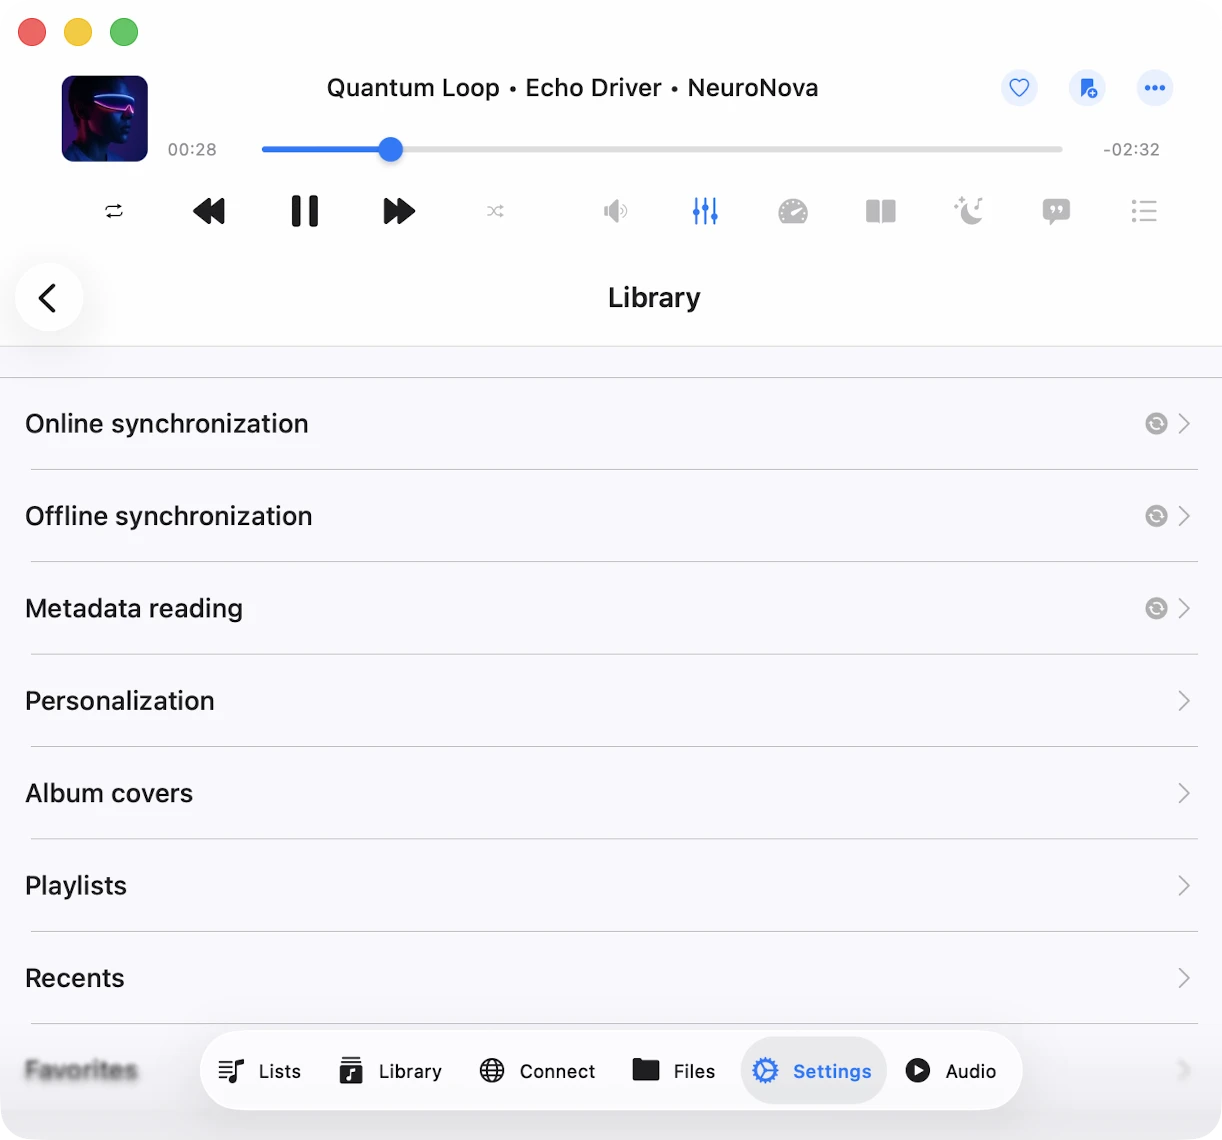
Metadata Reading
जब आप library में tracks add करते हैं, तो metadata reader काम पर लग जाता है। यह background process आपके tracks से सभी metadata पढ़ता है और उन्हें Artist, Album, Genre, और Composer के अनुसार organize करता है। आपको metadata reading की speed adjust करने का flexibility है ताकि data faster load हो, लेकिन ध्यान रखें कि यह अधिक energy use कर सकता है। आप metadata reader disable भी कर सकते हैं और tag information के बजाय file names display कर सकते हैं।
Importantly, metadata reader केवल आपकी music library में metadata update करता है और आपके cloud account या local storage में stored files को alter नहीं करता। अगर आप audio files के लिए metadata edit करना चाहते हैं, तो आप built-in tags editor का उपयोग करके ऐसा कर सकते हैं, जिसे आप options menu में corresponding action से activate कर सकते हैं।
Metadata Reader के Available Modes
- Deactivated: Metadata reader deactivate हो जाएगा, और audio tags से data के बजाय file names show होंगे।
- Current Song: Application केवल currently playing song के लिए metadata read करेगी। इस option का उपयोग करें अगर आपके पास slow network connection है ताकि metadata reader cloud server पर कई requests send करने से prevent हो, जो playback interruptions cause कर सकती हैं।
- Playback Queue: App audio player queue के सभी songs के लिए metadata read करेगी।
- Library: App music library के सभी songs के लिए metadata read करेगी।
जब Metadata reading in the background switch on है, metadata reader background mode में काम करता है। हालांकि, कृपया ध्यान दें कि अगर app audio playback के दौरान बहुत अधिक energy consume करती है, तो iOS operating system उसे suspend कर सकता है।
तो, अगर आपके पास large music collection है, तो metadata synchronization के लिए application का desktop version use करना advisable है। आप फिर data backup and restore feature का उपयोग करके desktop से synchronized music library transfer कर सकते हैं, जो app settings में available है।
जब Normalize metadata encoding enabled है, तो app music library के सभी songs के लिए metadata encoding automatically normalize करेगी। यह उन issues fix करता है जहां audio tags’ encoding broken है (जैसे Windows PC पर files editing के बाद) और जब track playing है या library में added है तो incorrect information display होने से prevent करता है।
Reload metadata action आपकी music library के सभी files को missing metadata वाले के रूप में flag करेगा, जो metadata reader को आपकी music library के हर file के लिए metadata refresh करने के लिए trigger करेगा।
Metadata reader start करने के लिए Start Metadata Reading action टैप करें। Operation progress नीचे display होगी।
Online Synchronization
Automatic online music sync आपको connected cloud services के tracks को music library में automatically add करने देता है। इस feature activate करने के लिए, music library settings पर जाएं और sync folders select करें।
इस option enabled होने से, application सभी selected folders scan करती है, supported audio files identify करती है, और उन्हें seamlessly आपकी library में integrate करती है। आप corresponding menu action पर टैप करके synchronization start या stop कर सकते हैं।
Online music synchronization exclusively तब operate करती है जब app foreground में हो, जिसका मतलब है synchronization में कुछ time लग सकता है। Process speed up करने के लिए, अपना app open रखें, इसे power source से connect करें, और application settings में Screen -> Always active option enable करें।
Alternatively, आप app के desktop version पर online music synchronization perform कर सकते हैं और data backup restore feature का उपयोग करके iOS version पर music library transfer कर सकते हैं।
आप यह भी set कर सकते हैं कि आप अपनी online music library कितनी बार synchronize करना चाहते हैं। अगर आप “Immediately” set करते हैं, तो online sync हर बार जब आप application खोलते हैं शुरू हो जाएगी।
Offline Synchronization
यहां आप offline music synchronization configure कर सकते हैं।
Synchronized Offline Folders
जब आप cloud folder को offline available (More Actions menu के माध्यम से) बनाते हैं, तो यह Local Files → Offline Folders section में appear होगा। App उसकी contents को आपके device पर download करेगी। अगर आप cloud में folder में changes करते हैं — जैसे files add, remove, या update करना — तो app उन changes detect करेगी और local copy automatically update करेगी।
इस screen पर, आप manually offline folder synchronization start कर सकते हैं, offline folder को उसके enclosing folder में show कर सकते हैं, और इस folder के लिए offline mode disable कर सकते हैं। Offline mode disable करने से आपके device से files के सभी local copies remove हो जाएंगी।
Time Interval
आप time interval set कर सकते हैं कि app कितनी बार offline folders में modifications check करे।
Start Local Folders Scanning
यह option application के Documents directory में located सभी local folders को scan करता है supported audio files find करने के लिए। ये सभी local files seamlessly आपकी music library में added हो जाती हैं। आपके device पर लेकिन इस application के बाहर located local files को music library में manually add करना होगा, क्योंकि app को iOS/MacOS security restrictions के कारण application Documents directory के बाहर files access नहीं है।
Important
अपनी music library को अपनी local files के साथ updated रखने के लिए periodically offline music synchronization initiate करना advisable है।
Personalization
इस section में, आप अपनी preferences के अनुसार music library screen style configure कर सकते हैं। तीन options available हैं: Plain menu, Grouped menu, Tabbed menu।
Album Covers
यहां, आप अपने device पर stored album covers की quality choose कर सकते हैं और अपने cached album covers manage कर सकते हैं। Default रूप से, app आपके tracks में embedded album covers check करेगी और available होने पर उन्हें display करेगी। अगर कोई embedded album artworks नहीं हैं और ‘Search in the folder’ option enabled है, तो app JPEG या PNG images के लिए enclosing folder check करेगी और उन्हें उस folder के सभी tracks के लिए album artwork के रूप में use करेगी।
प्लेलिस्ट्स
आप एक ही song को playlist में दो बार add करने का option enable कर सकते हैं। Default रूप से, यह option disabled है।
हाल के
आप अपनी recently played songs list manage कर सकते हैं।
- Delete List: आप recently played songs की पूरी list delete कर सकते हैं।
- Change List Size: आप set कर सकते हैं कि list में कितने items appear होने चाहिए।
- Export Songs List: अपनी recently played songs list को different formats में export करने के लिए इस action का उपयोग करें: M3U, CSV, या TXT। विस्तृत निर्देश हमारी website पर यहां available हैं।
पसंदीदा
आप अपने favorite songs की list manage कर सकते हैं।
- Simultaneous Editing: Music library और files section दोनों में simultaneously एक song को favorites list में add करने के लिए यह option enable करें।
- Delete List: आप favorite songs की पूरी list delete कर सकते हैं।
- Export Songs List: Recents section के समान, आप अपने favorite tracks की list different formats में export कर सकते हैं: M3U, CSV, या TXT।
Delete music library
यह action music library database erase करेगी, लेकिन यह आपकी music files untouched रखेगी।
Content loading limit
Default रूप से, application content loading time reduce करने के लिए pagination use करती है। हालांकि, आप यह option disable कर सकते हैं और application को एक साथ सभी available data load करने allow कर सकते हैं। ऐसा करने के लिए, application settings open करें, “Personalization” -> “Content loading limit” तक scroll down करें और “Deactivated” choose करें।
Main Menu Style
आप Media Library menu style configure कर सकते हैं। Available options Plain Menu और Grouped Menu हैं। इसे change करने के लिए, सेटिंग्स खोलें, फिर Personalization पर जाएं, और Main Menu Style select करें।