How to Edit ID3 Tags on iPhone and Mac
Intro
In this tutorial, we will learn how to edit your audio tags on iPhone or Mac using the built-in tag editor in the Evermusic or Flacbox app. Evermusic and Flacbox allow you to connect to your cloud storage services like Dropbox, Google Drive, OneDrive, and even your home computer, TimeCapsule, or NAS. With the ability to download songs, albums, and artists for offline playback at your convenience, your music is always at your fingertips.
When you import songs into your music library, they are intelligently grouped by artists, albums, and genres. This makes it vital to keep your songs’ metadata updated. With accurate metadata, you can locate any song, album, or artist in your music library.
While many desktop apps offer metadata editing, Evermusic and Flacbox take simplicity to the next level by including an ID3 tag editor. Now, you can use one app to build your music library, enjoy your tracks, and fix audio tags.
Pro Editor
But before you begin, check out the Evertag app — it supports 120+ audio tags, 30+ audio formats, and offers powerful batch editing. If you’re looking for a full-featured tag management tool, Evertag is the way to go. However, if you just need a simple tag editor, feel free to continue with this guide.
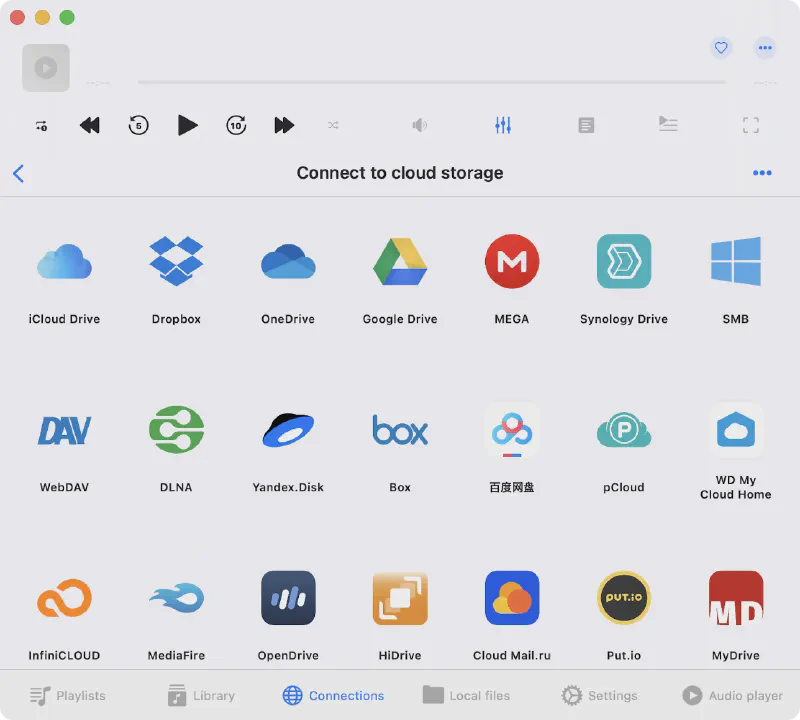
Connect Your Cloud Account
Link your preferred cloud account within the app.
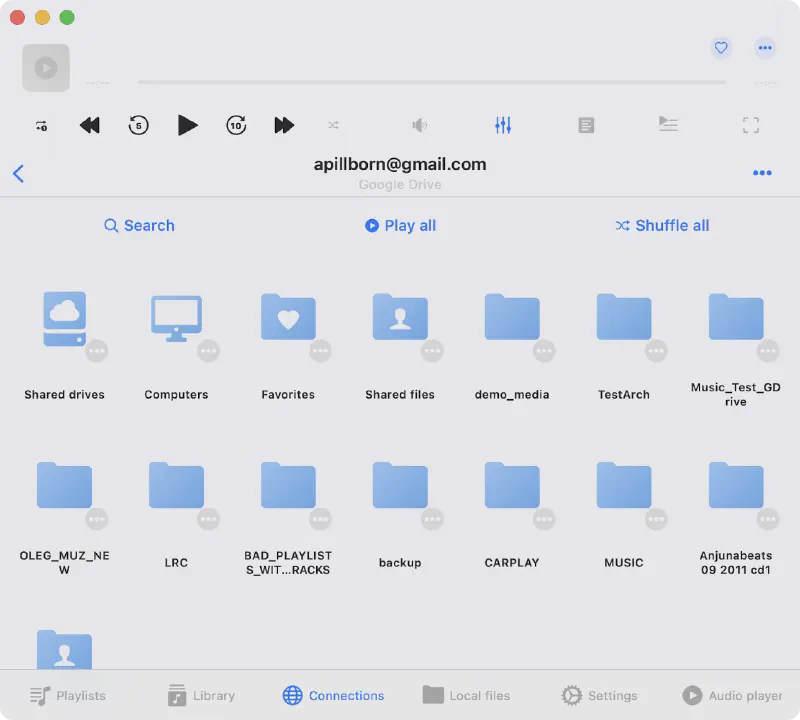
Navigate to Your Audio Files
Open the folder containing your audio files in the connected cloud account.
Access File Options
Tap the ‘More’ button (’…’) near the file you want to edit.
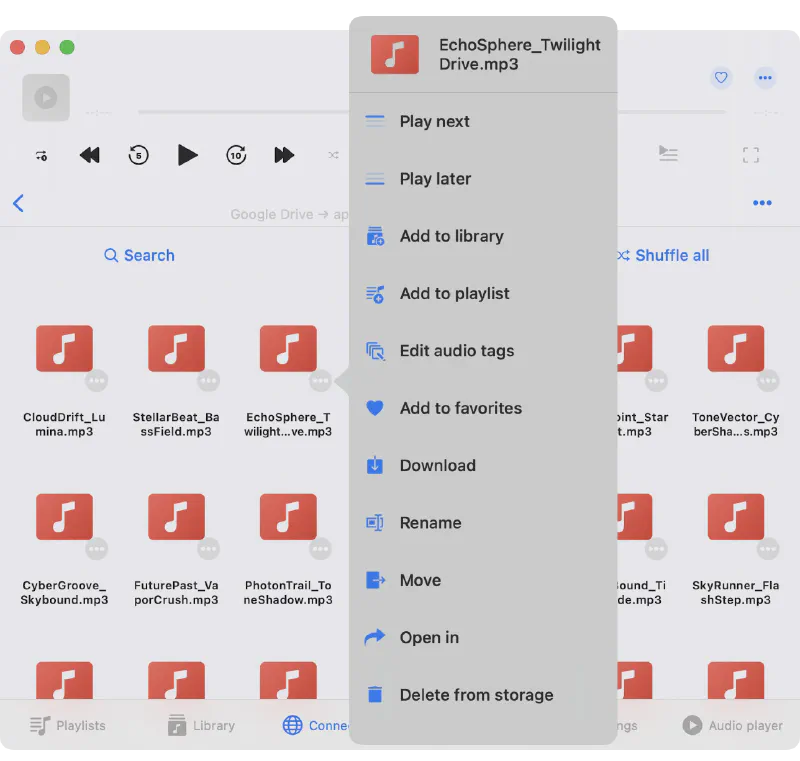
Choose ‘Edit Audio Tags’
In the popup menu, select ‘Edit audio tags.’
Download and Edit
Wait as the file is downloaded to the cache, and the edit screen appears.
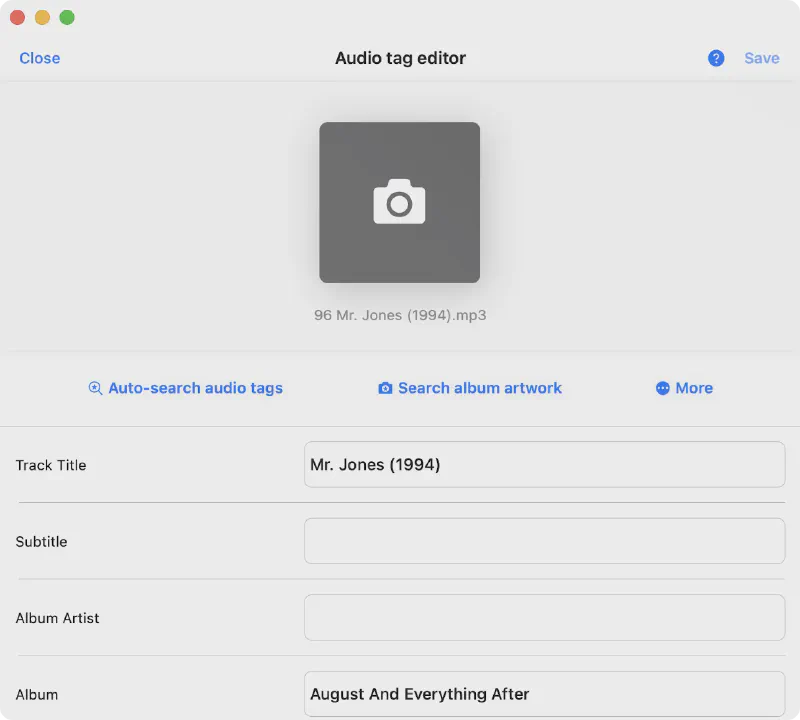
Edit Tags
On the ‘Tag Editor’ screen, modify metadata fields such as Title, Artist, Album, Year, Comment, Track Number, Genre.
Once you’ve finished editing, tap the ‘Save’ button to save your changes.
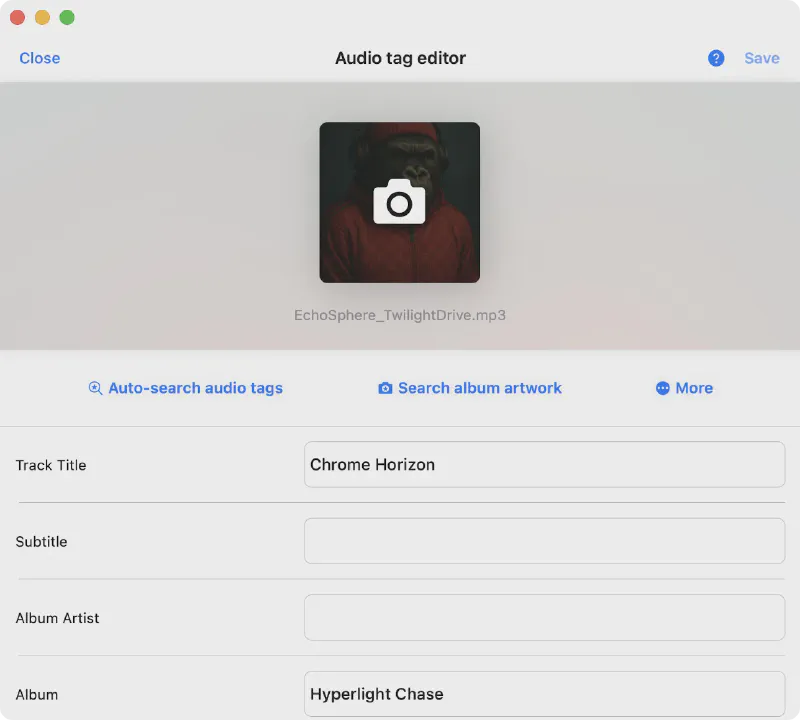
Smart Autocomplete
You can also utilize the smart autocomplete feature by tapping the ‘Auto-Search Audio Tags’ button. This helps correct spelling errors and adds missing information. Imagine you only remember the artist and track name but not the album name – simply fill in the known fields (mistakes are allowed) and tap the ‘Auto-Search Audio Tags’ button. The app will use an online database to find missing tags for your track and fill in the gaps.
Automatic Upload
When you close the tags editor, the app will automatically upload the edited audio file back to the cloud, ensuring your library stays up to date.
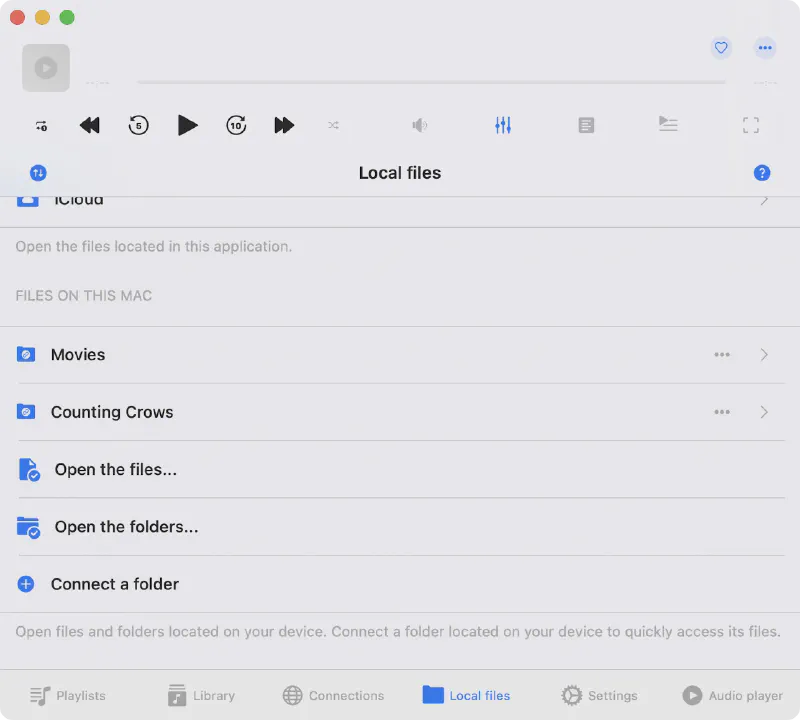
Edit Local Files
You can edit audio tags for files stored directly on your device — without importing them into the app.
- Go to the “Local Files” section, then scroll down to “Files On This Device.”
-
Tap “Connect a Folder”.
-
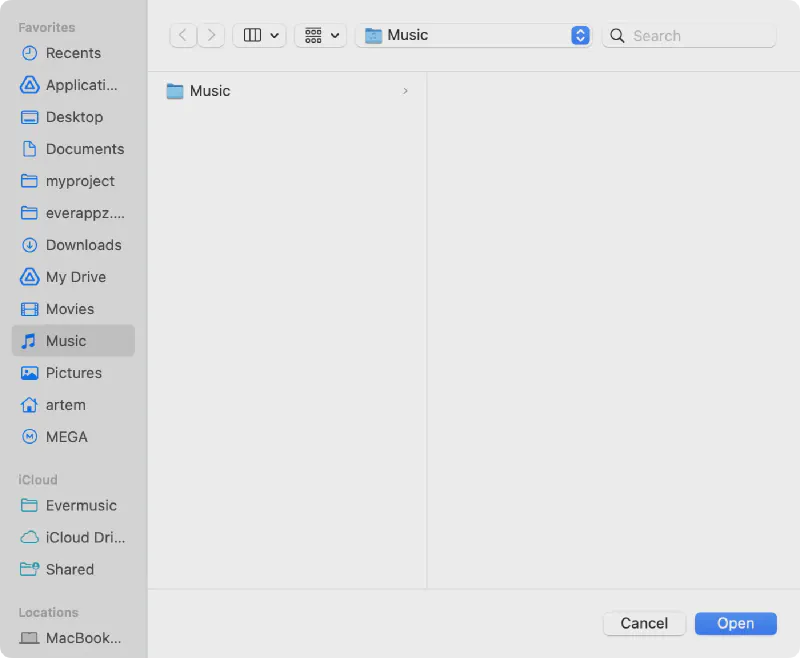
In the folder picker, choose the directory you want to access and tap “Open” to confirm.
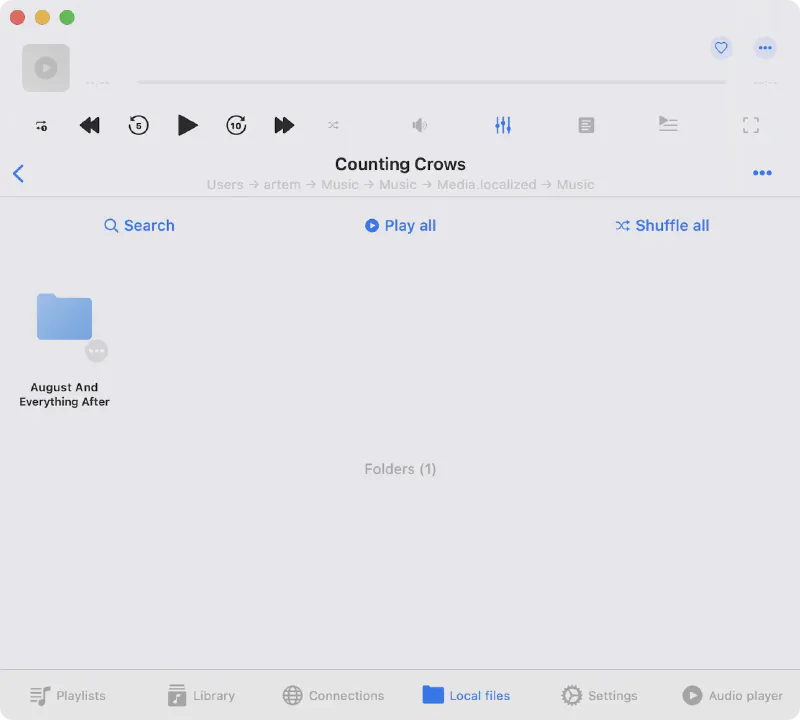
- After adding the folder, tap on it to view the files inside.
- Just like with cloud files, tap the “More Actions” button next to an audio file and select “Edit Audio Tags.”
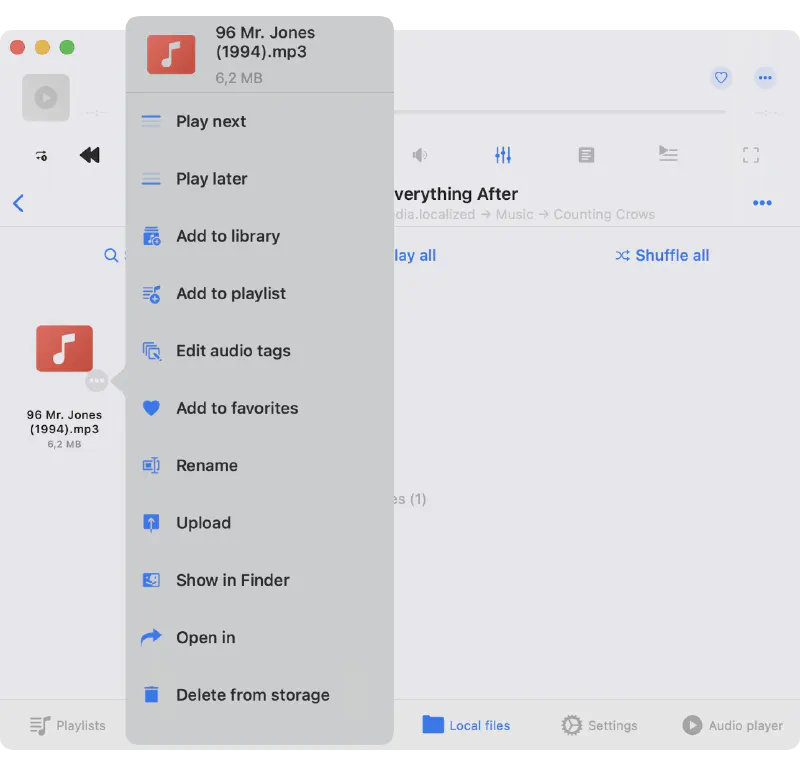
- The Tag Editor will open. Make your changes and tap “Save”. That’s it! Your edits are applied directly to the file — no need to copy it back or move anything around.
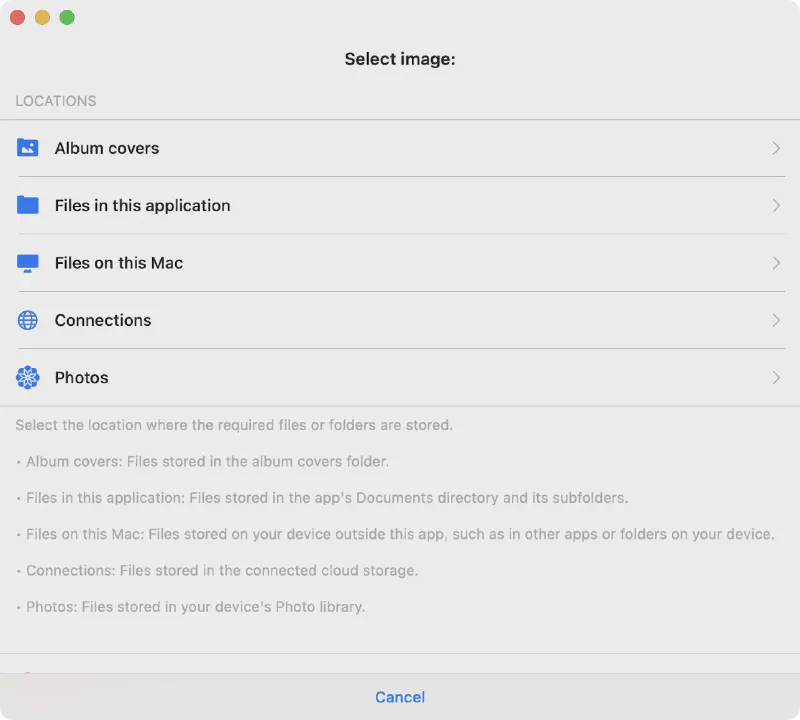
Edit Album Cover
To change an album cover:
- Tap the Camera icon in the artwork carousel.
- Choose the image location: Local Files, Cloud, Downloads, or Photo Library.
- Select an image to apply as cover art.
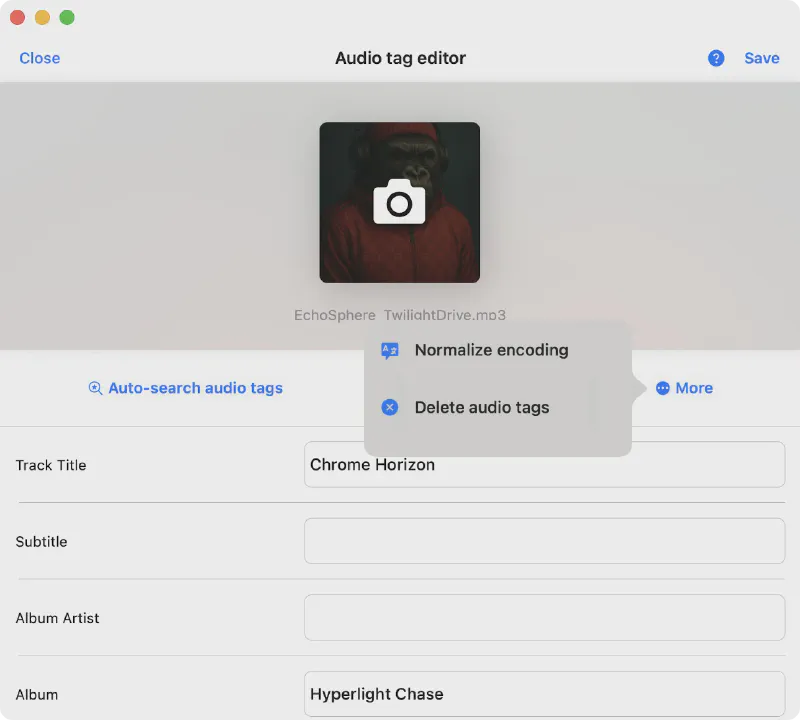
More Actions in Tag Editor
Extra editing options are available via the toolbar beneath the artwork view.
Auto-Search Audio Tags
This action activates the smart tag search engine, which finds and fills in complete metadata for your audio file based on the existing information.
The app uses the MusicBrainz database — one of the most comprehensive tag databases — with over 50 million tracks.
Search Album Artwork
Use metadata to search the web for the correct album artwork. Once found, save the image to your Photos using the system context menu. After that, return to the tag editor, tap the Camera icon, go to Photos Library, and select the saved image. The app will set it as the cover for your audio file. You can adjust how cover images are scaled in the app’s settings.
Normalize Encoding
This action will normalize the text encoding of all tags in the audio file’s metadata. It’s especially helpful if you’re switching from a Windows PC, where files may use different encodings that appear as unreadable or garbled characters on a Mac.
Delete Audio Tags
Clear all metadata fields for a file. Useful when starting from scratch. Tap Save to confirm.
Tag Editor Settings
Navigate to Settings → Tag Editor to customize behavior.
Album Cover Scaling
Select how album covers should be scaled when saved into audio files. You can disable scaling to keep the original image size, but be aware that some players may not support large artwork files.
Update Online Files
You can control how the app updates metadata for audio files stored in cloud services:
-
Show confirmation message
Ask before applying metadata changes to cloud files. -
Automatically update file’s metadata
Save metadata changes to the cloud file automatically after editing. -
Do not update file’s metadata
Skip updating cloud files—changes will apply only locally.
Edit Online Files
Choose what happens to locally downloaded copies of cloud files after editing:
-
Always delete downloaded file
Remove the local copy after saving changes. -
Do not delete downloaded file
Keep the downloaded file on your device after editing.
Main Screen Buttons
Customize which actions appear on the main screen of the tag editor. Enable or disable specific buttons to tailor the interface to your workflow.
Conclusion
Simplify your music library management and tag editing with Evermusic and Flacbox. Enjoy a streamlined experience and make the most of your cloud-stored music. Try it today and rediscover your music collection with ease!